Emergency Access
The Emergency Access feature in OmegaAI is specifically designed to provide physicians with expedited access to search patient studies and records in critical situations. This feature is crucial when immediate patient data is necessary, and the user may not have regular access permissions under normal circumstances. Below is a guide on how to utilize the Emergency Search functionality.
Accessing Emergency Access
-
Initiating Emergency Access:
-
Click on the search bar found at the top centre of any page in OmegaAI.
-
Among the list of search options, click on Emergency Access. This will direct you to the Emergency Access drawer.

Note: By default the Emergency Access option will be turned off for all roles with the exception of users (i.e. Referring Physicians) who are part of the Referring Physician portal.
For users to gain access to this feature, the Organization's Admin must provide access via the Roles settings page.
Steps to Enable Emergency Access Feature for Users
Note: The following steps apply only to the Organization's Admin.
-
Access the Organization page by clicking on Organization from the left side navigation bar within OmegaAI.
-
Select desired Organization from the Master Organizations panel located on the left side of the screen.
-
Click Details from the right side panel.
-
Click Users & Roles from the left side panel.
-
Hover your mouse over the third icon in the top right corner of the Users page, it will read Roles.
-
Click Roles. The Roles page will now appear.
-
Hover your mouse over the + icon found next to Roles, you will see Add Roles, click it.
-
Add role name in the top text box.
-
Click Search from the Main Level panel.
-
Click the grey toggle (will turn blue once activated as it is inactive by default) next to Emergency Search in the Secondary Level panel.
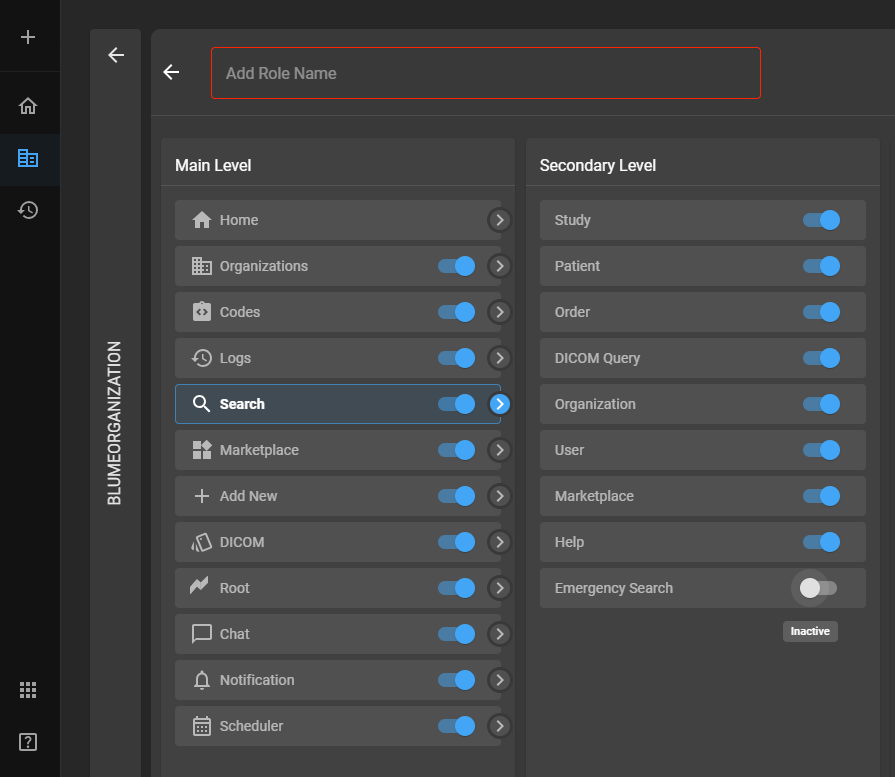
The respective role will now have access to the Emergency Access feature in the search bar dropdown.
-
-
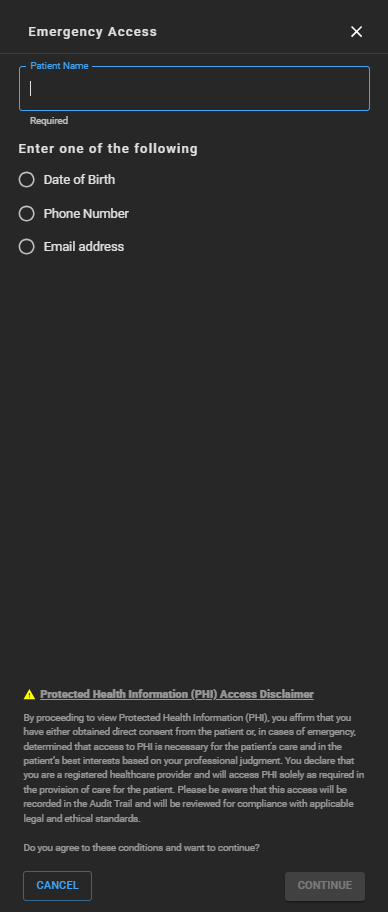
Entering Patient Information:
-
To access a patient's studies, reports, and images you must enter their details:
-
First Name and Last Name of the patient.
-
At least one of the following: Date of Birth, Phone Number, or Email address of the patient.
-
-
-
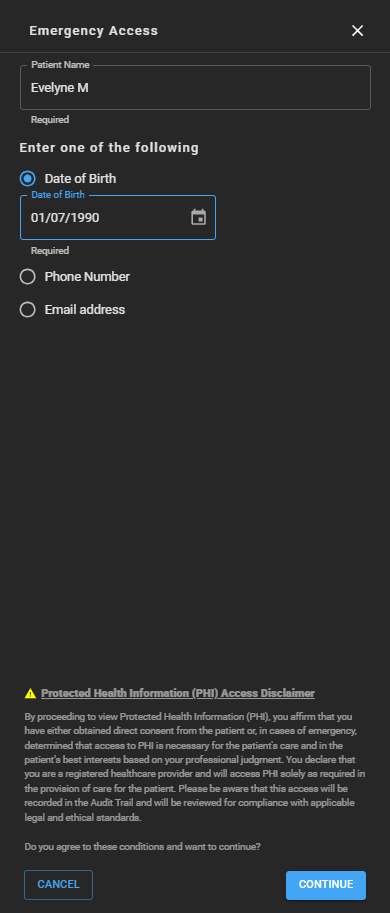
Verification and Compliance:
-
After entering the patient information, the CONTINUE option will turn blue and thus be clickable.
-
-
By proceeding, you acknowledge and agree that you have the necessary privileges to access the patient records under emergency conditions.
-
Understand that all actions taken during this search are recorded in audit trails and are auditable, ensuring compliance with privacy regulations and organizational policies.
Accessing Patient History and Records
-
Navigating Patient History Page:
-
Once the information is verified and you continue, you will be directed to the patient history page.
-
This page will display all available studies for the selected patient.
-
-
Accessing Study Details:
-
To access specific study details, hover your mouse over the desired study.
-
You will see options to access final images, records, forms, or to perform other relevant actions.
-
A single left click will bring up the Omega Dial, where you can select your preferred action or view additional study options.
-
Practical Considerations
-
Privilege: Use the Emergency Access responsibly, acknowledging that it is intended for critical situations where quick access to patient information could be lifesaving.
-
Security and Compliance: Ensure you stay informed about your organization’s policies governing Emergency Access. Regularly review applicable rules, guidelines, and regulatory requirements to maintain proper legal and ethical compliance when using this feature.