Using Global Search
Overview
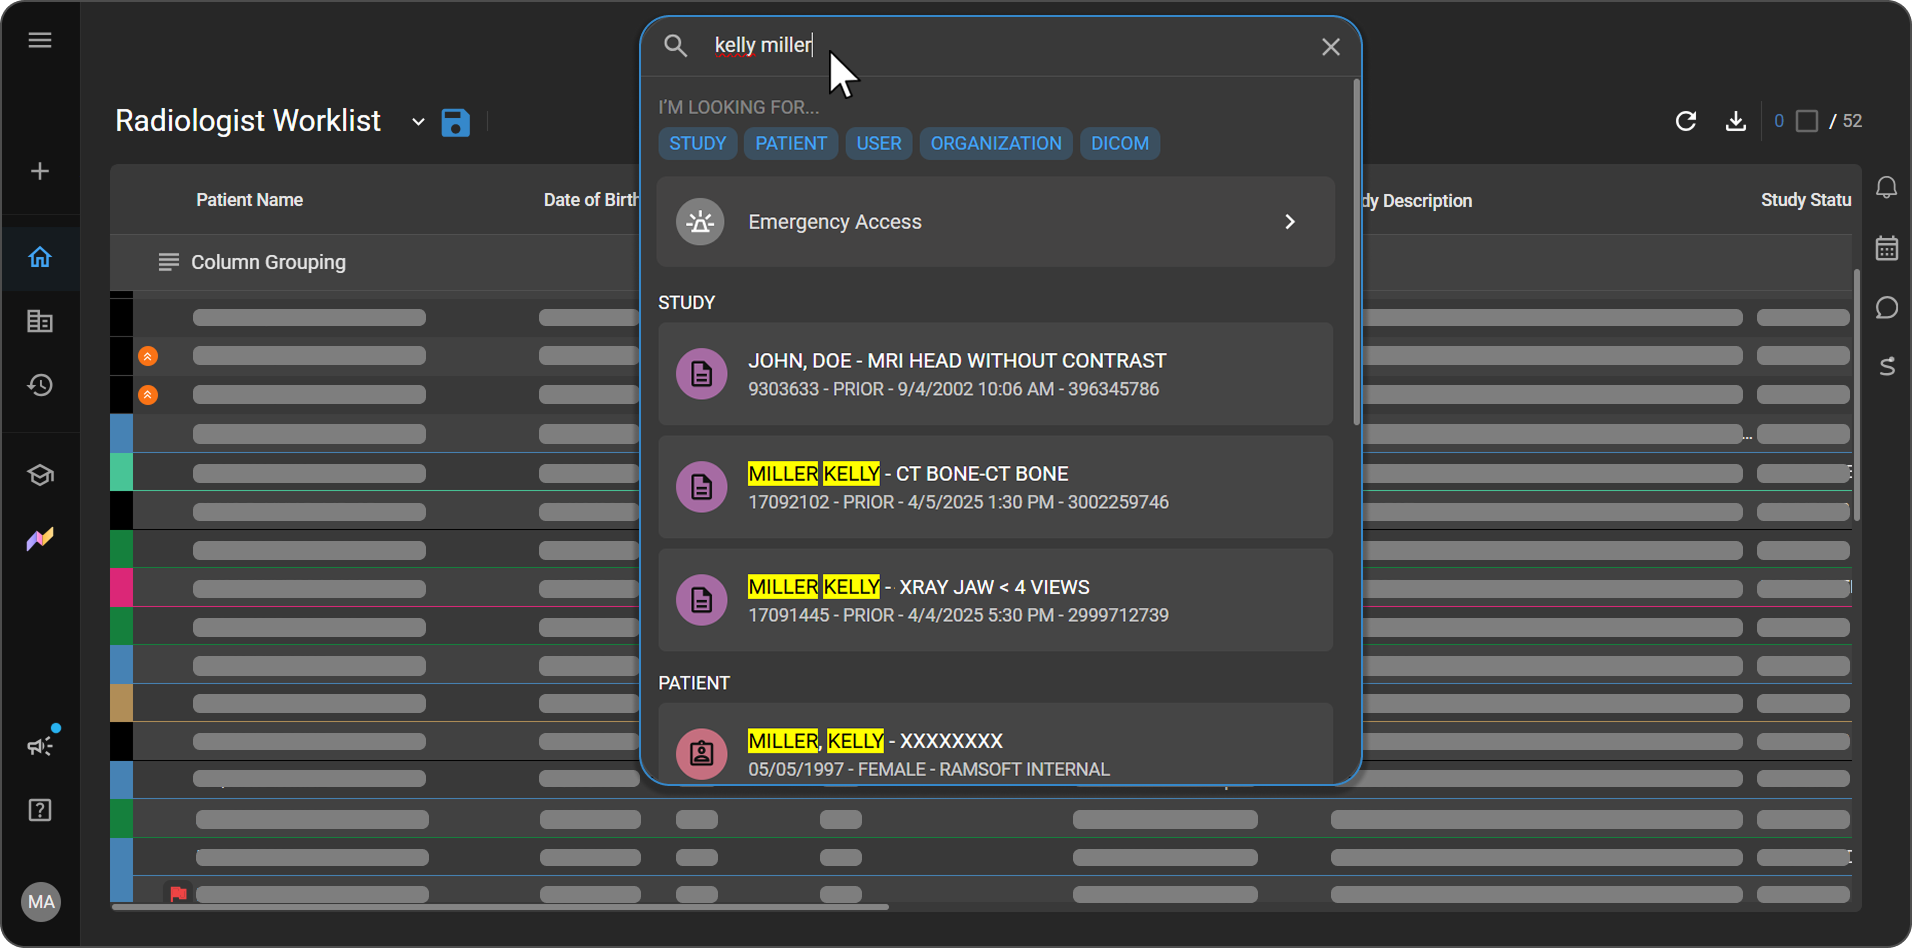
Global Search is OmegaAI's unified search feature, letting you quickly find patients, studies, users, organizations, and DICOM records from a single search bar — without navigating through separate menus. The search bar is located at the top center of every main OmegaAI page, so it's always within reach no matter where you're working.
Who Can Use This
Note:
- You must have the required privileges to be able to perform a study search.
- You can only search for records that belong to the organizations and child imaging organizations you are associated with. However, if the order is assigned to a specific Referring or Consulting Physician, the user will be able to view the study records belonging to any organization.
Search Options at a Glance
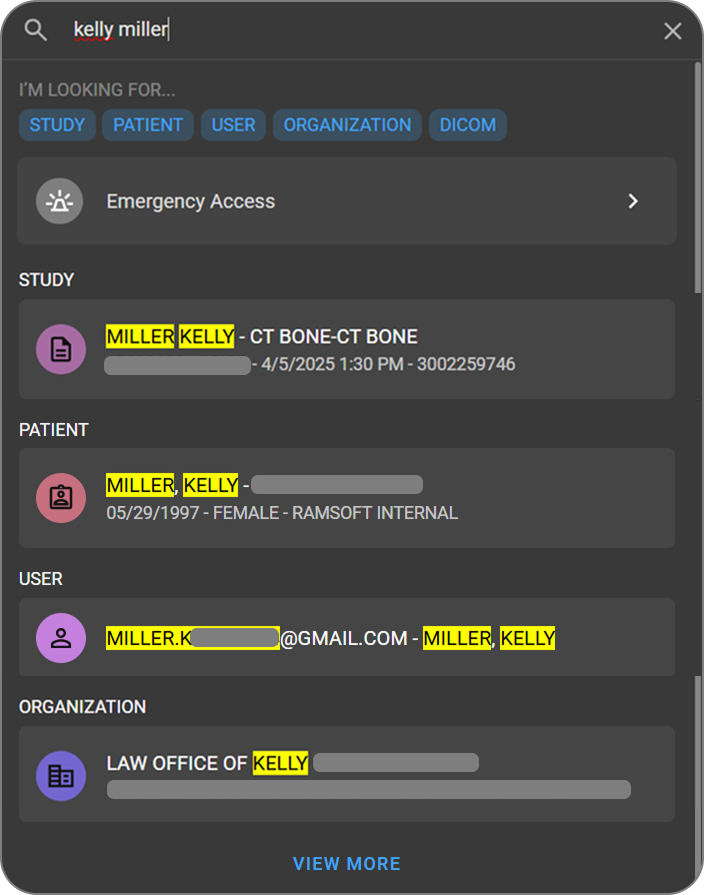
Typing into the search bar without selecting a category runs a Global Search — an unfiltered sweep across every category at once (patients, studies, users, organizations, and DICOM), with matching results grouped by category. If you want to narrow things down instead, I'm Looking For lets you select one of five specific categories, or jump straight to Emergency Access via its own shortcut card:
| Option | Description |
|---|---|
| Study Search | Searches specifically for clinical studies, matching on fields like patient name, accession number, study date, modality, and study status. Use this when you already know you're looking for a study rather than a patient or user record. |
| Patient Search | Searches for patient records by name, date of birth, patient ID, or other identifying details, returning matching patients rather than their individual studies. |
| DICOM Search | Unlike the other options, this queries an external imaging device directly — connected via Omega Link — instead of searching OmegaAI's internal records. Use it to find and import studies that live on a connected device but haven't yet been received into OmegaAI. See Searching DICOM Records for the full field list and import steps. |
| Organization Search | Finds organizations within your network, including referring organizations, so you can quickly look up an organization's details or associated studies. |
| User Search | Finds other OmegaAI users, including referring physicians. Results display each user's login, name, mobile number, and license/NPI ID, so you can confirm you've found the right person before reaching out to them. |
| Emergency Access | Gives physicians expedited access to search for and view patient studies in urgent situations, bypassing the usual assignment-based restrictions. See Emergency Access for setup and usage steps. |
Running a Basic Search
|
|
Working with Search Results
What you can do with a result depends on its type.
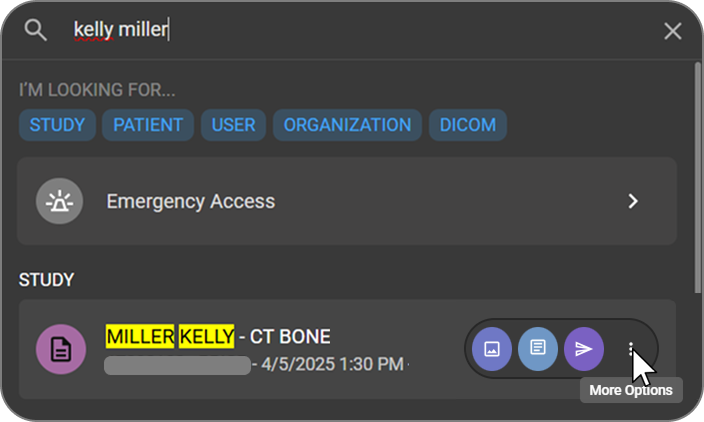
Study results. Click anywhere on a study result to open it directly in Image Viewer. For other actions, hover over the result to reveal a More Options (⋮) icon on the right side. Click it to open three additional quick-action icons:
Hover over any of these icons to see a tooltip identifying it. |
|
Patient results. Click anywhere on a patient result — or the Go to Patient button that appears on hover — to go directly to that patient's record.
User results. Click anywhere on a user result — or the Go to User button that appears on hover — to go directly to that user's information.
Organization results. Click anywhere on an organization result — or the Go to Organization button that appears on hover — to go directly to that organization's information.
How Result Matching Works
Global Search uses broad matching logic, so don't be surprised if a result doesn't appear to match your search term exactly. For example, searching "Kelly Miller" may return results that match on an associated email address rather than the name itself. This is intentional — it's designed to surface every relevant record, not just exact name matches.
Matching is also accent-insensitive — for example, searching "juarez" will match records containing "Juárez."
Searching DICOM Records
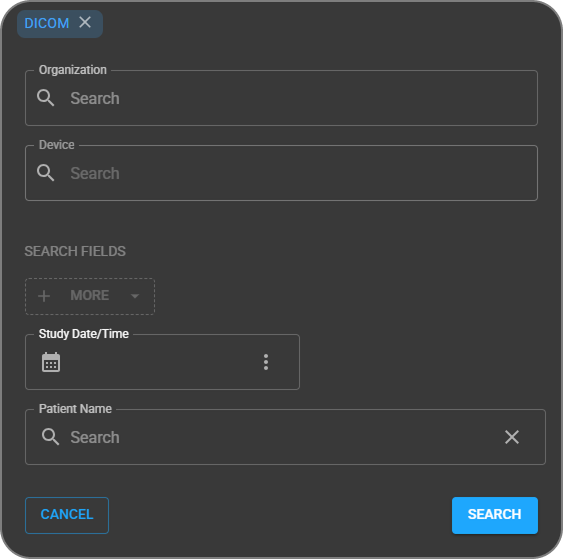
DICOM Search is different from the other search types — instead of searching OmegaAI's internal records, it queries an external imaging device directly.
To search DICOM records:
-
From I'm Looking For, select DICOM.
-
Choose the organization you want to search, then select a device (connected via Omega Link) — the device list filters automatically based on the organization you chose.
-
By default, the search panel shows two fields: Study Date/Time and Patient Name. Click + More to add any of the other available fields:
# of Instances Accession # Age at Study Anatomic Focus Assigning Authority Birth Date Gender Imaging Organization Managing Organization Modality Patient ID Reading Physician Referring Physician SSN Study Description Study ID Study Priority Study Status Study UID The Study Date/Time field uses a date-range picker — click it to select a start and end date from the calendar, then click Done.
-
Run the search, then either:
- Select individual studies to retrieve, or
- Click Download All Results to import everything at once.
-
Click the trash icon next to any result to open the task log and track its import status.
Tips for DICOM Search
- Use the full range of search fields to narrow large result sets quickly.
- Check the task log regularly to monitor import progress.