Patient Managed Scheduling & Onboarding
Patients can self-schedule imaging appointments. They can take a photo of their referral form with their smartphone and send it directly to the imaging centre.
The scheduled studies appear under Scheduled Appointments tab of the home page.
Managing Appointments in Blume
Viewing Schedules
-
Go to the Scheduled Appointments tab on the home page.
-
Your scheduled and completed studies will be listed here.
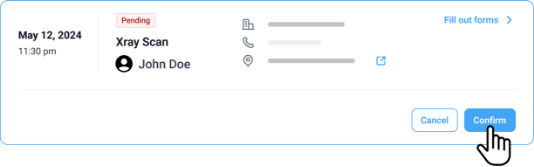
Confirm Appointment
-
Go to the Pending appointment card.
-
The option to confirm would be shown.
-
Click on the Confirm button to confirm the appointment.
Cancel Appointment
-
Pending appointments can not be cancelled.
-
Click on Cancel button.
-
The reason for cancellation appears.
-
Provide the reason and click on Submit.
-
The cancelled status appears on the appointment.
-
For Scheduled appointments, perform the following:
-
Click on the Cancel icon.
-
The reason for cancellation appears.
-
Provide the reason and click on Submit.
-
The cancelled status appears on the appointment.
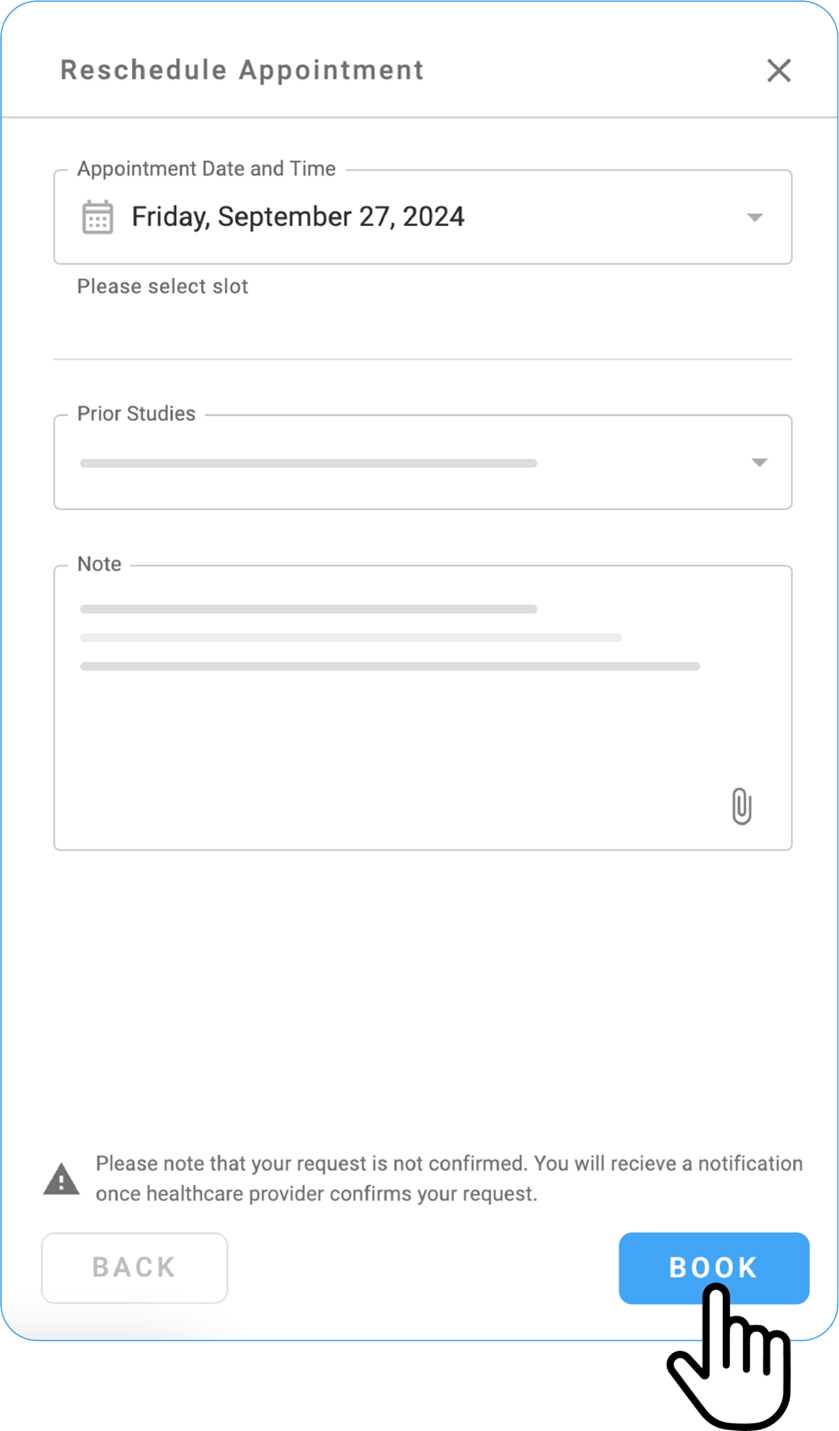
Reschedule Appointment
Scheduled appointments have an option to reschedule.
-
Click on the Reschedule button.
-
Reschedule Appointment window appears.
-
Enter the details.
-
Click on Request.
-
Reschedule request is sent to the Imaging Centre.
-
Appointment goes to the Requested status.
Getting Directions to an Imaging Center
-
Open the Scheduled Appointments tab on the left side of the home page.
-
Locate the appointment with the Scheduled status.
-
The address of the imaging center is displayed on the appointment card.
-
Click the address to open it in Google Maps.
-
View directions and distance on Google Maps.
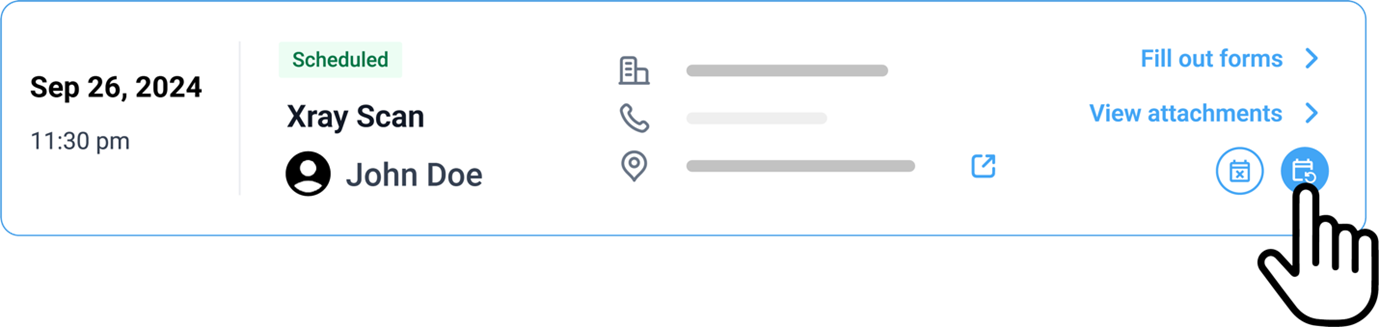
Viewing Appointments with Imaging Centers
All appointments are listed under the Scheduled Appointments tab on the left side of the home page.
Checking Appointment Status
Appointments are color-coded based on their status:
-
Blue: Scheduled
-
Grey: Pending
-
Red: Cancelled
-
Yellow: Requested
You can also confirm or cancel appointments directly.
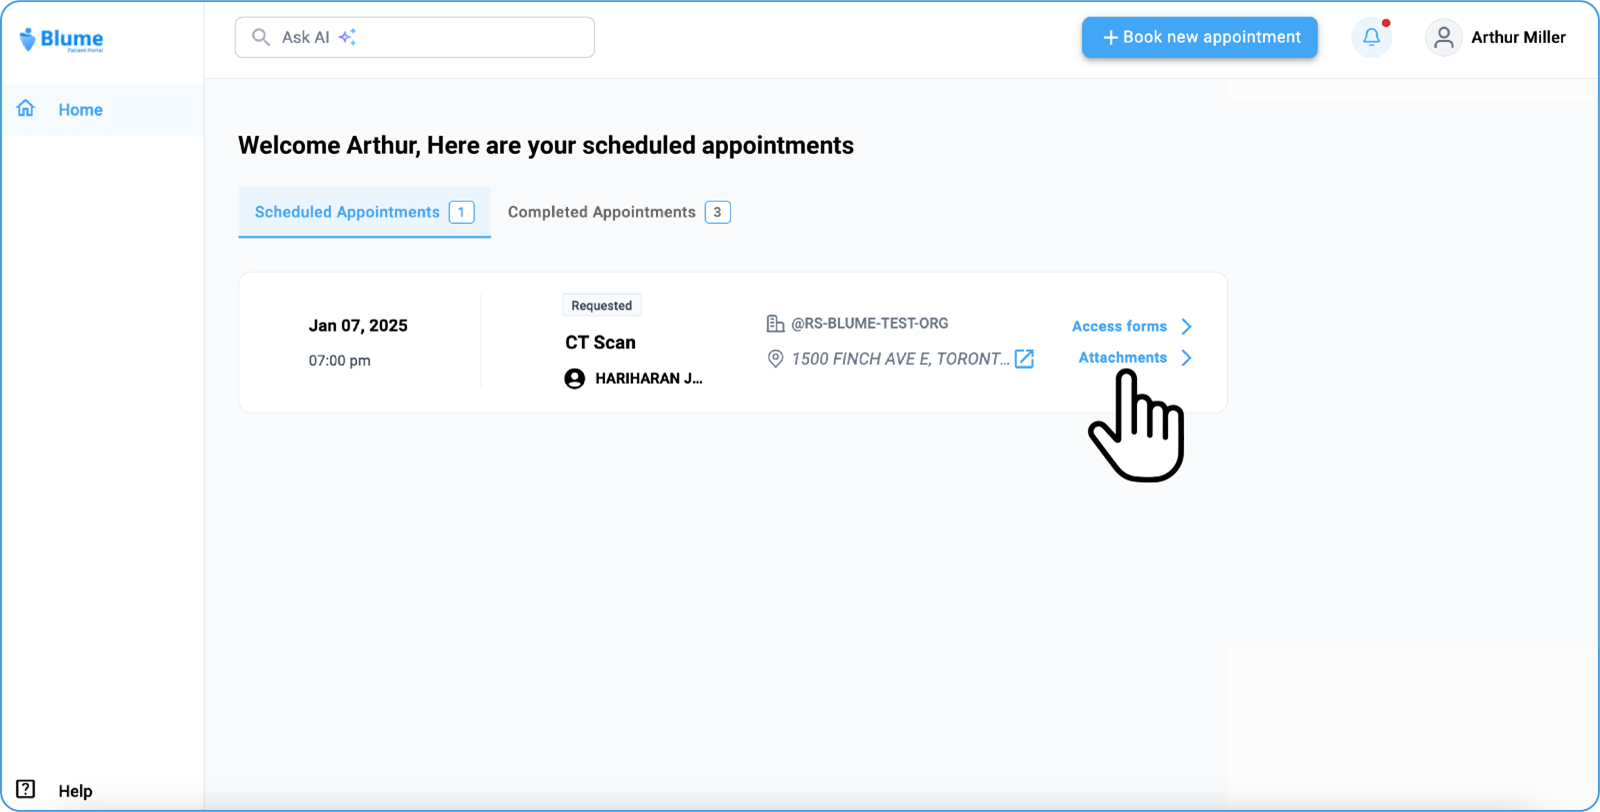
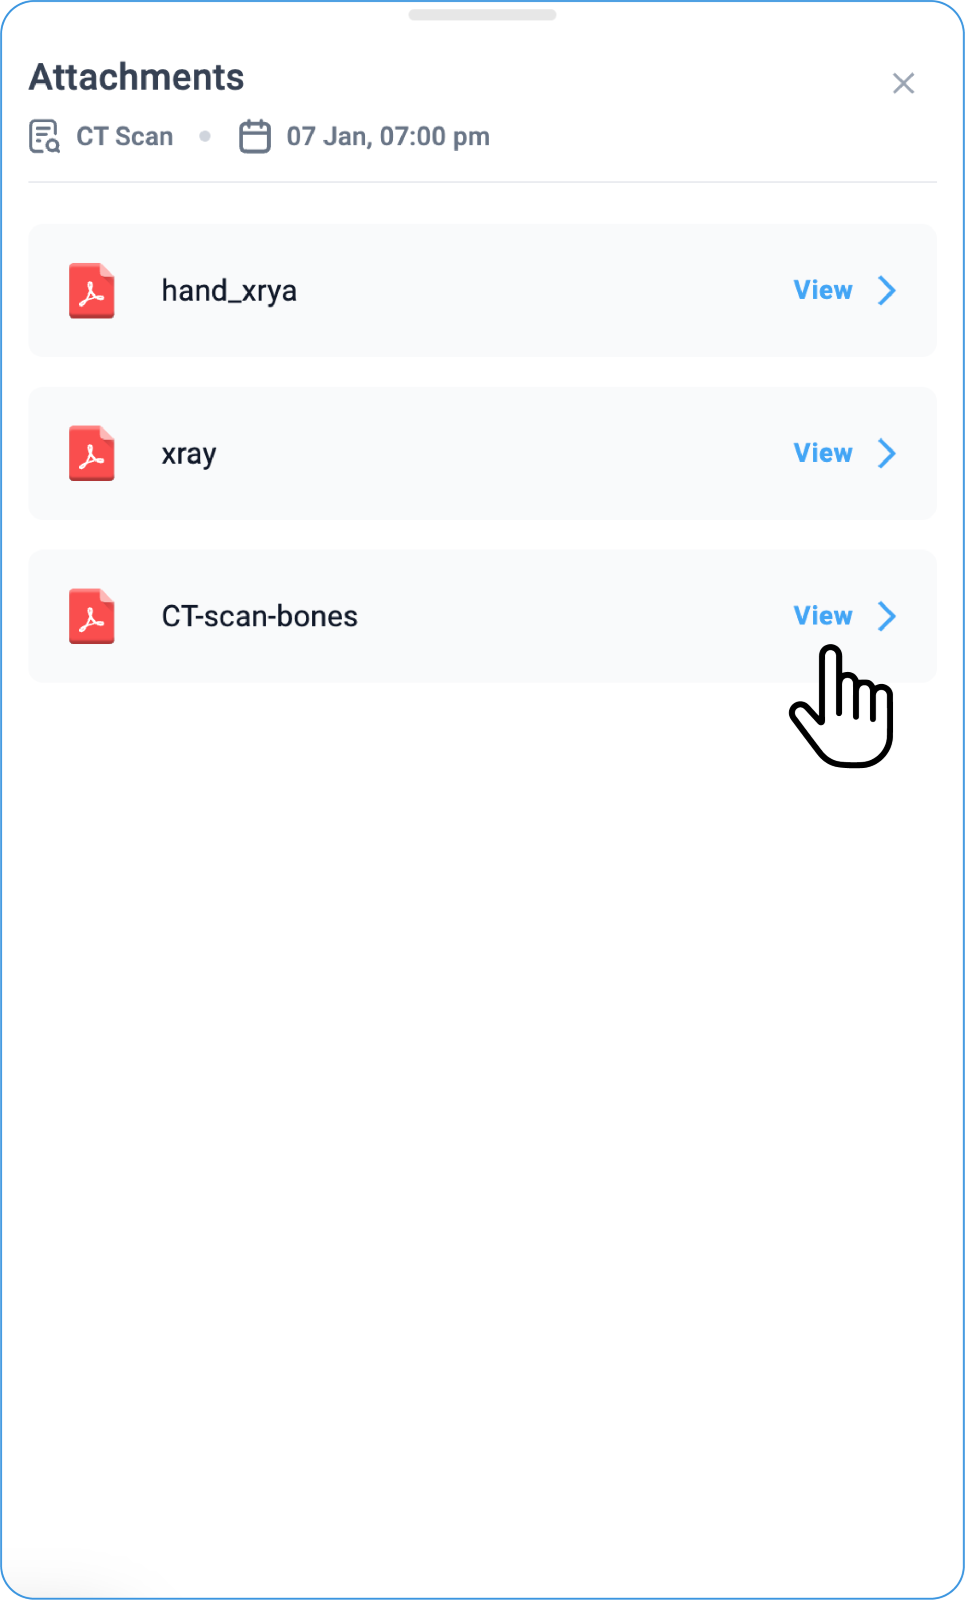
View Attachments in Full Screen
-
Navigate to Scheduled Appointments.
-
Locate the appointment card for the desired study.
-
If an attachment is available, you will find it below the Access Forms option.
-
Click on the Attachment option.
-
The attachment will appear as a thumbnail preview on the right.
-
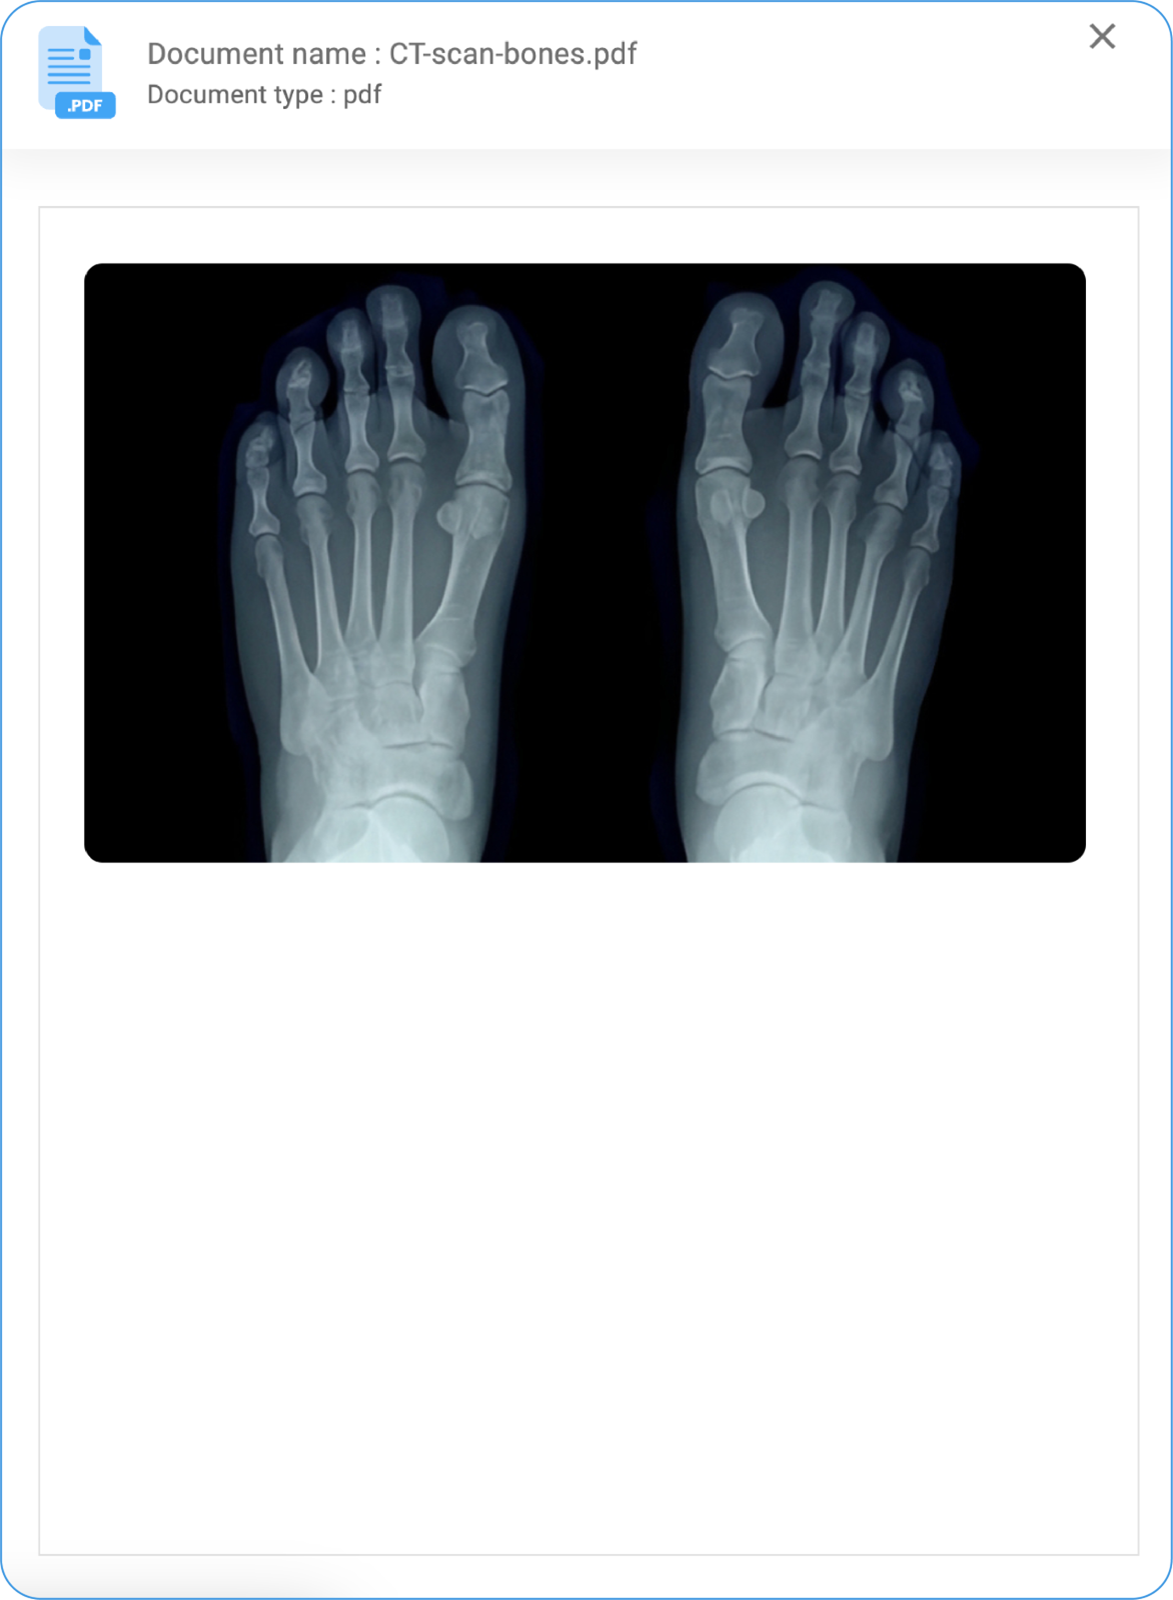
Click on View to enlarge and see it in full screen.
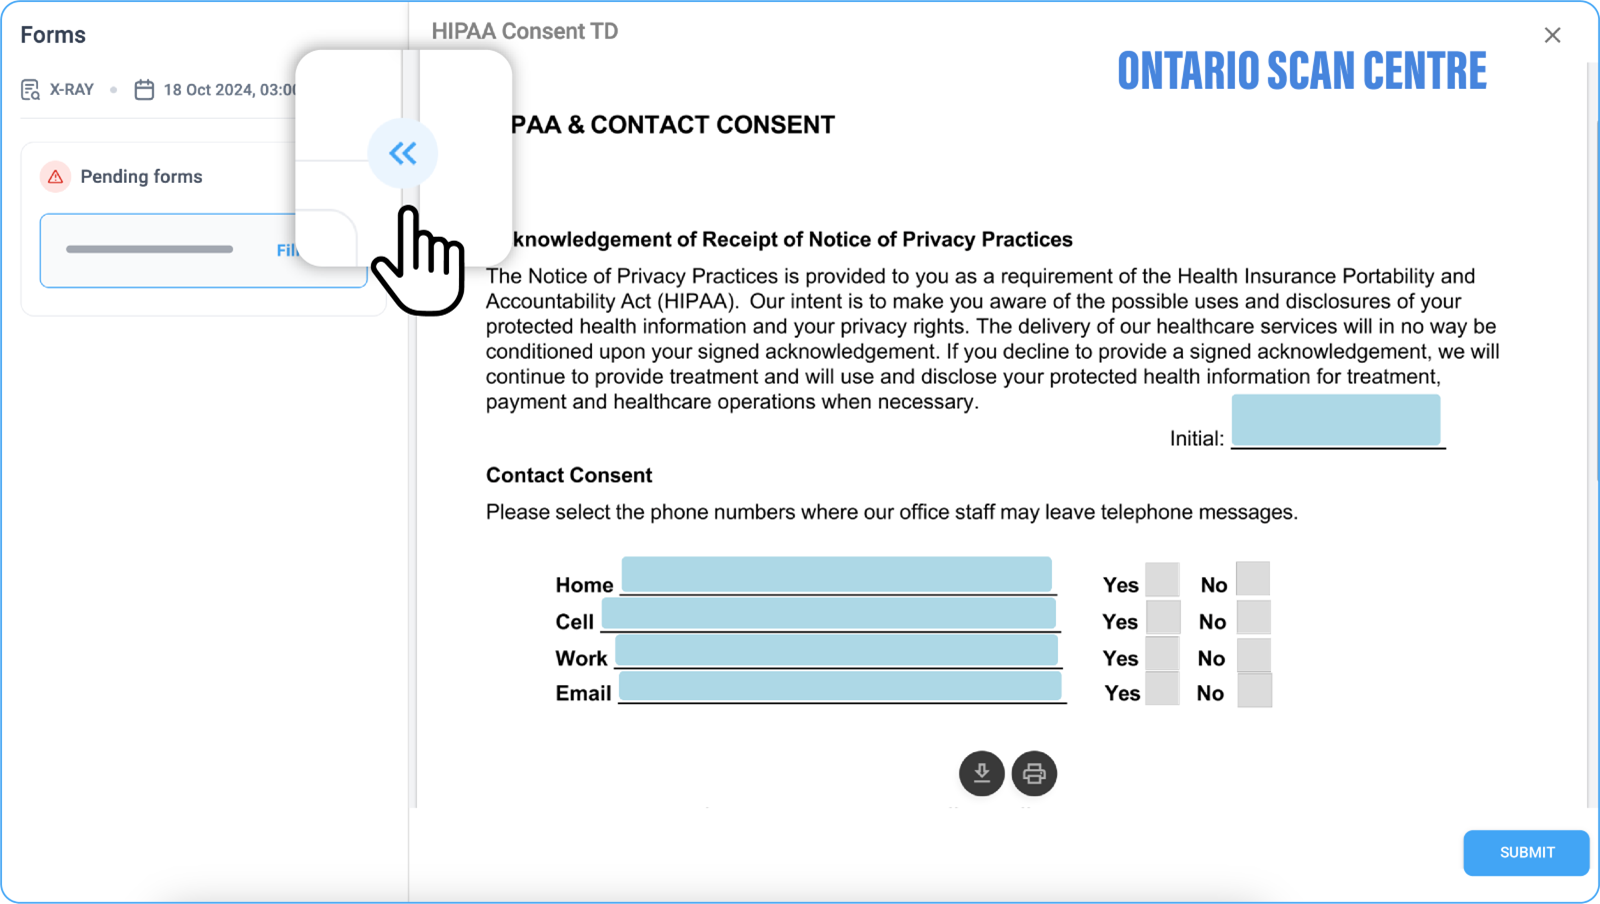
Viewing Forms in Full Screen
-
Click on Access Forms under Scheduled or Completed Appointments.
-
A list of available forms will appear on the left side.
-
Click on the desired form to open and view it in full screen.
Viewing and Filling Forms
-
Open the Appointments tab (Requested/Scheduled/Completed).
-
Select the specific appointment.
-
Click on Access Forms.
-
Pending and completed forms are categorized into:
-
Registration Form
-
Clinical Form
-
Choose the required form to view or fill it in full screen.