Create and Manage Healthcare Services
Healthcare services are the bookable resources that appear as columns in the Scheduler calendar. They usually represent machines, rooms, or specific clinical services.
This article shows you how to create a healthcare service, set its working hours, and edit, deactivate, or delete it. To choose which services appear in your own calendar, see Choose Which Healthcare Services Appear in the Scheduler.
Before you begin
- Scheduler access: Open the Scheduler by clicking the Calendar icon on the right-side navigation bar.
- Organization: Know which organization the service belongs to. You select it when you create the service.
- Working hours: Know which days and times the service is open. Working hours also decide whether the service appears in Day view on a given day.
- Permission to delete: To delete a service, your role needs the Delete Healthcare Service permission, under Organization > Delete in user access control. It covers services in your organization and its child organizations. See User access control and roles.
Open the Healthcare Services list
-
In the top-right toolbar of the Scheduler, click the Edit Healthcare Services icon (gear icon).

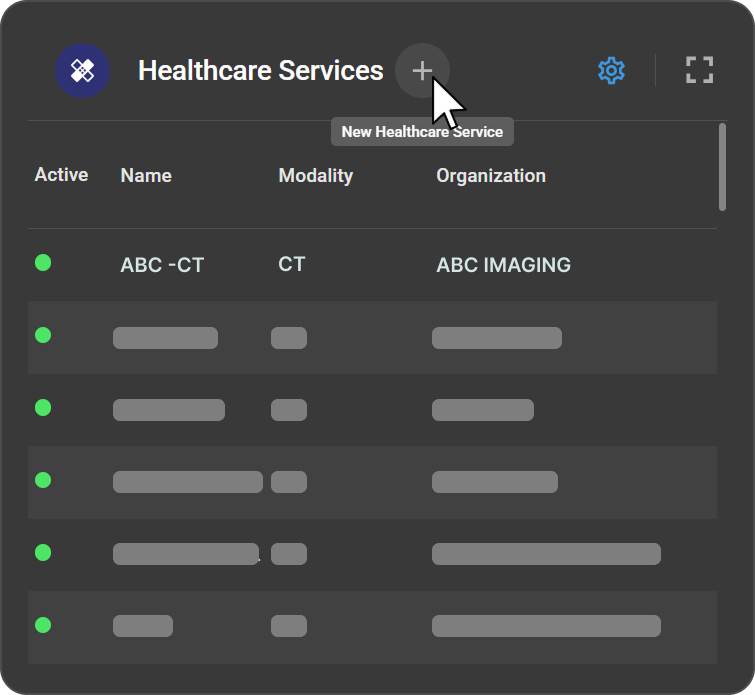
Expected result: The Healthcare Services panel opens. It lists all existing services with their Active status, Name, Modality, and Organization.
Create a healthcare service
Enter the service details
-
At the top of the Healthcare Services panel, click the + button. The new service form opens.
-
Fill in these fields:
|
|
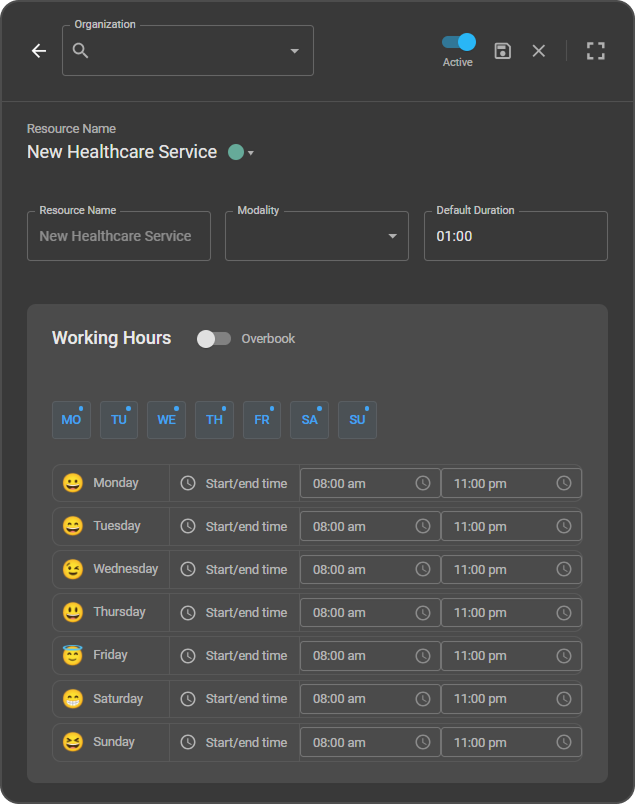
Note: The default duration is used when a study's order set has no duration, or a duration under 10 minutes. See How appointment length is set.
Set working hours
The days of the week appear as buttons, from MO to SU. By default, all days are active and highlighted blue.
- To turn a day off, click its button. Click it again to turn the day back on. Active days show Start and End time fields. Inactive days show a dash (–), which means no working hours are set.
- For each active day, set the Start and End times.
- (Optional) To use a picker, click the clock icon next to a time field. An analog clock opens, with AM and PM options.
Note: Working hours also decide when the service appears in Day view. On a day with no working hours, the service is hidden unless Display Unavailable is on. A service with no working hours on any day is hidden on every day. See Show or hide unavailable services in Day view.
Allow overbooking
- Overbook: Turn on the Overbook toggle, next to the Working Hours heading, to allow more than one booking in the same time slot.
Set whether the service is active
- Active: The Active toggle at the top of the form controls whether the service can be booked. It's on by default for a new service. You can turn it on or off at any time.
Note: A deactivated service stays in the system, but it can't be booked.
Save the service
- To save: Click the Save (disk) icon.
- To discard: Click the Close (X) icon.
Expected result: The new service appears in the Healthcare Services list. To show it as a column in your calendar, add it from the Resource panel. See Choose Which Healthcare Services Appear in the Scheduler.
Edit a healthcare service
|
|
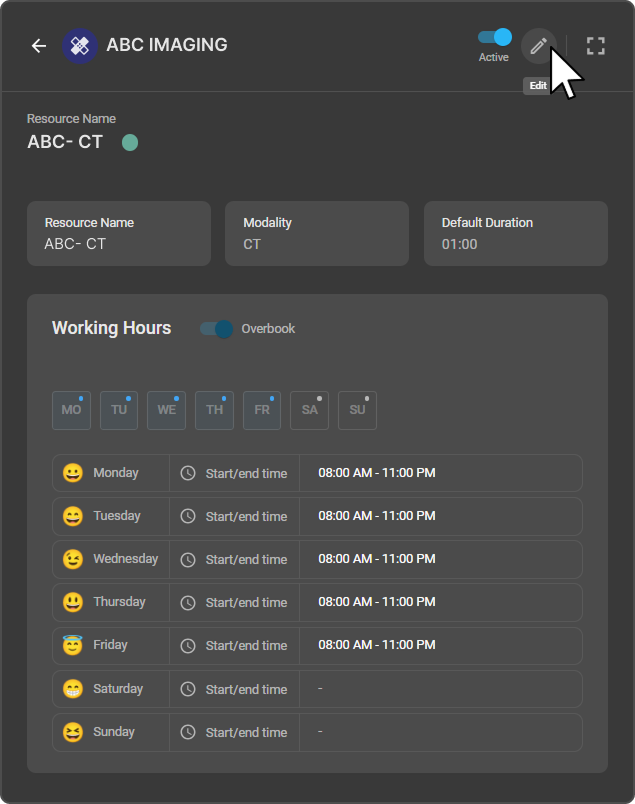
Expected result: The service uses its updated settings.
Note: You can turn the Active toggle on or off directly from the service detail view. You don't need to enter edit mode.
Delete a healthcare service
|
|
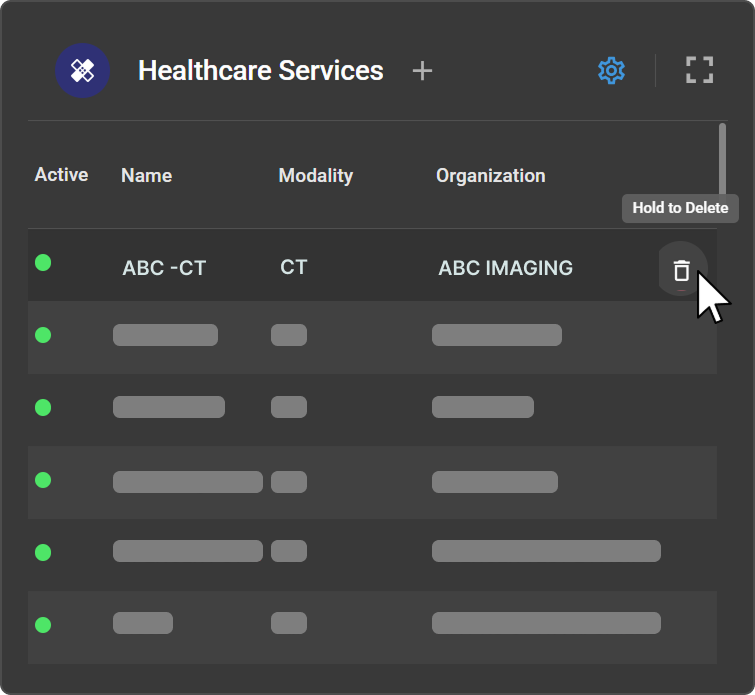
- Click Delete to confirm, or click Cancel to go back.
Expected result: If the service has no future appointments, it's deleted right away. If it has future appointments, an error appears instead. See Troubleshooting.
Important: You can't undo a deletion. To stop bookings but keep the service, turn off its Active toggle instead.
Troubleshooting
"Unable to delete the Healthcare Service" error
- Message:
Unable to delete the Healthcare Service. The deletion cannot be processed because there are appointments scheduled for future dates. Please move all future appointments to another Healthcare Service before proceeding. - Cause: The service has appointments scheduled for future dates.
- Fix: Click Got It to close the message. Move all future appointments to another healthcare service, then try deleting again.
A new service doesn't appear in the calendar
- Cause: New services aren't added to your calendar view automatically, or the service has no working hours on the selected day.
- Fix: Select the service in the Resource panel. If you're in Day view, check its working hours or turn on Display Unavailable. See Choose Which Healthcare Services Appear in the Scheduler.
Related articles
- How the Scheduler Works: Learn the main parts of the Scheduler and its rules.
- Choose Which Healthcare Services Appear in the Scheduler: Add services to your calendar view.
- Request an Appointment: Book appointments in a healthcare service.
- Block Time on the Calendar: Reserve time when a service can't be booked.