User Profile
This guide provides instructions on accessing and managing your user profile in OmegaAI. It covers editing user information, customizing hotkeys for the Image Viewer, and logging out of the system.
Accessing and Editing User Information
-
Navigating to User Profile:
-
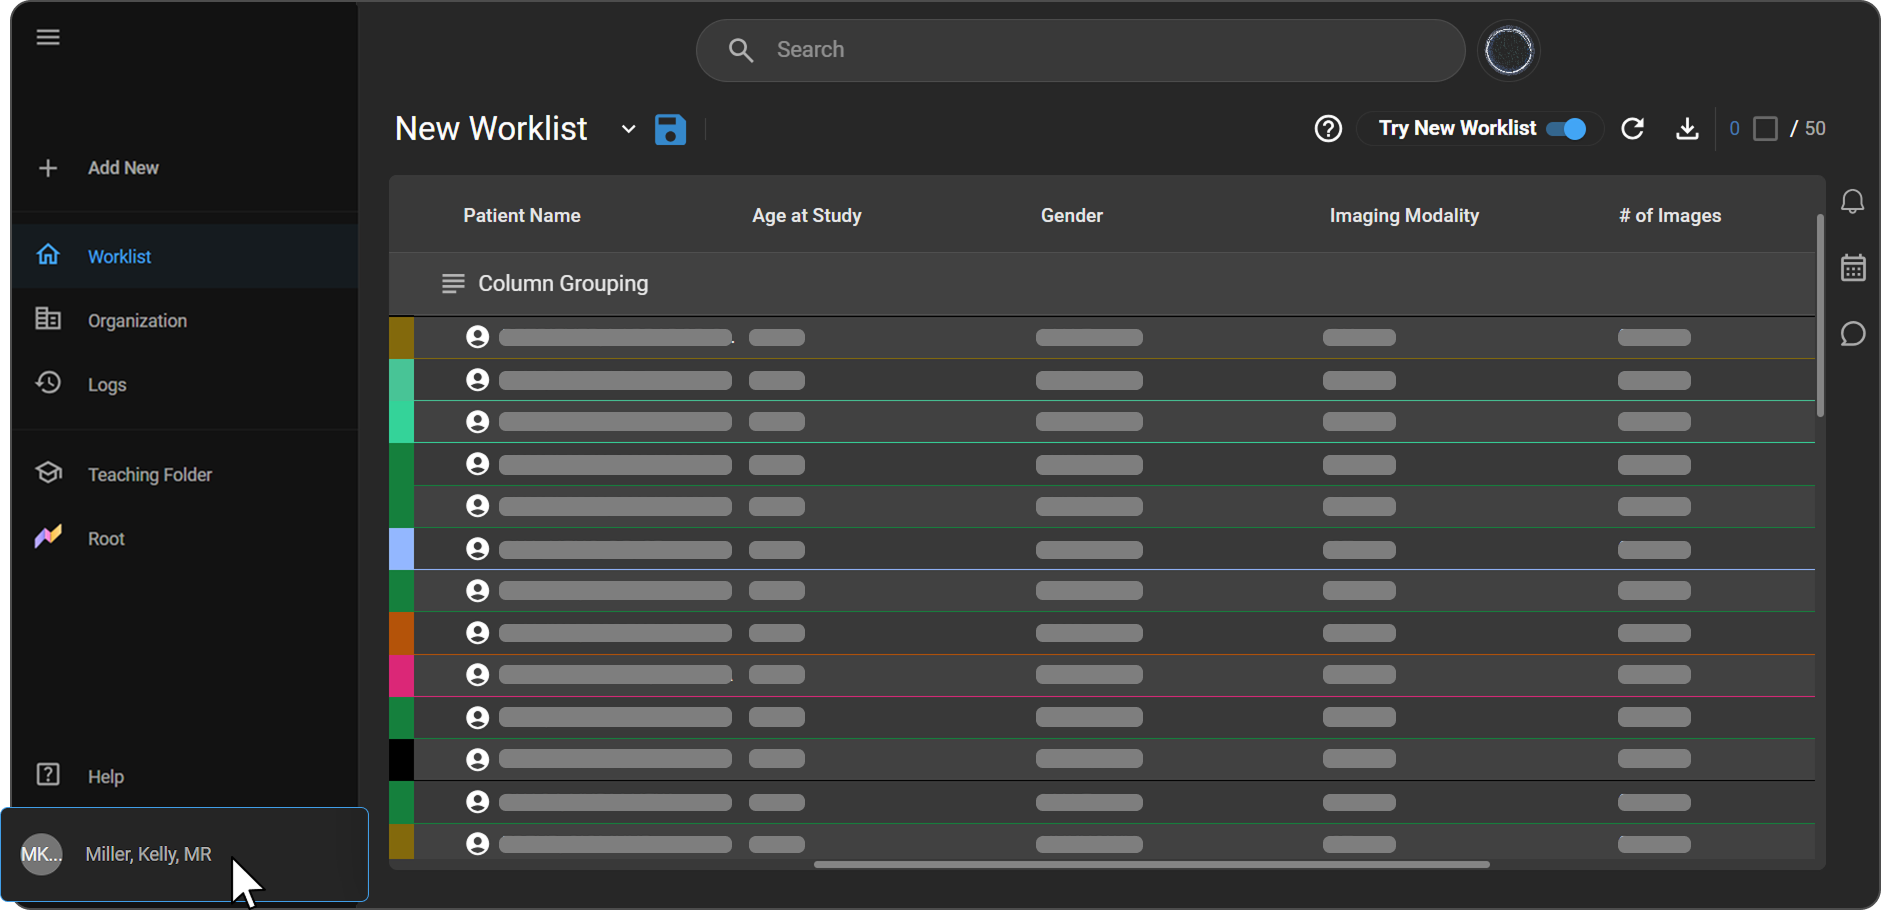
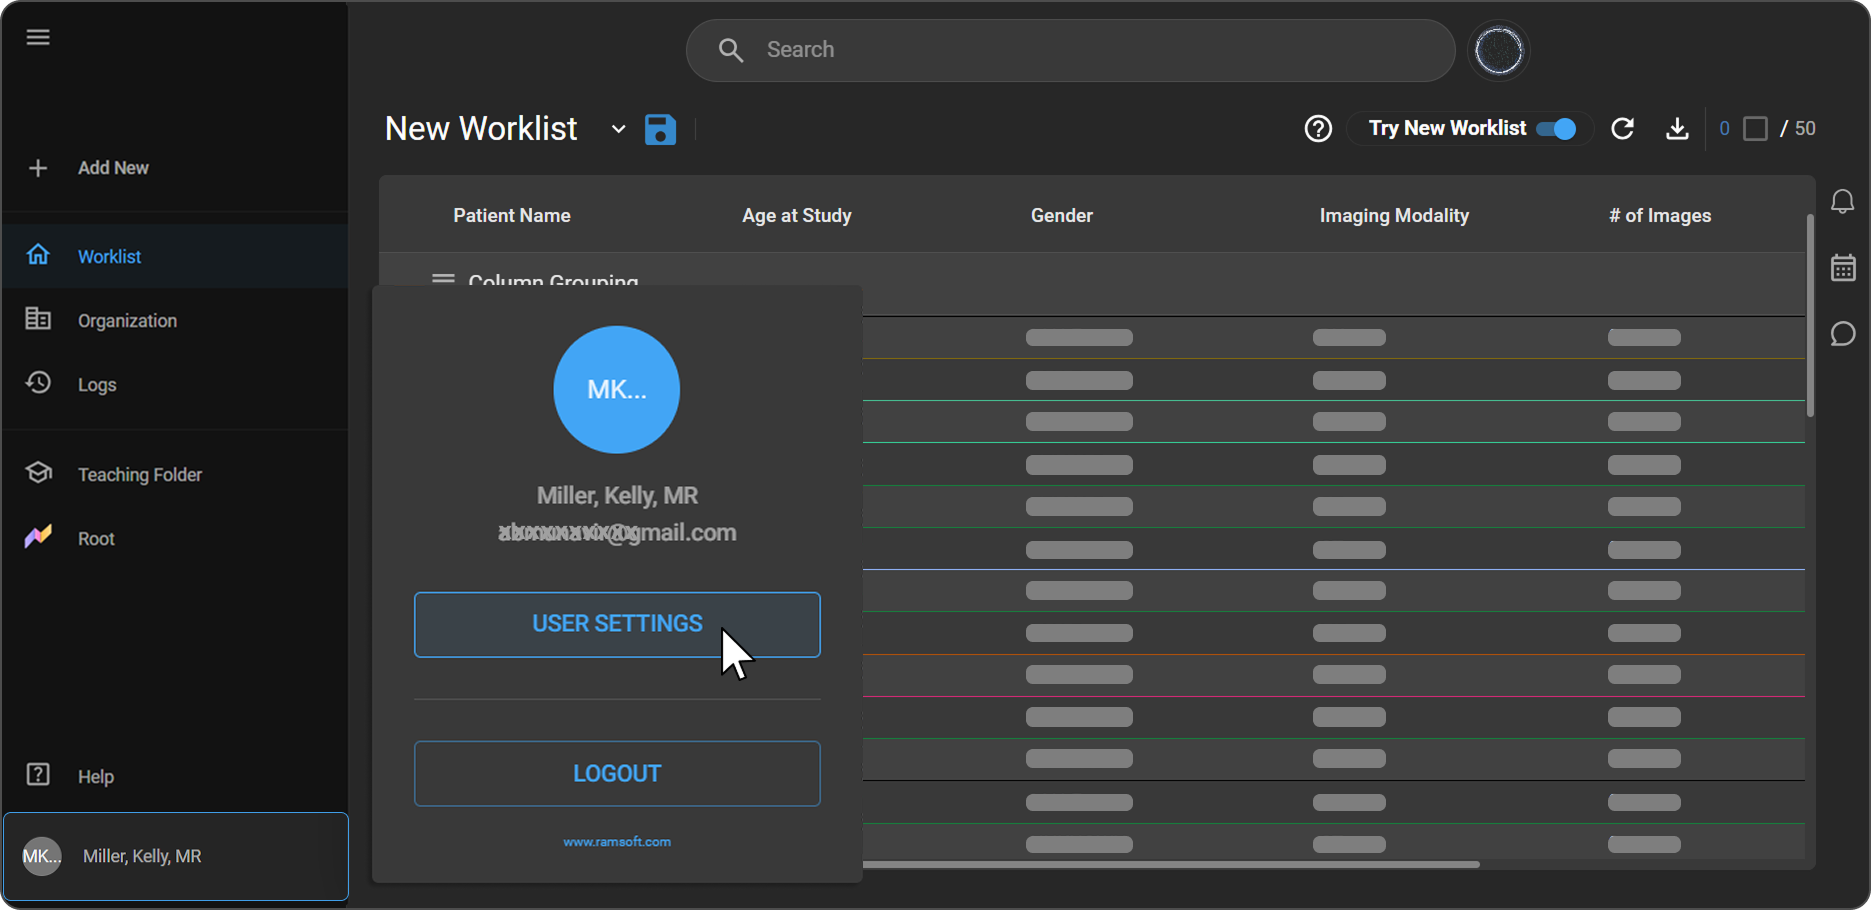
On the left-side navigation bar, scroll down to the bottom to find your profile avatar displaying your initials (e.g. KM). Hover over it to see your name, then click on it. A pop-up appears showing your name, email address, and two options — User Settings and Logout.
-
-
Open User Settings:
-
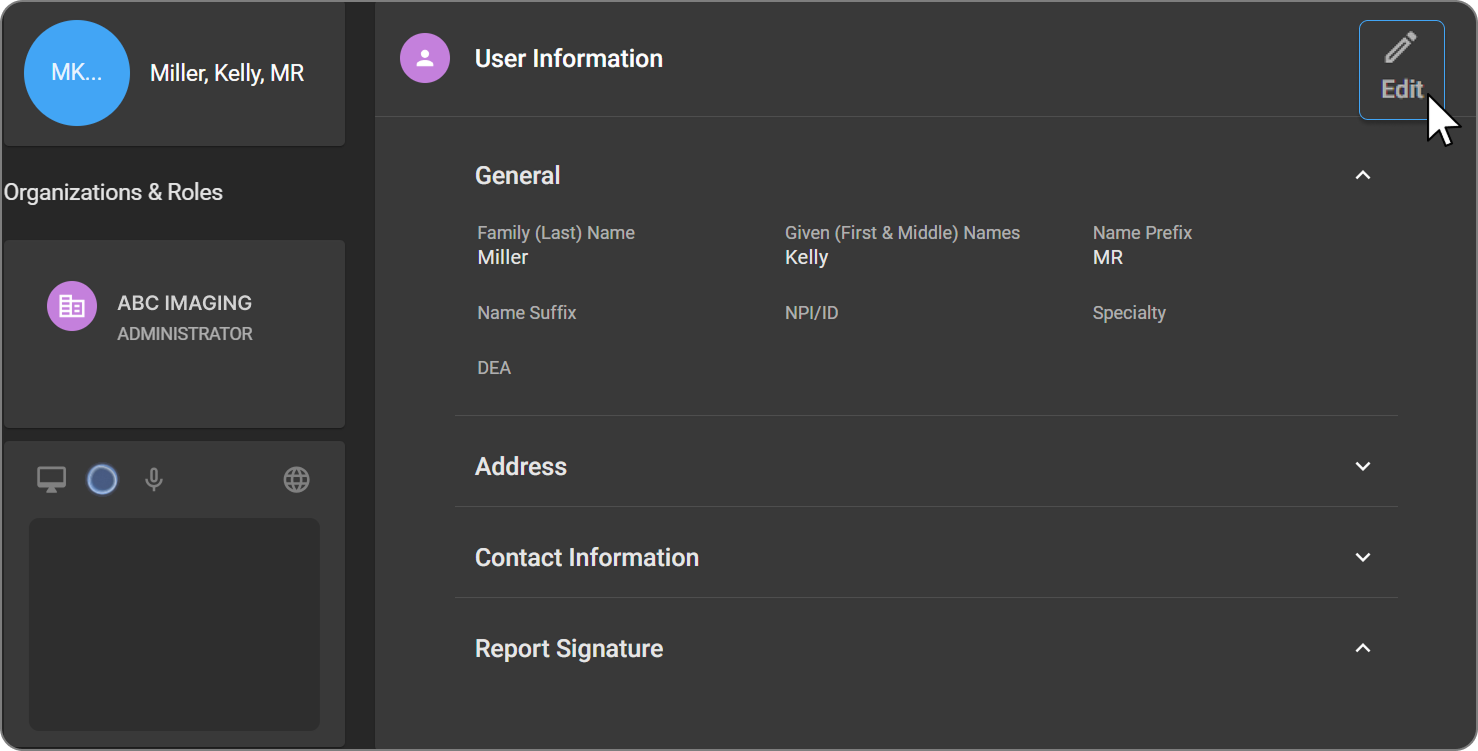
Click User Settings to open the User Profile page. The left panel displays your name, avatar, Organizations & Roles, and the settings toolbar. The right panel displays your User Information.
-
-
View your User Information
- The User Information panel on the right shows your profile details across several collapsible sections: General, Address, Contact Information, License List, and Report Signature. An Edit button is available at the top-right of the panel.
-
Edit your information
-
Click the Edit button at the top-right of the User Information panel. All fields become editable. Enter your updates in the relevant fields.
-
Click Save to apply your changes. Your profile is updated immediately.
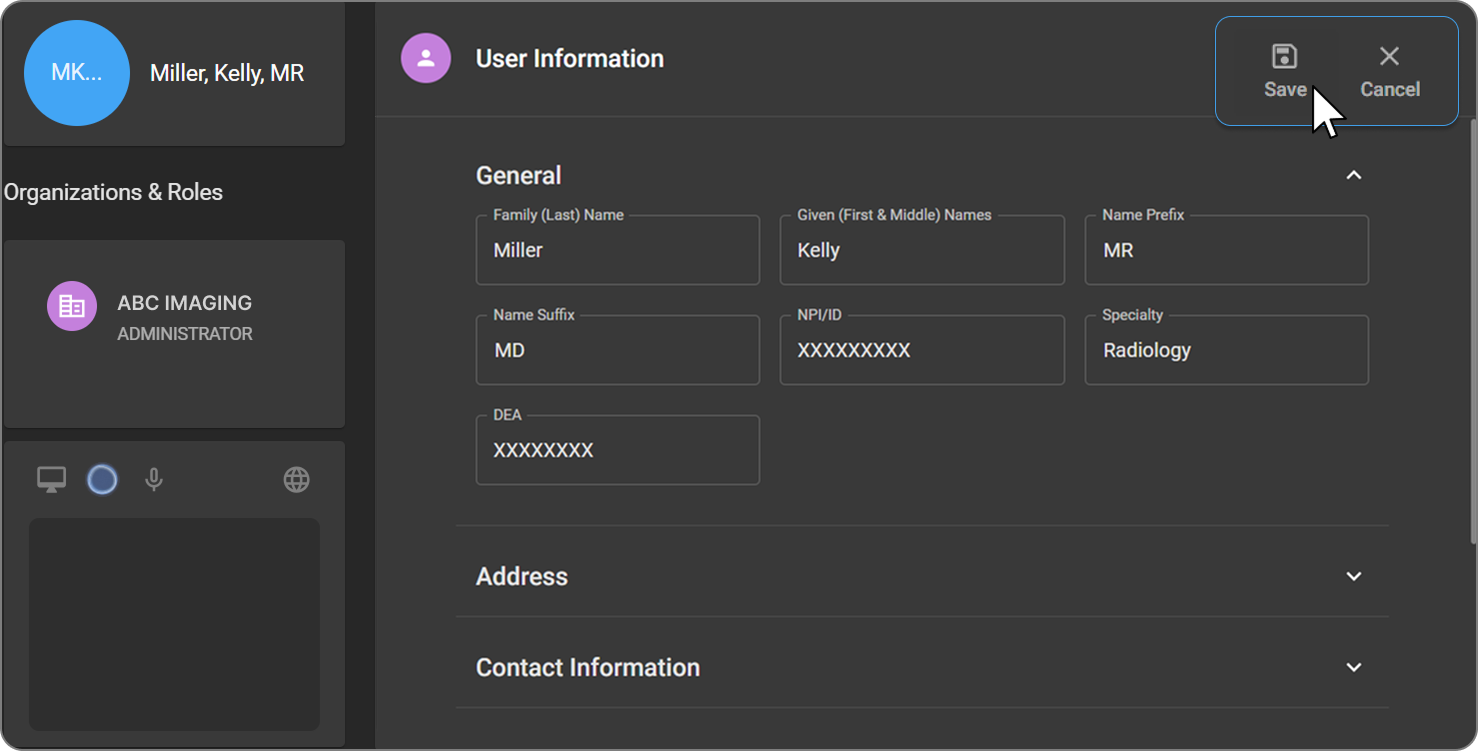
- Click Cancel to discard all changes and return to View Mode.
-
Note:
The Organizations & Roles section in the left panel is read-only. It displays the organizations you are currently associated with and your assigned role in each. Role changes can only be made by an administrator.
User Settings Toolbar
The settings toolbar appears at the bottom of the left panel on the User Profile page. It provides access to additional configuration options.
The toolbar contains the following icons, from left to right:
| Name | Description |
|---|---|
| Display Settings | Configure display preferences and monitor layout. |
| User Profile Sync | Manage profile synchronization settings based on NPI or Login Email ID. |
| Hotkey Customizations | Open the Hotkey Customization panel to configure keyboard shortcuts for the Image Viewer. |
| Voice Commands | Configure voice command input settings. |
| Language | Switch the interface language. Displays the currently active language (e.g. English). |
User Profile Synchronization based on Login Email ID or NPI ID
This feature prevents duplicate practitioner records by automatically matching and synchronizing user profiles based on a unique NPI or Login Email ID. It allows a single practitioner to be linked to multiple organizations without duplication.
-
Automatically link an existing user profile to a new organization when NPI or Login Email matches.
-
Allow one practitioner entity across multiple organizations.
-
Show clear messages for data conflicts.
How Matching & Synchronization Functions
Step 1: Matching
When adding a new Physician/User:
-
Enter NPI and/or Login Email ID.
-
The system searches for existing profiles:
-
No match found → A new user profile is created.
-
Match found → System links to the existing profile (no duplicate created).
-
Step 2: Synchronization & Role Assignment
-
A message appears: “A user with this NPI/Login Email already exists in the system. The existing profile will be added to your organization with the role you selected.”
-
Linking the existing user to your organization with your selected role.
Logging Out of OmegaAI
Logging Out:
-
Navigate to the User Profile avatar at the bottom of the left-side navigation bar on the OmegaAI homepage.
-
In the pop-up that appears, click Logout to log out of the system securely.