Navigate the Scheduler
The Scheduler shows appointments on a calendar timeline, with one column for each healthcare service. This article shows you how to open the Scheduler, switch views, go to a date, use full-screen mode, change the time interval, and filter appointments by status.
Before you begin
- Healthcare services in your view: The calendar shows only the healthcare services you selected. To add or remove them, see Choose Which Healthcare Services Appear in the Scheduler.
Open the Scheduler
-
On the right-side navigation bar, click the Calendar icon.
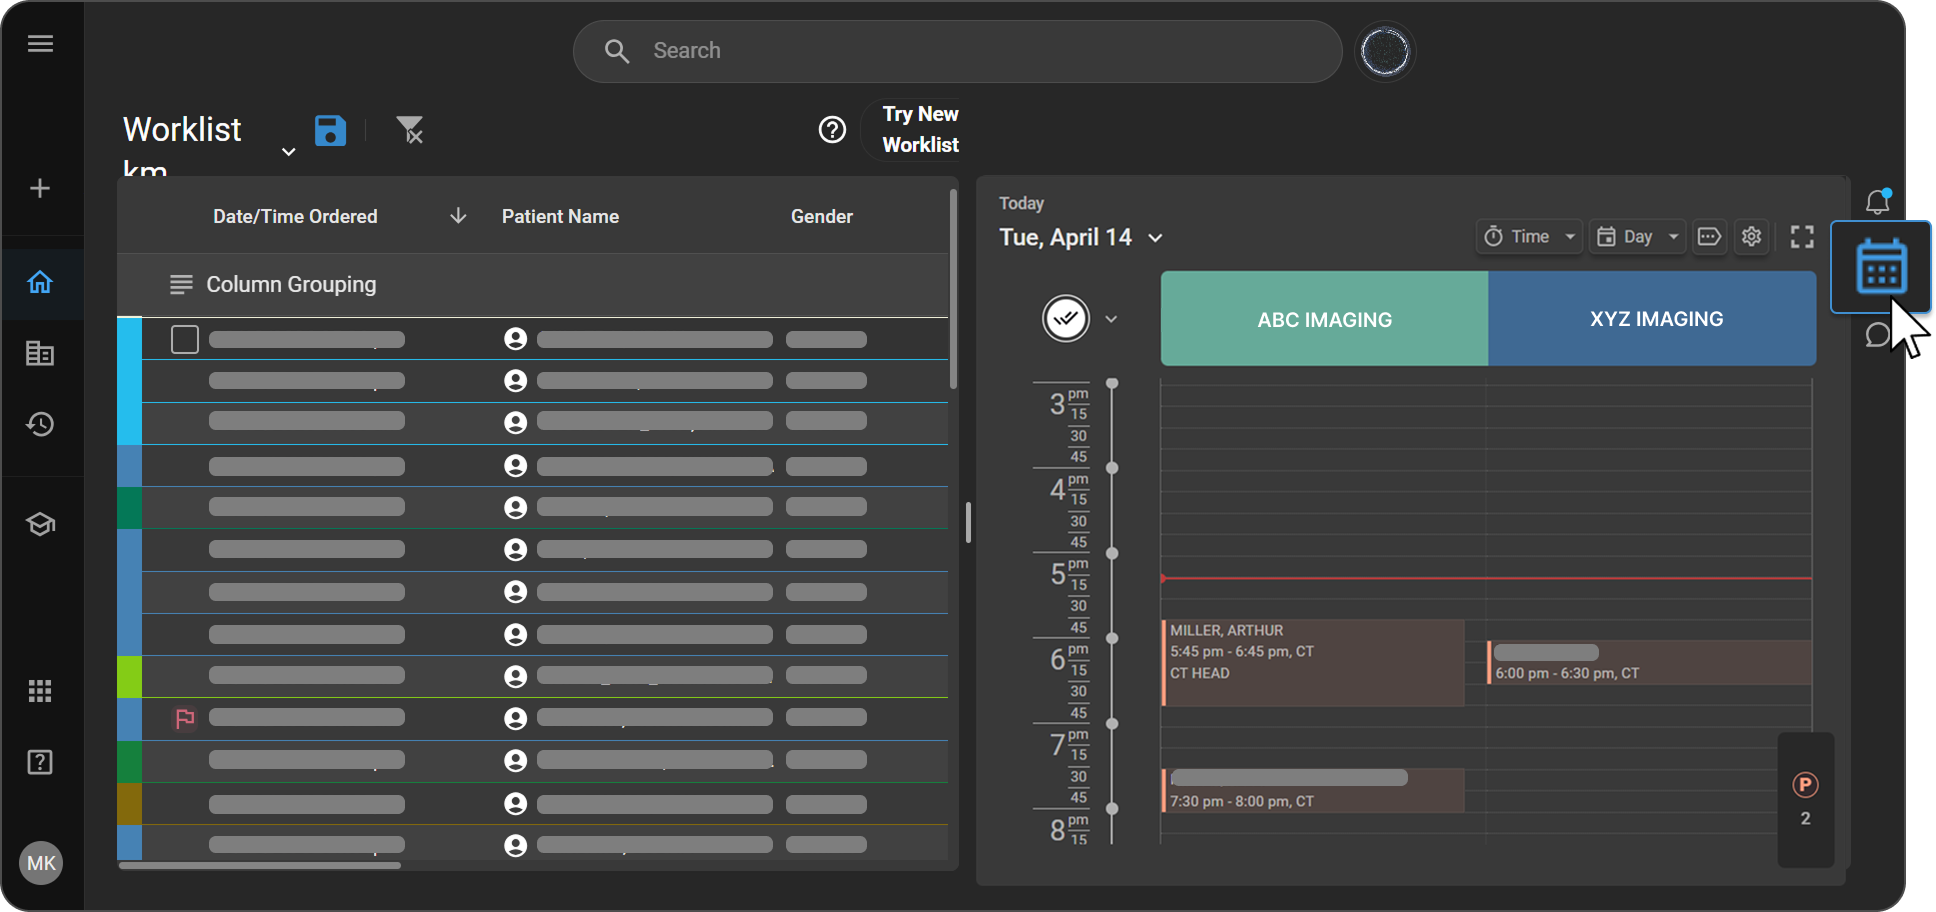
Expected result: The Scheduler opens and shows today's appointments. A red horizontal line across the calendar marks the current time.
Tip: Each healthcare service shows times in its own clinic's time zone, and the red line marks the current time in each column. If any selected service is in a different time zone from your computer, hover over the dot on a column's red line to see that clinic's time zone and current time.
Switch between Day and Week views
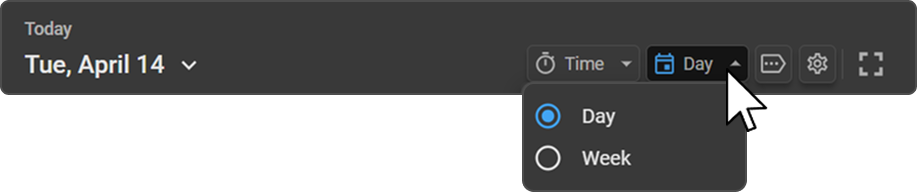
- In the top-right toolbar, click the view button. It shows the current view, such as Day.
- Select a view:
-
Day: Shows appointments for the selected day, with healthcare services as columns across the top.
-
Week: Shows the full week, Sunday to Saturday, with the dates as columns under each healthcare service header.
-
Expected result: The calendar switches to the view you selected.
Tip: When you select more healthcare services than fit on the screen, click the Next button on the right edge of the header to scroll through the rest. This works in both Day and Week views.
Go to a specific date
-
Click the down arrow next to the current date. A monthly mini-calendar opens.
-
(Optional) To move between months, click « or ».
-
Select the date you want.
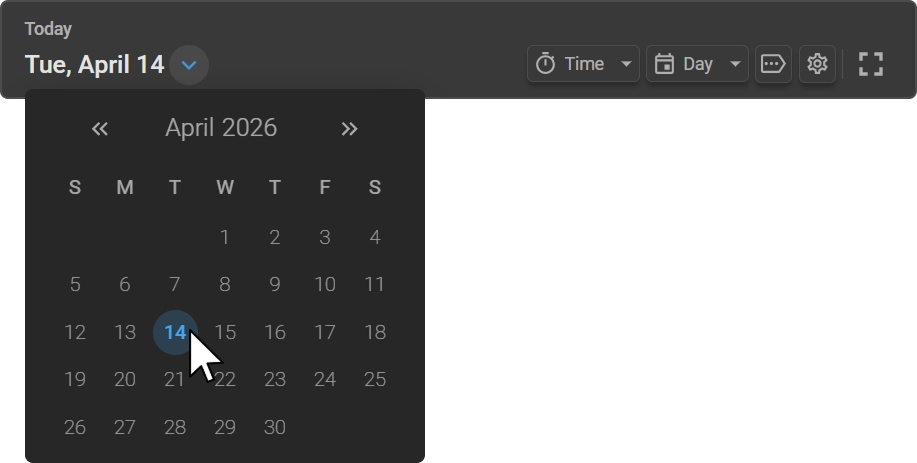
Expected result: The calendar jumps to the selected date.
Tip: A label above the date, such as Today or Tomorrow, shows how the selected date relates to today.
Use full-screen mode
Full-screen mode opens the Scheduler in a larger panel and adds a Month view.
-
In the top-right corner of the Scheduler, click the Full screen icon.
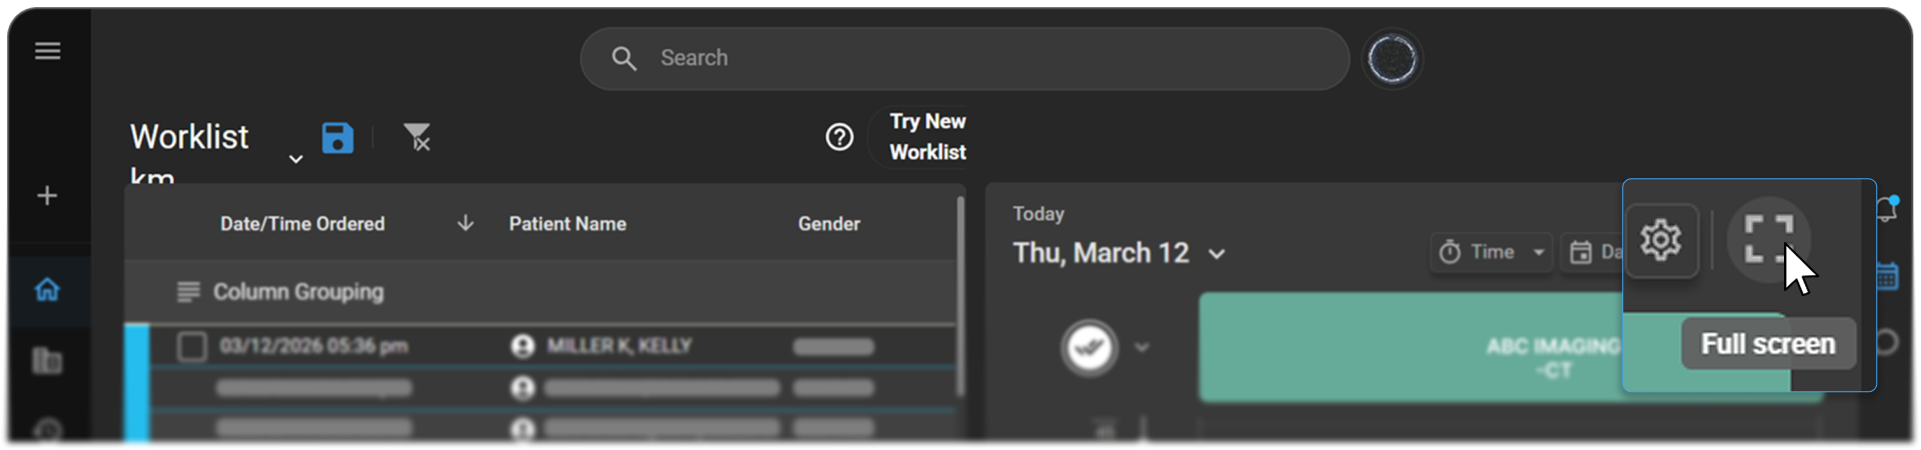
Expected result: The Scheduler fills the screen, and more healthcare service columns fit across the top. A date selector that shows two months stays open on the left, so you don't need the down arrow next to the date.
Tip: In the two-month date selector, today's date is outlined and the selected date is highlighted. Days that have appointments or blocks are marked with a ring. In Week view, the whole selected week is highlighted.
Switch views in full-screen mode
-
Click the view button.
-
Select Day, Week, or Month:
- Day and Week: Work the same as they do outside full-screen mode, including the Next button.
- Month: Shows one healthcare service at a time across a full monthly calendar, Sunday to Saturday. To switch services, click > on the right of the service header for the next service, or < on the left for the previous one.
Each day lists its appointments and blocks with their start time, for example
06:45 am Block time. On the first service, only > appears. On the last service, only < appears.
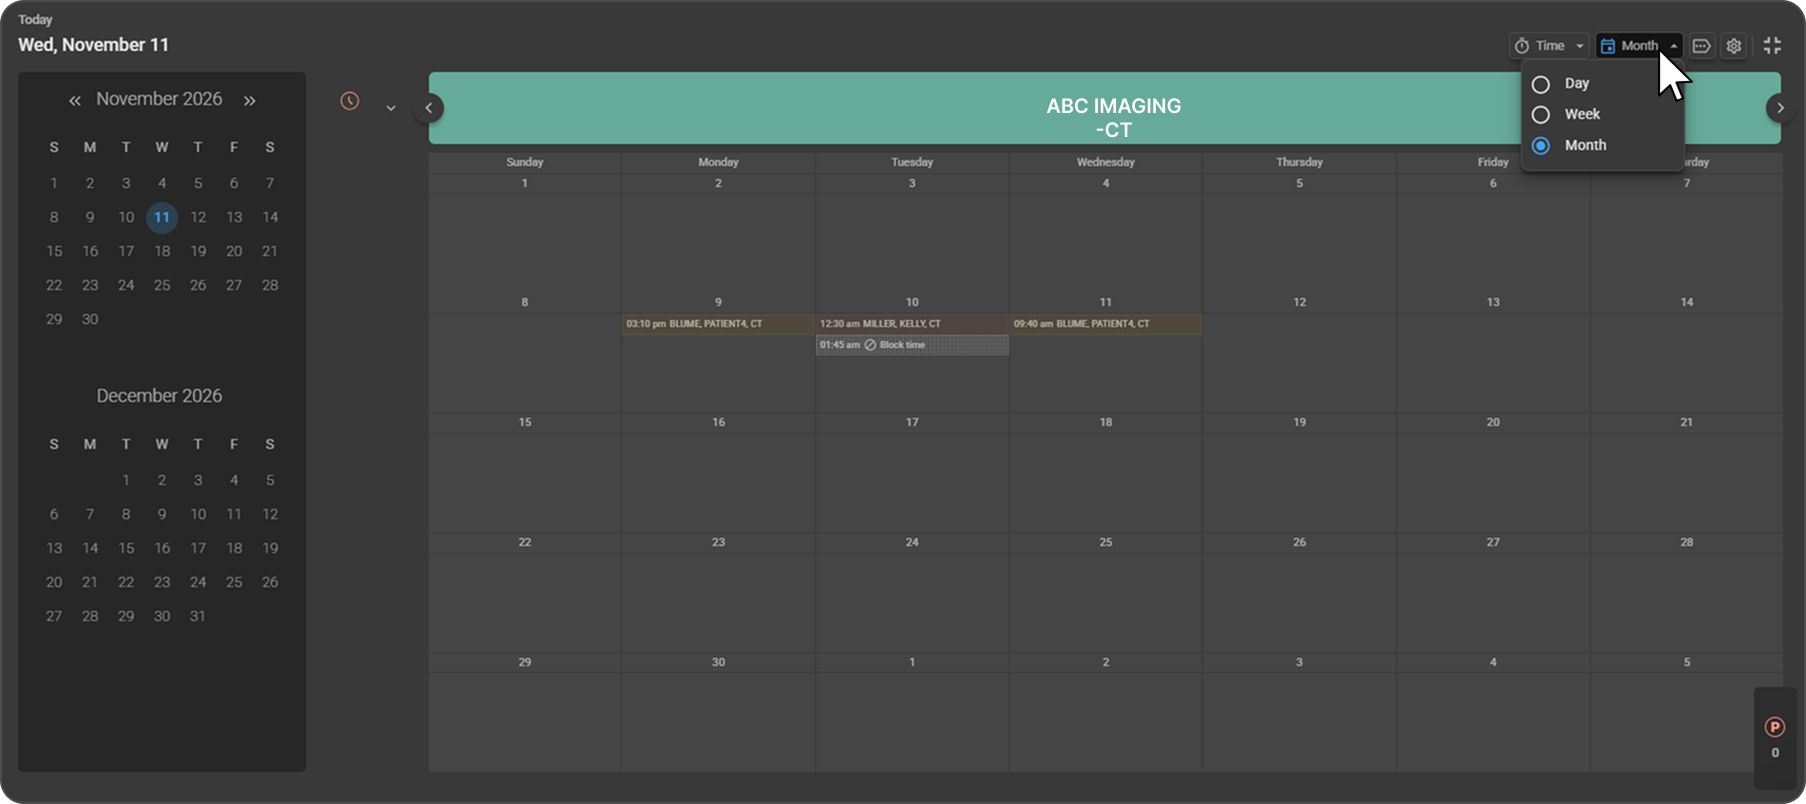
Note: Month appears in the view menu only in full-screen mode. To leave full-screen mode, click the Exit Fullscreen icon in the same corner.
Change the time interval
The time interval sets how finely the timeline is divided. A shorter interval, such as 5 minutes, gives a detailed view for precise scheduling. A longer interval, such as 30 minutes, gives a broader view of the day.
-
In the top-right toolbar, click Time. The Time Interval dropdown opens.
-
Select 5 Minutes, 10 Minutes, 15 Minutes, or 30 Minutes.
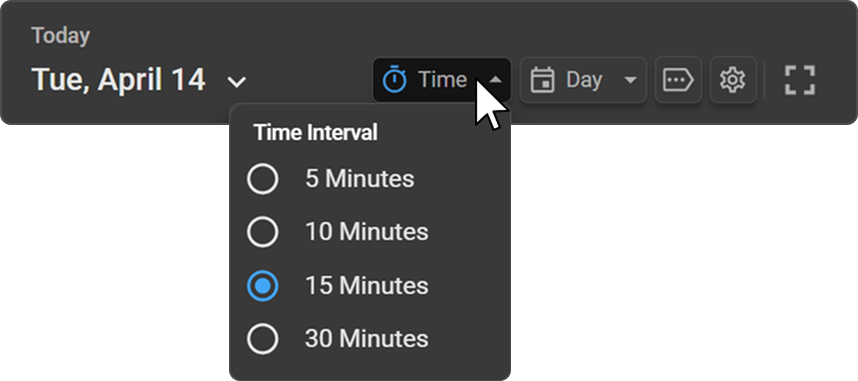
Expected result: The timeline shows time slots at the interval you selected.
Filter appointments by status
-
On the left side of the Scheduler, click the status icon. The status filter dropdown opens.
-
Select a status. All shows every appointment and is the default. You can select only one status at a time.
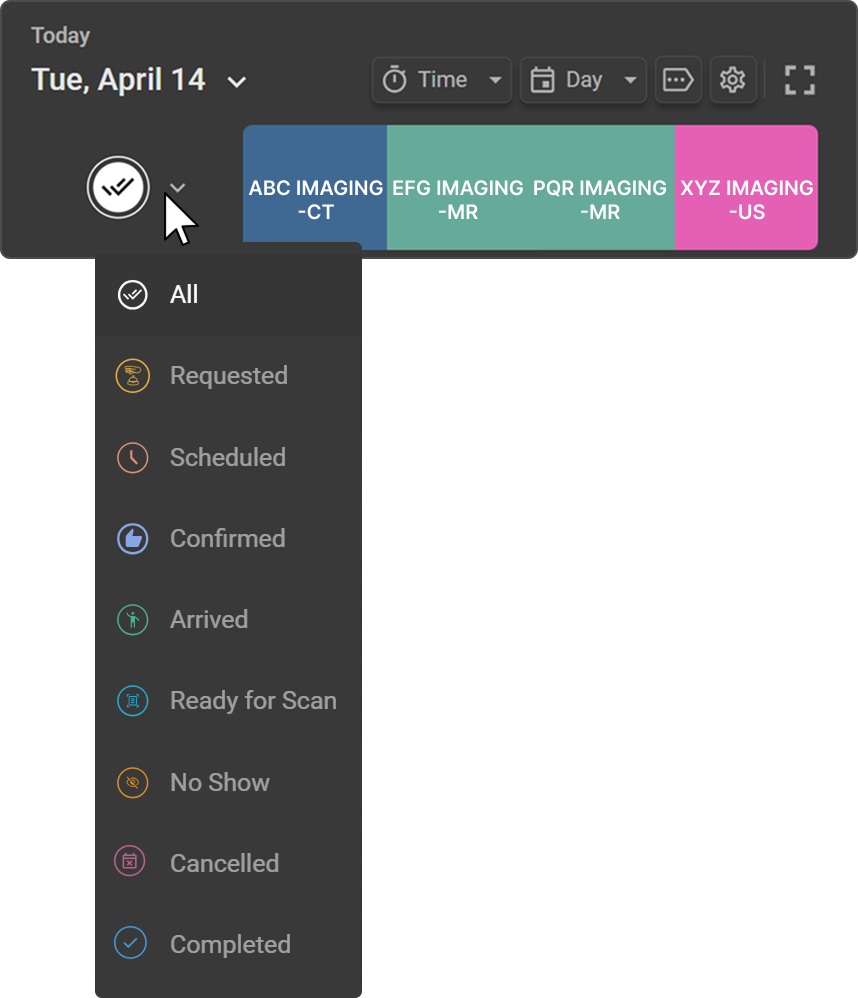
Expected result: The calendar shows only appointments with the selected status.
For the list of statuses and how they change, see Understand appointment statuses.
Troubleshooting
The calendar shows "No resources selected"
- Cause: No healthcare services are selected in the Resource panel.
- Fix: Select at least one service. See Choose Which Healthcare Services Appear in the Scheduler.
A healthcare service column is missing
- Cause: The column may be off the screen, or, in Day view, the service may be unavailable that day.
- Fix: Click the Next button to scroll through columns. In Day view, turn on Display Unavailable. See Show or hide unavailable services in Day view.
The Month view isn't in the view menu
- Cause: Month is available only in full-screen mode.
- Fix: Click the Full screen icon, then open the view menu.
Related articles
- How the Scheduler Works: Learn the main parts of the Scheduler and its rules.
- Choose Which Healthcare Services Appear in the Scheduler: Control which columns you see.
- Request an Appointment: Schedule a study from the Worklist or the calendar.