Managing Self-Scheduling
Self-scheduling allows patients to request and schedule their own imaging appointments through a secure link provided by the healthcare organization. The availability of this feature depends on the license purchased by the organization.
Self-scheduling is implemented as a separate asset for the OmegaAI self-scheduler and is available to organizations with the AFD license or as an add-on in BPP.
This section explains:
- How administrators enable and configure self-scheduling in OmegaAI
- How patients use the self-scheduling link through Blume
Enabling Self-Scheduling in OmegaAI
Administrators can enable and configure self-scheduling within the organization settings in OmegaAI.
Accessing Self-Scheduling Settings
- Navigate to Organization.
- Select Details.
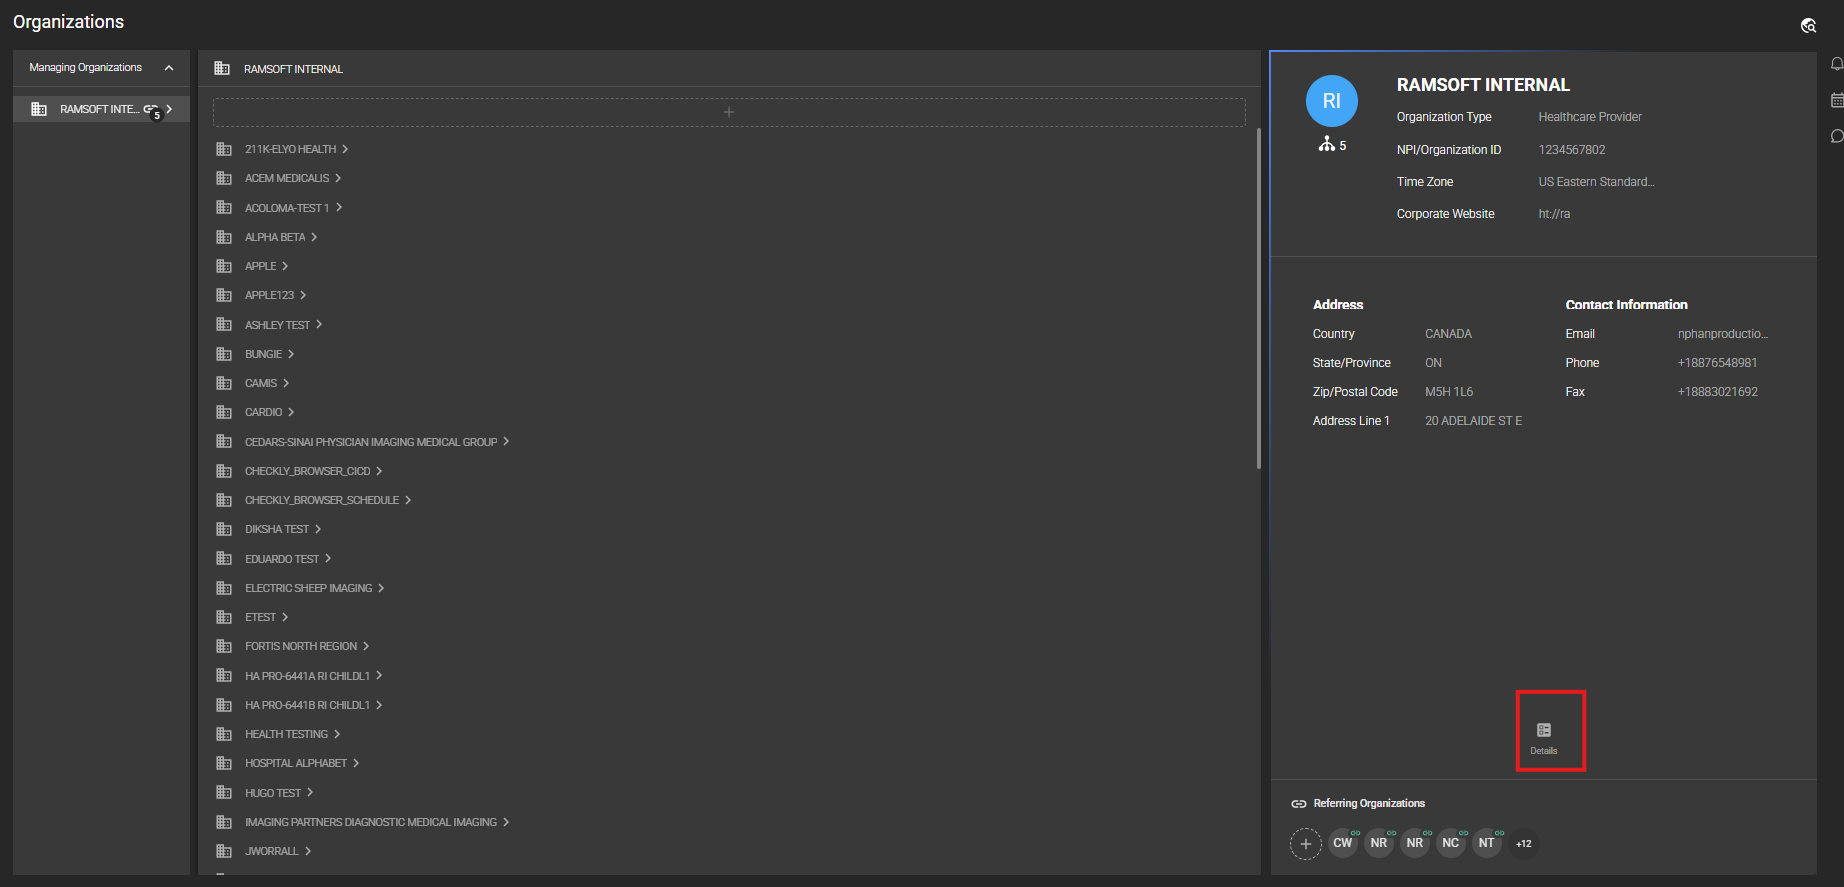
- Select the RIS tab.
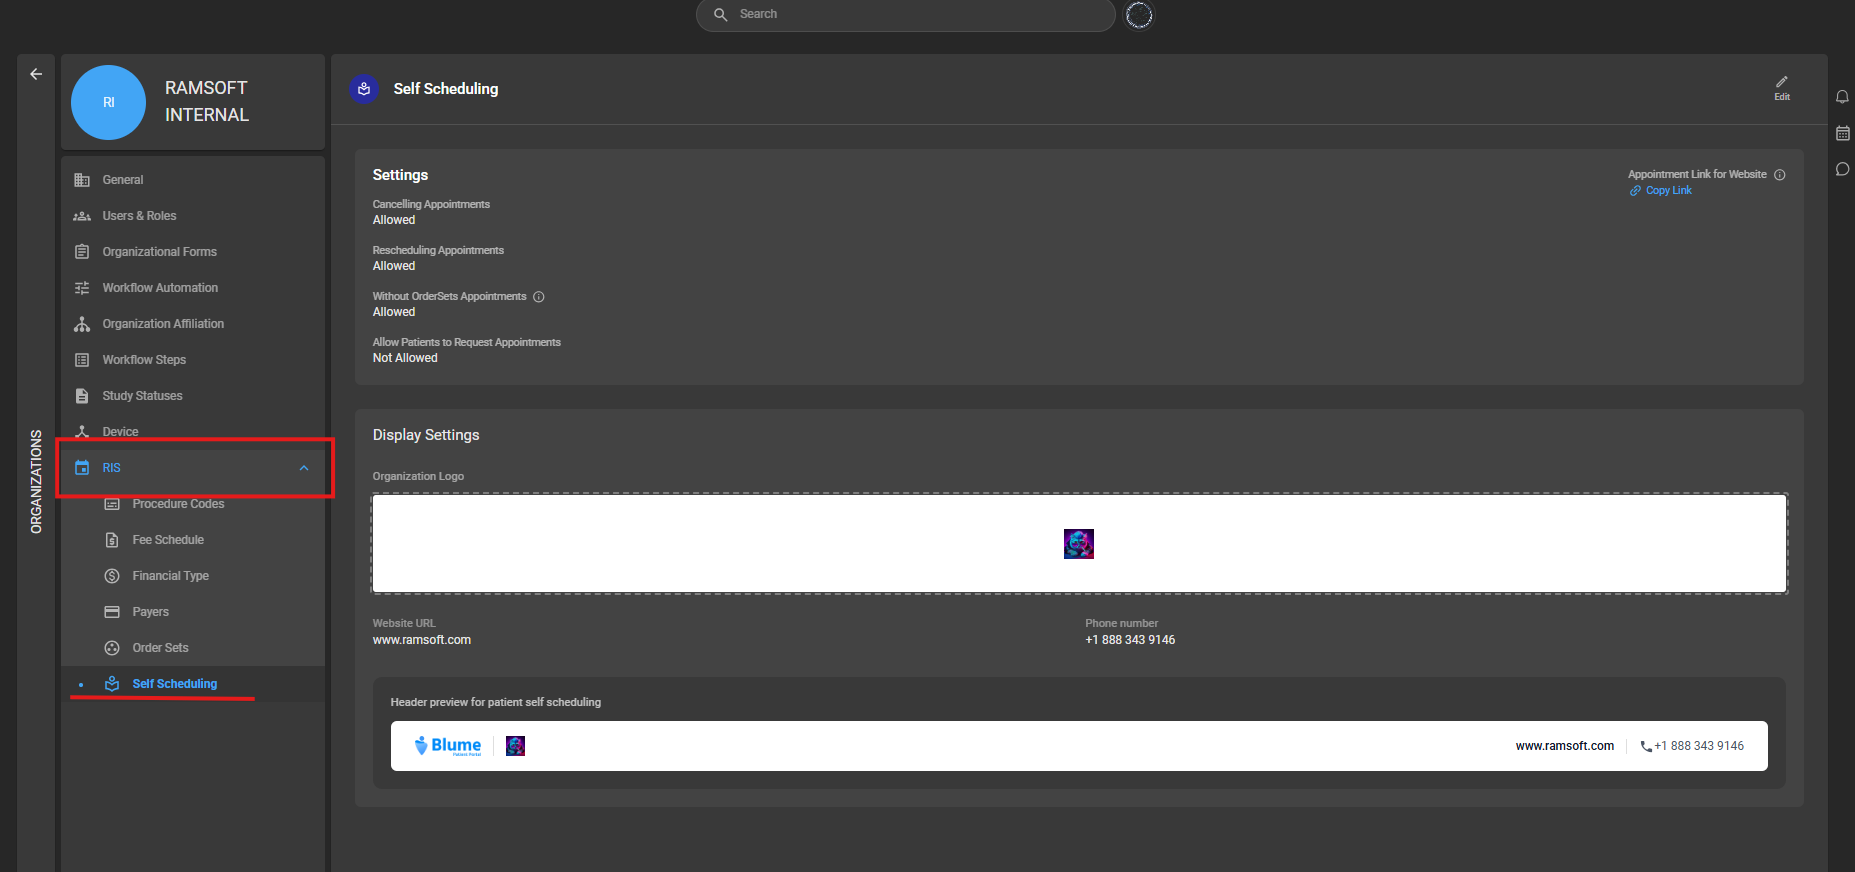
- From the dropdown menu, select Self Scheduling.
The Self Scheduling configuration page appears, where administrators can manage the available settings.
Available Self-Scheduling Functions
Edit Configuration
-
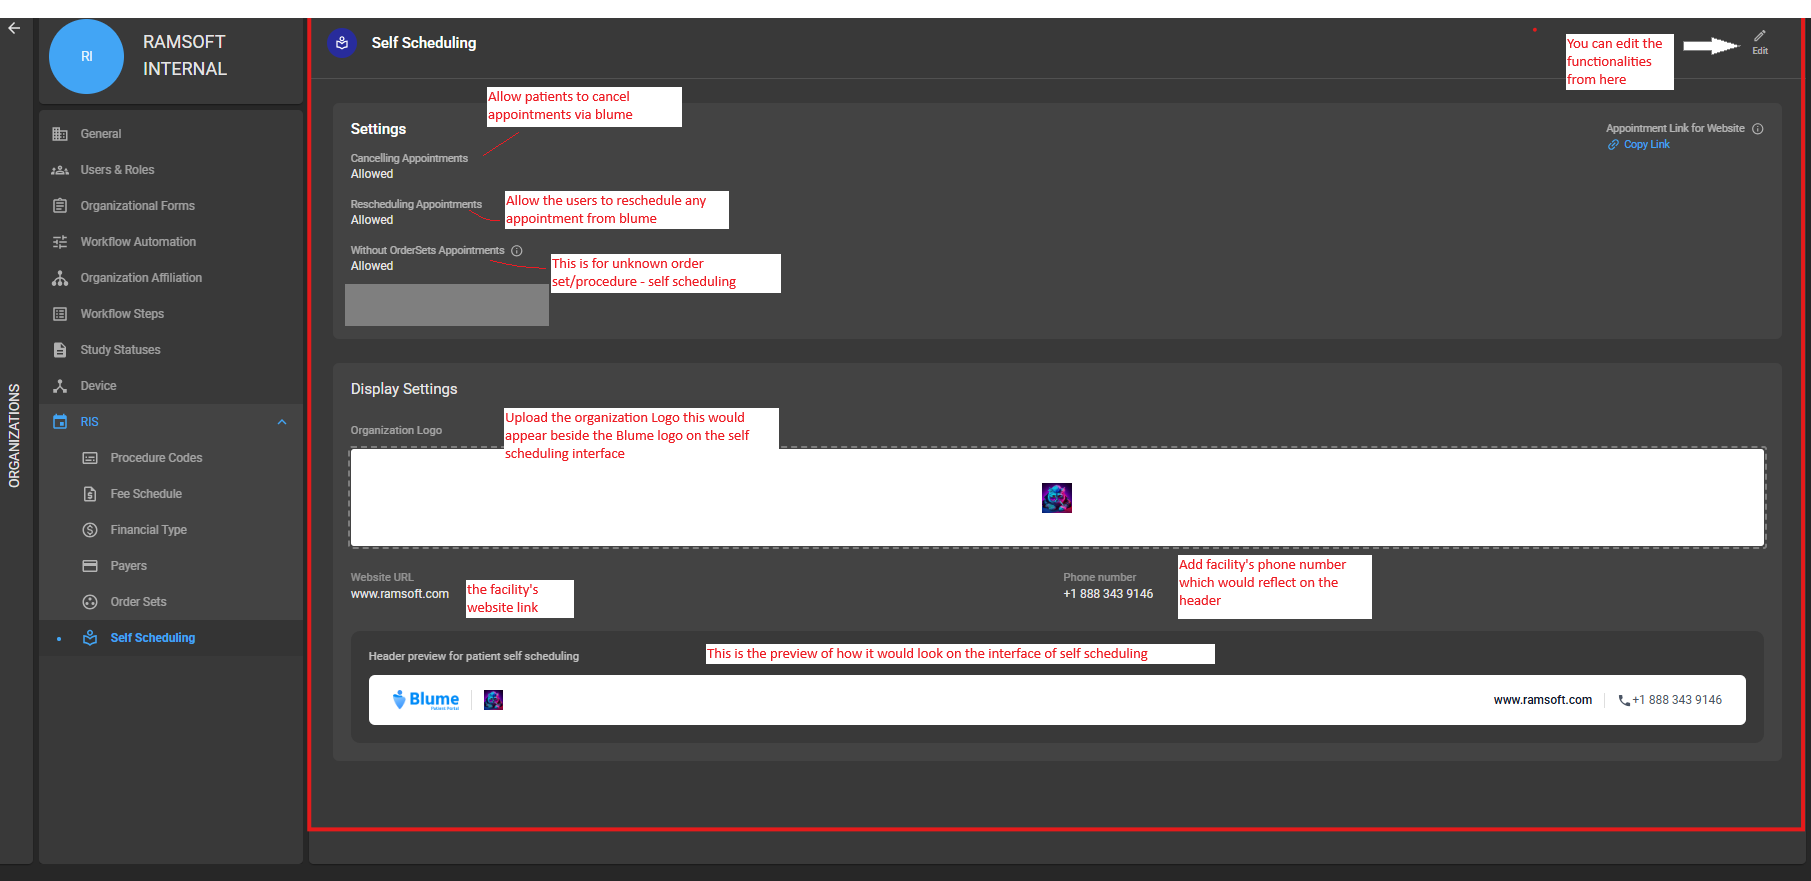
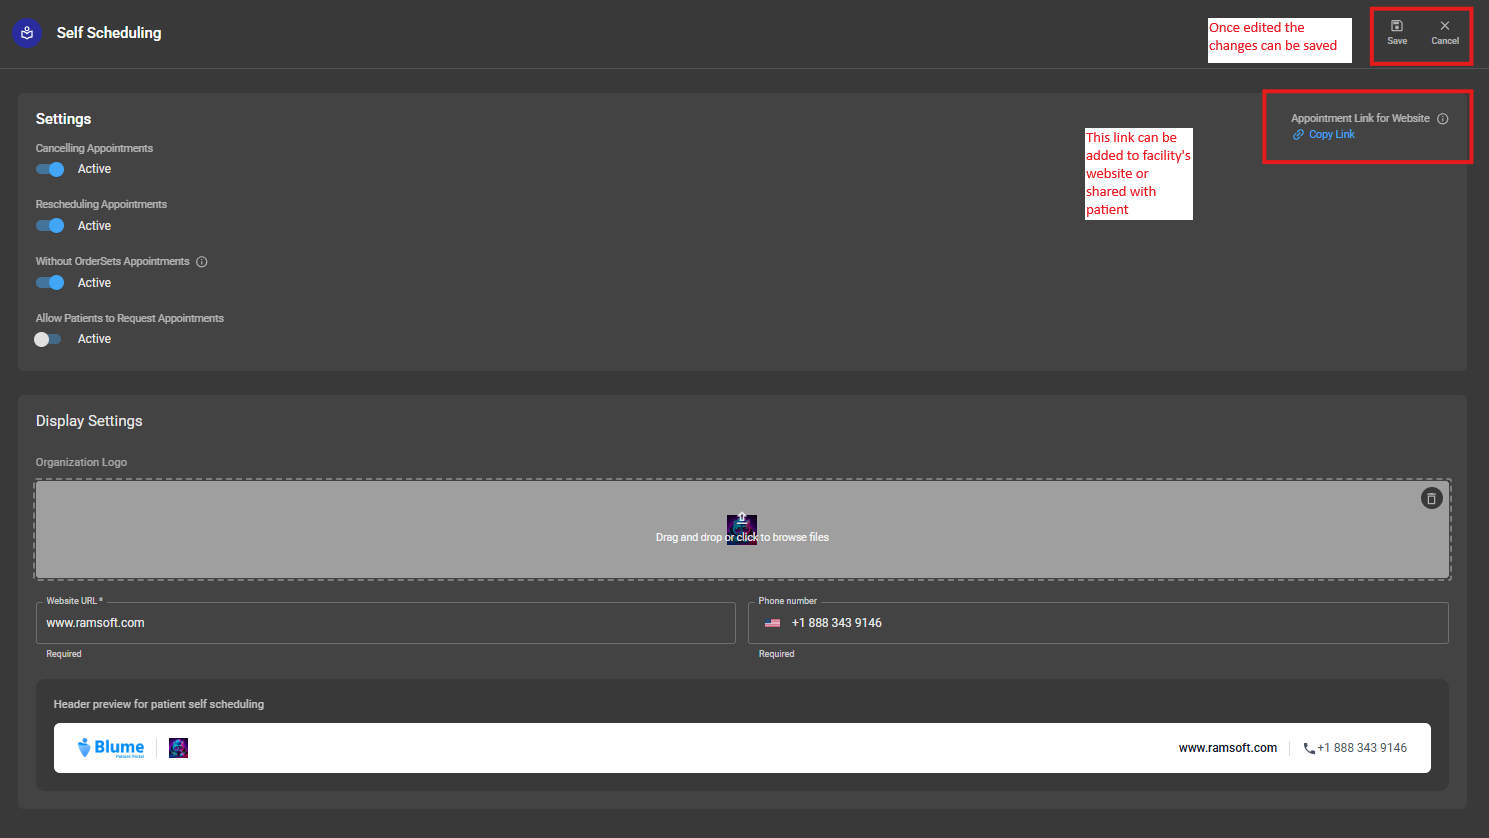
Select Edit to modify self-scheduling settings.
-
Administrators can update the following options:
Copy Link
Copy the self-scheduling URL and embed it on the organization’s website or share it with patients to allow direct appointment scheduling.
Cancel Appointments
Enable this option to allow patients to cancel their scheduled appointments.
Reschedule Appointments
Enable this option to allow patients to reschedule their appointments through Blume.
Unknown Order Set
Allows patients to select Unknown Procedure from the procedure list when scheduling an appointment.
Interface Settings
- Administrators can customize how the self-scheduling interface appears to patients.
- Available options include:
- Uploading and adjusting the facility logo (displayed beside the Blume logo)
- Updating the facility phone number
- Updating the facility email address
- Previewing how the header appears on the interface
Configuring the Procedure List
The procedure list displayed to patients during self-scheduling is derived from the Procedure Codes configured in OmegaAI.
If procedure codes are configured for the organization, they will automatically appear as selectable procedures in the self-scheduling workflow.
Accessing Procedure Codes
- Navigate to Organization.
- Select Details.
- In the left menu, select RIS.
- From the submenu, select Procedure Codes.
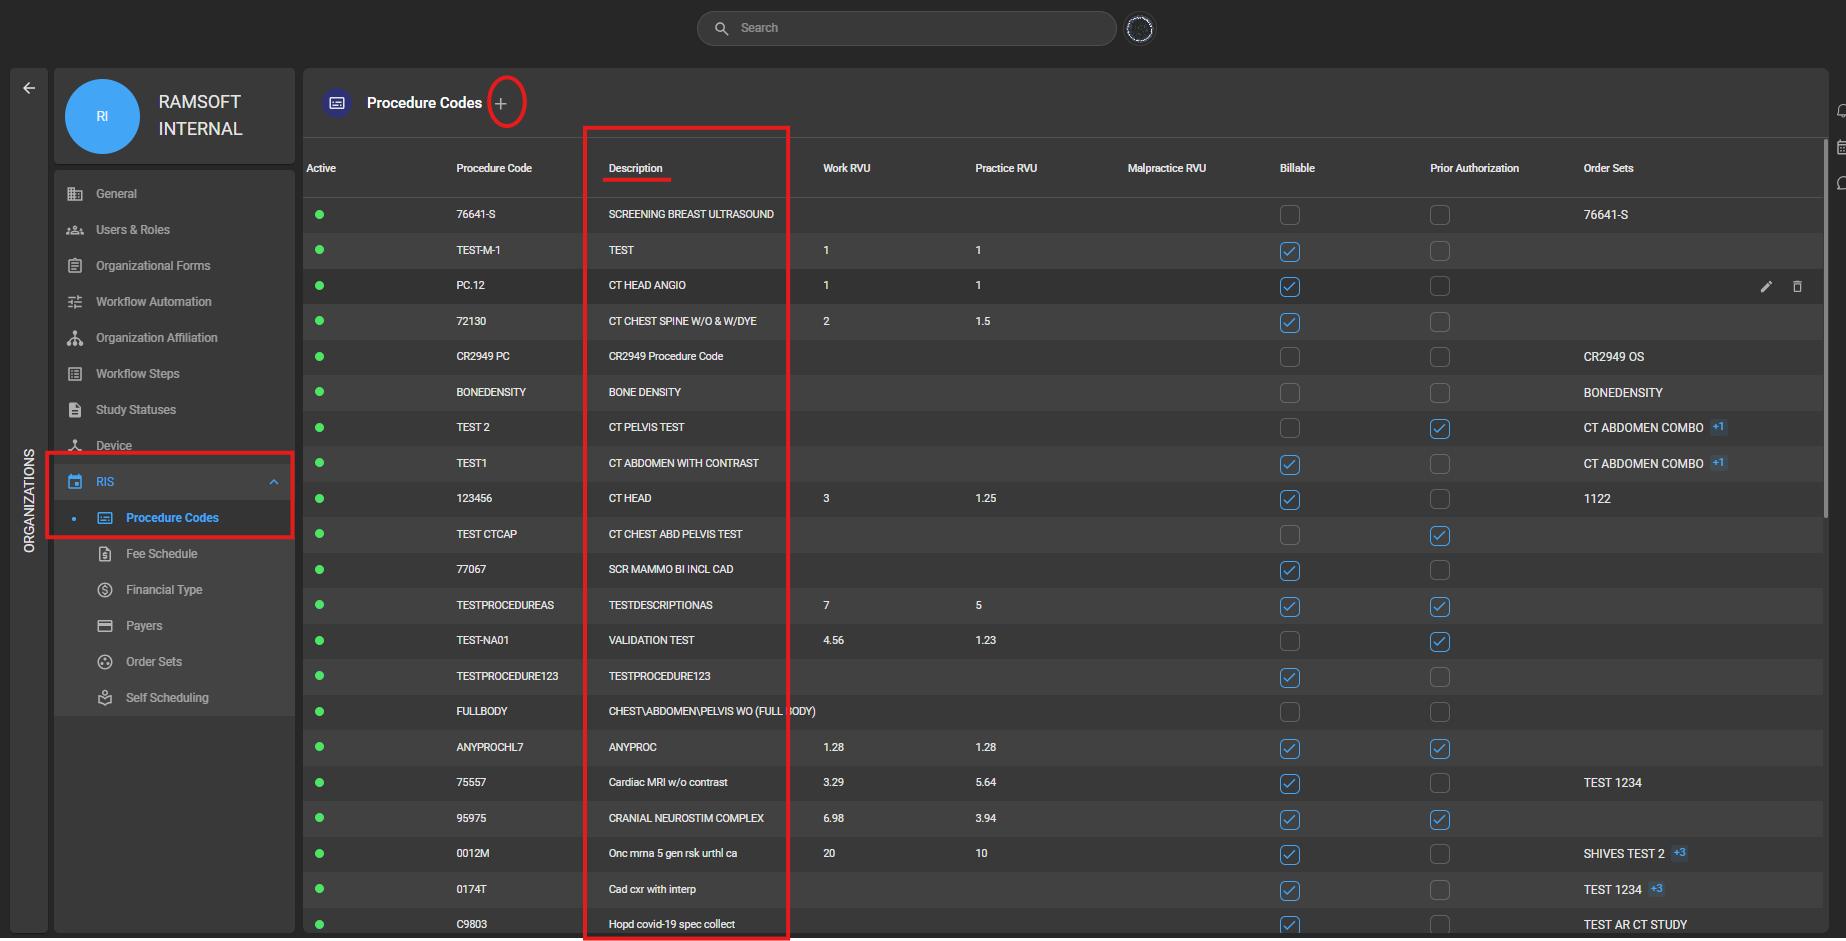
Administrators can:
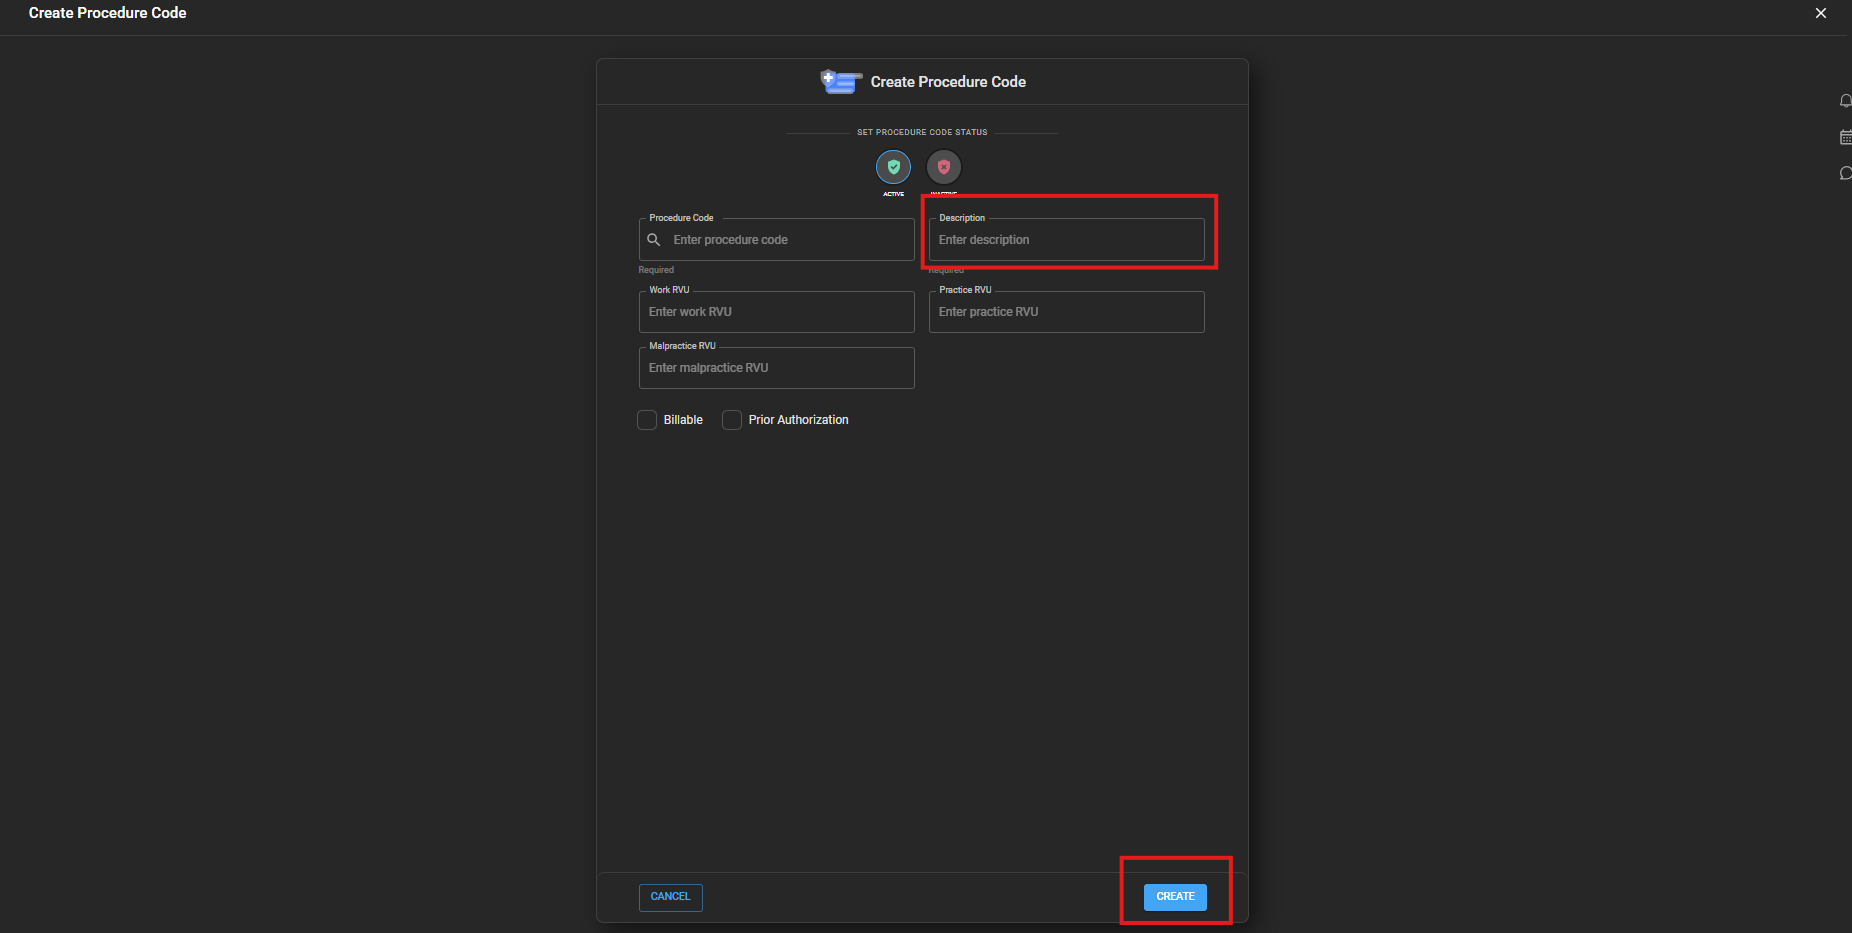
- Create a new procedure code using the + icon
- Edit an existing procedure by hovering over it and selecting the edit (pen) icon
The description field associated with each procedure code is visible to patients during appointment scheduling.
Facilities can update the procedure description as needed.
Managing Parent and Child Organizations
License Behavior
Self-scheduling is enabled at the organization level, therefore:
- Each managing organization or child organization will have its own self-scheduling link.
Procedure Codes
Procedure codes configured for an organization are unique to that organization. Only those procedures will appear in the patient self-scheduling interface.
Shared Organization Settings
If the following settings are configured at the parent organization level but not at the child organization level, the parent organization settings will take precedence:
- Logo
- Phone number
- Website name
Patient Self-Scheduling via Blume
Patients can access the self-scheduling interface through the link provided by the healthcare organization.
Using this interface, patients can:
- Request imaging appointments
- Upload imaging request forms
- Select preferred imaging locations
- Choose available time slots
- Submit personal details
- Complete any required forms
Using Self-Scheduling
Follow the steps below to request an appointment using the self-scheduling link:
-
Accessing the Self-Scheduling Page
- Copy the self-scheduling link provided by the healthcare organization.
- Paste the link into your web browser and press Enter.
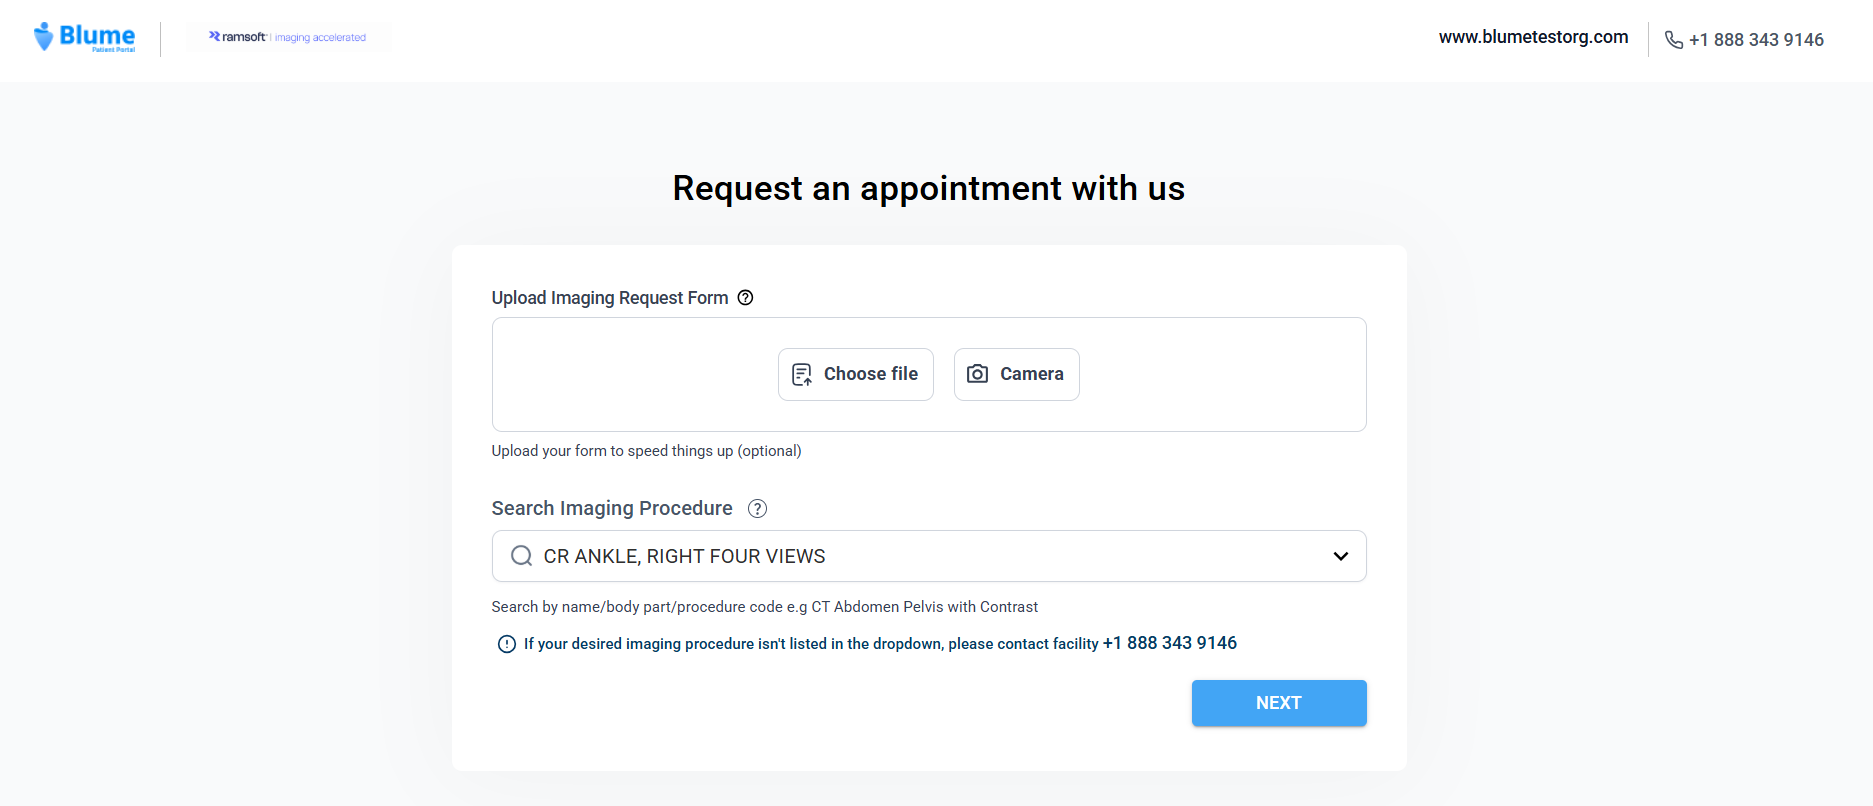
You will be directed to the Request Appointment page.
-
Uploading Imaging Request Form (Optional)
Patients can upload supporting documents, such as an imaging request form from their system.
- Click Choose File.
- Upload the document from your device.
Note:
- On mobile devices, patients can also capture and upload images directly using the device camera.
- Uploaded files are automatically converted to PDF format.
-
Selecting Imaging Procedure
- Under Select Imaging Procedure, choose the appropriate procedure from the list.
- Click Next to proceed.
-
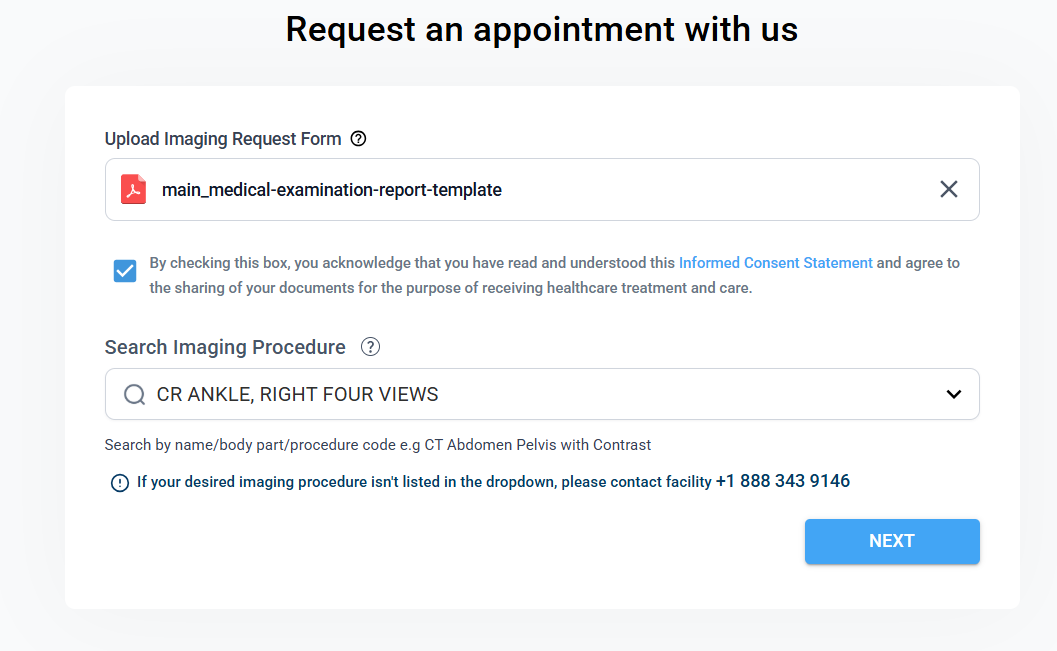
Providing Consent
Before proceeding, patients must review and accept the informed consent statement when uploading documents in the document upload section:
Consent statement:
“By checking this box, you acknowledge that you have read and understood this Informed Consent Statement and agree to the sharing of your documents for the purpose of receiving healthcare treatment and care.”
Consent Requirement Logic
- When files are uploaded
The Informed Consent checkbox appears, and it must be selected before the Next button becomes active.
- When no files are uploaded
The Informed Consent checkbox does not appear.
Click Next to continue.
-
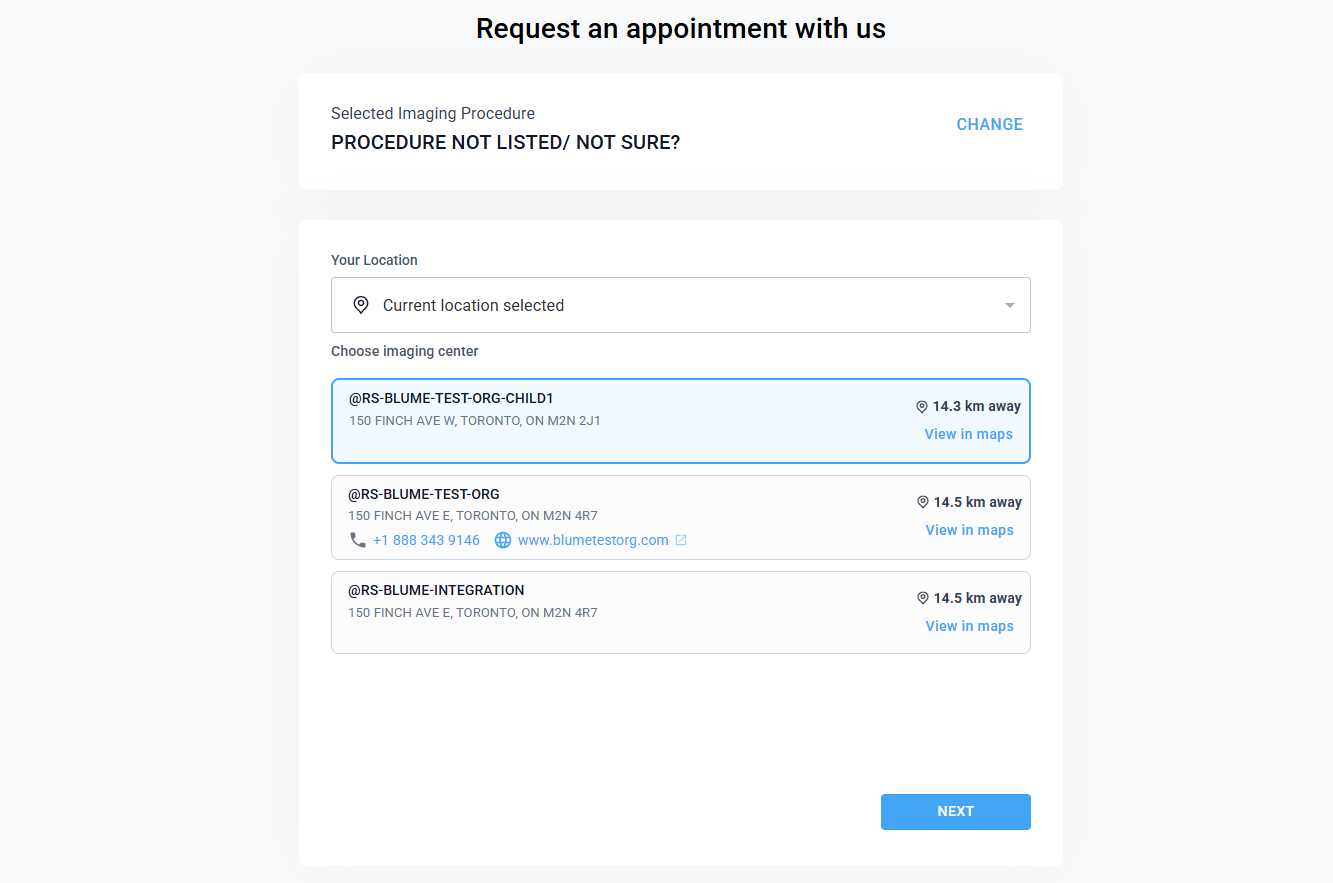
Selecting Location and Imaging Centre
- Enter your location manually or allow the system to auto-detect your location.
- The system displays nearby imaging centres, ordered from nearest to farthest.
- Click View in Maps to locate the centre.
- Select the preferred imaging centre.
- Click Next
-
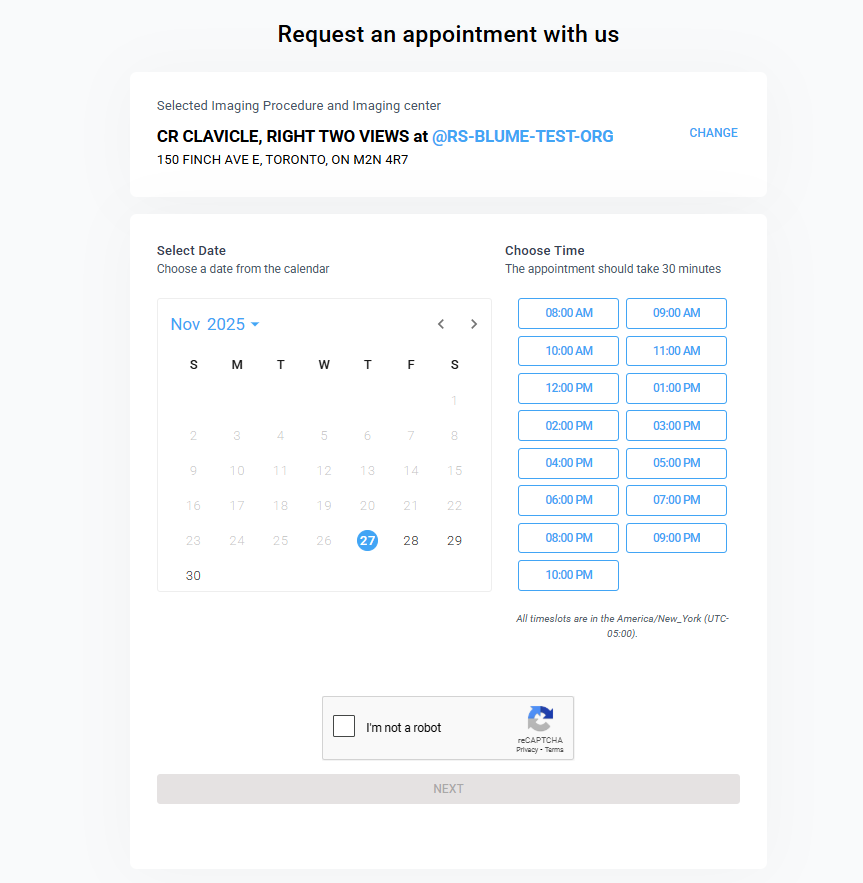
Selecting an Appointment Slot
You will be directed to the Choose a Slot page.
-
Select a date from the calendar.
-
Use the arrows to navigate between months and years. To change the year, click the arrow beside the year at the top of the calendar. To move between months, use the arrow at the far-right corner of the calendar to scroll through the available months.
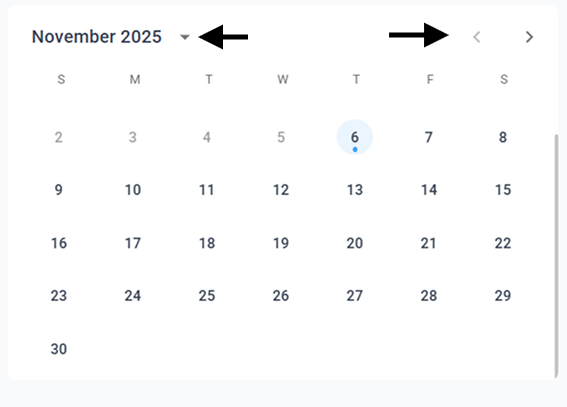
Notes:
-
Past dates cannot be selected.
-
Only current or future dates are available.
-
Select an available time slot displayed beside the calendar.
-
Complete the CAPTCHA verification to confirm identity.
-
Click Next to proceed.
-
Click Cancel/Close to discard changes.
-
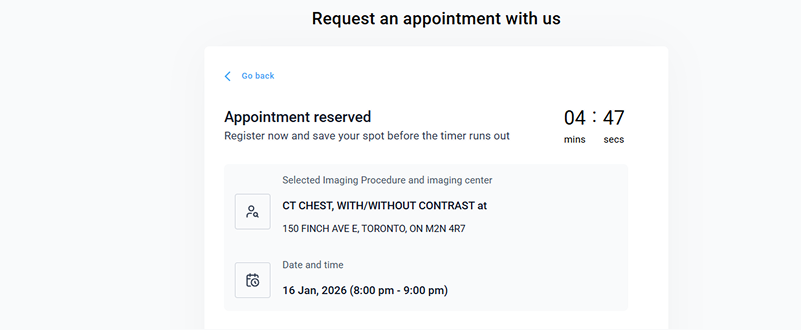
Requesting the Appointment
-
On this page, patients must complete registration before the timer displayed at the top-right corner expires.
-
Basic appointment details are displayed at the top of the page.
-
Scroll down and provide the required information:
-
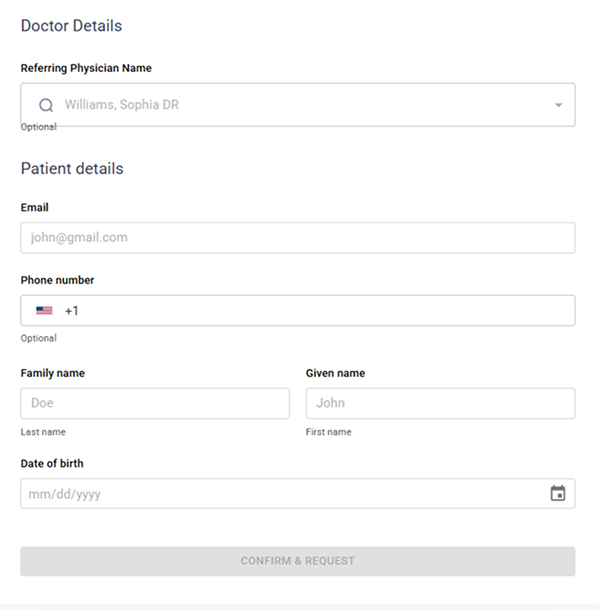
Doctor Details (Optional)
-
-
Patients can search for the referring physician using Meta Search, if applicable.
-
Patient Details
Provide the following information:
- Email Address
- Phone Number (optional)
- Family Name
- Given Name
- Date of Birth (select using the calendar)
After completing the required fields:
Click Confirm and Request to submit the appointment request.
-
Completing Forms (Optional)
After submitting the appointment request, the system displays an Appointment Request Submitted confirmation message.
Patients can choose to:
- Proceed to fill forms, or
- Skip and close
If proceeding:
- The system redirects to the Forms section.
- All pending forms appear on the left panel.
- Click Fill It below each form to complete it.
- Click Submit after completing the form.
Patients can exit any form at any time using the X (close) button.

-
Viewing Requested Appointments
Requested appointments appear in the Blume app home screen under Scheduled Appointments, along with their appointment details.