Creating a Worklist
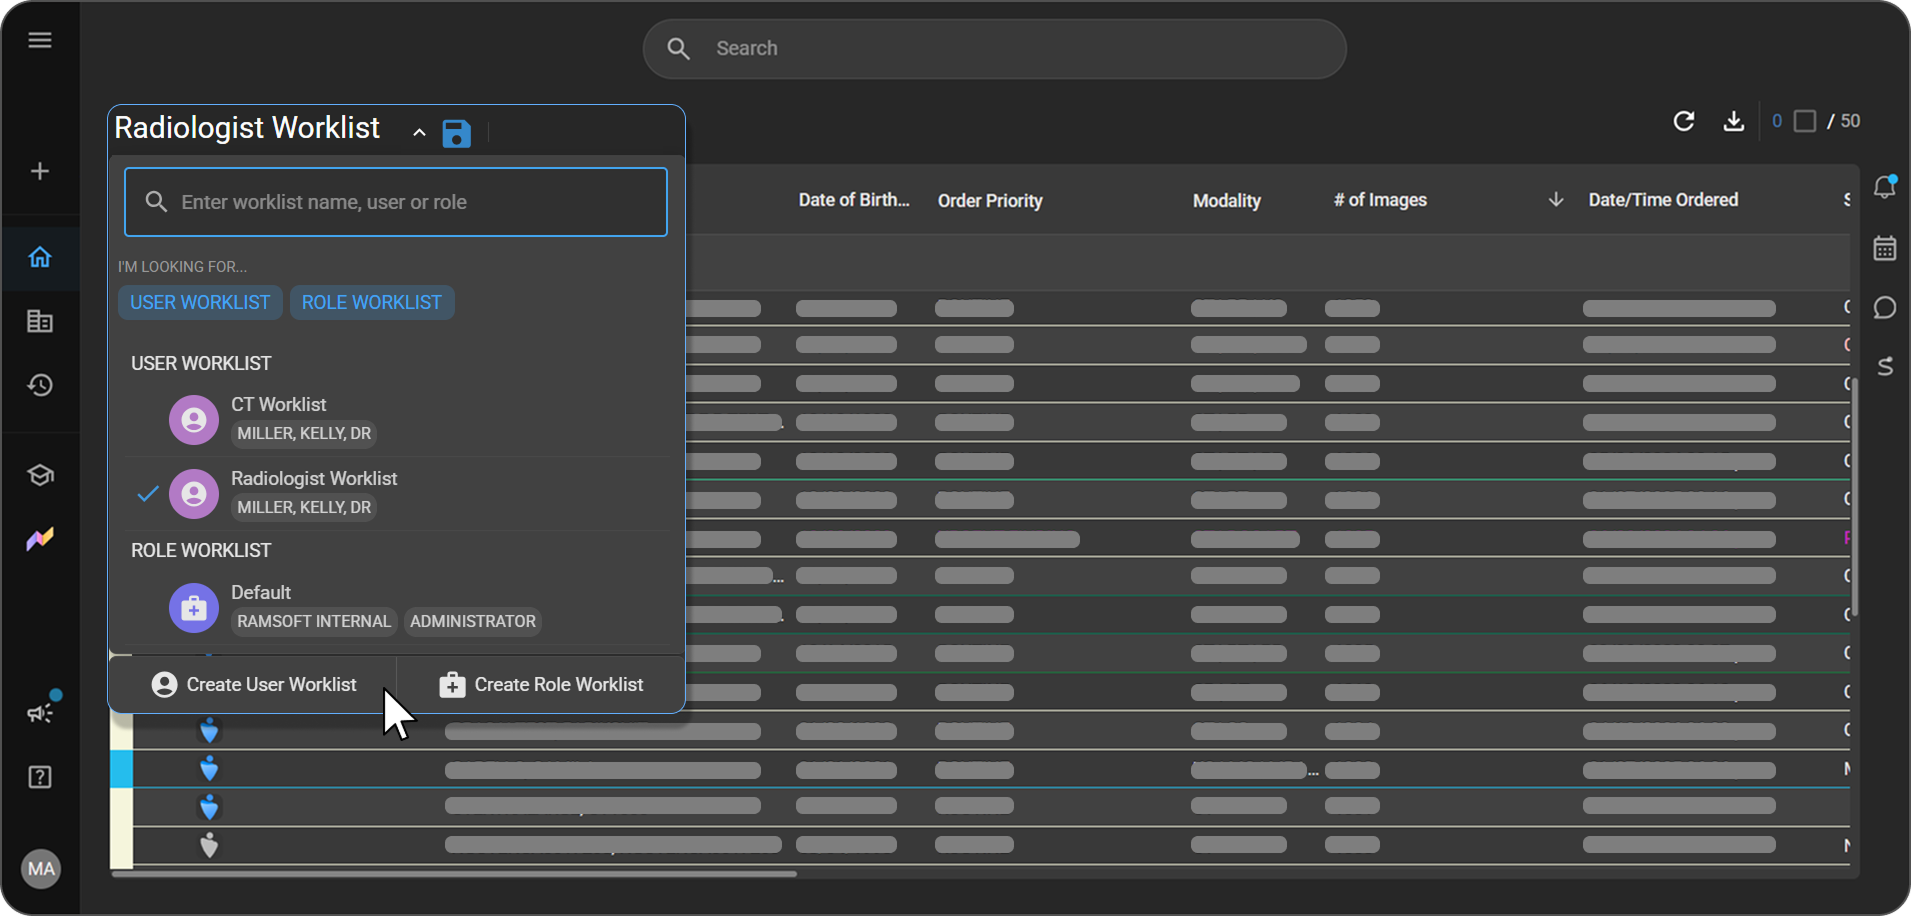
Two buttons at the bottom of the Worklist Selector start the creation flow: Create User Worklist and Create Role Worklist. This article covers both. Once a worklist exists, its columns, filters, sorting, and name work the same way regardless of how it was created — see Customizing a Worklist for those mechanics, including how to modify an existing worklist of either type.
Note: A User Worklist is personal to you — a private queue tied to your login. A Role Worklist is shared by everyone assigned to a given role in your organization, with the same columns, filters, and sorting for the whole team. See Worklist Overview: User Worklists vs. Role Worklists for the full distinction.
Before you begin
- Creating a User Worklist requires the Manage My Worklist permission, on by default for most users. See Worklist Overview: Permissions and access.
- Creating a Role Worklist requires the Manage Role Worklist permission, off by default. See Worklist Overview: Permissions and access.
Create a User Worklist
-
Click Create User Worklist at the bottom of the Worklist Selector to open the New Worklist panel.
-
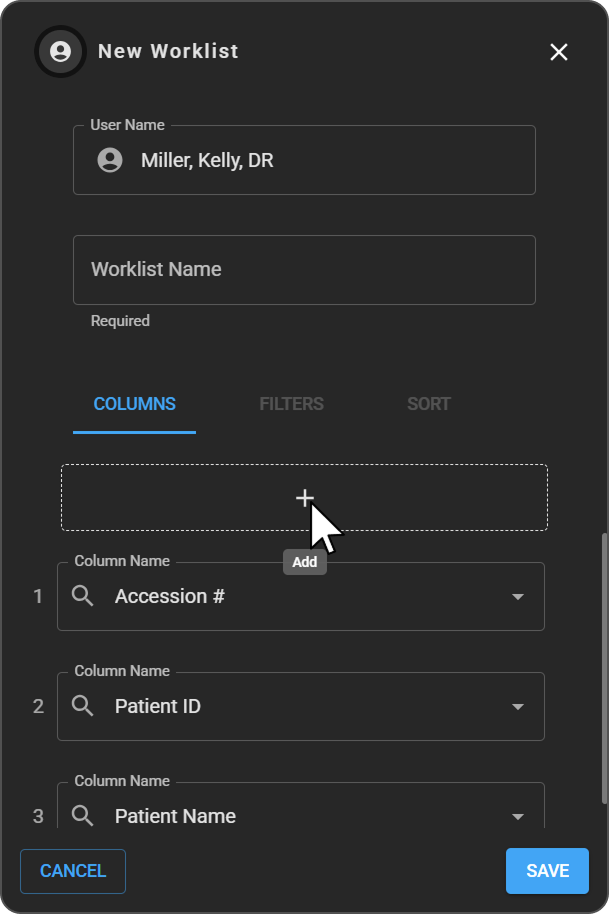
Fill in the two fields:
|
|
-
Add and arrange columns on the Columns tab. This works exactly like any other worklist's — see Customizing a Worklist: Manage columns for the full procedure, and Table of Worklist Fields for the full list of fields you can add as a column.
Note: The Filters and Sort tabs are disabled in this panel, the same as for a Role Worklist — filtering and sorting are set from the column headers on the worklist itself once it's loaded, not from here.
-
Click Save to create the worklist.
Expected result: The new User Worklist appears in the Worklist Selector.
Create a Role Worklist
- From the Worklist Selector, click Create Role Worklist to open the New Role Worklist panel.
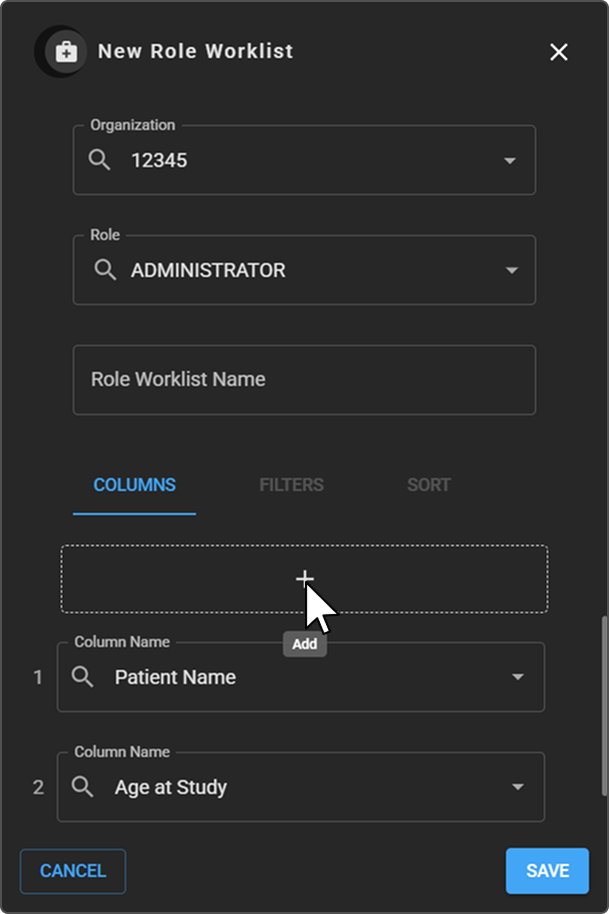
- Fill in the three fields required before you can add columns:
|
|
-
Add and arrange columns on the Columns tab. This works exactly like any other worklist's — see Customizing a Worklist: Manage columns for the full procedure, and Table of Worklist Fields for the full list of fields you can add as a column.
Note: The Filters and Sort tabs are disabled in this panel — as with User Worklists, filtering and sorting are set from the column headers on the worklist itself once it's loaded, not from here.
Important: Save stays disabled until the worklist has at least one column.
-
Click Save to create the Role Worklist.
Expected result: The new Role Worklist appears in the Worklist Selector for everyone assigned to that role, and can be opened like any other worklist.
Related articles
- Worklist Overview — the Worklist Selector, User vs. Role Worklists, and permissions
- Customizing a Worklist — modifying an existing worklist, plus the full columns, filters, sort, rename, and save mechanics
- Table of Worklist Fields — the full list of fields available as worklist columns