Customizing a Worklist
This article covers personalizing how a worklist looks and behaves — which columns show, what filters and sort order apply, and renaming or saving your changes. It applies to both User Worklists and Role Worklists; the settings panel and its mechanics are identical for both. For creating a new worklist — User or Role — see Creating a Worklist. For setting a worklist as your default or deleting it, see Worklist Overview.
Before you begin
- You need an open worklist. See Worklist Overview for opening and switching worklists.
- Editing another user's worklist, or saving your changes as a new Role Worklist, may require additional permissions — see Worklist Overview: Permissions and access.
Open Worklist Settings
|
|
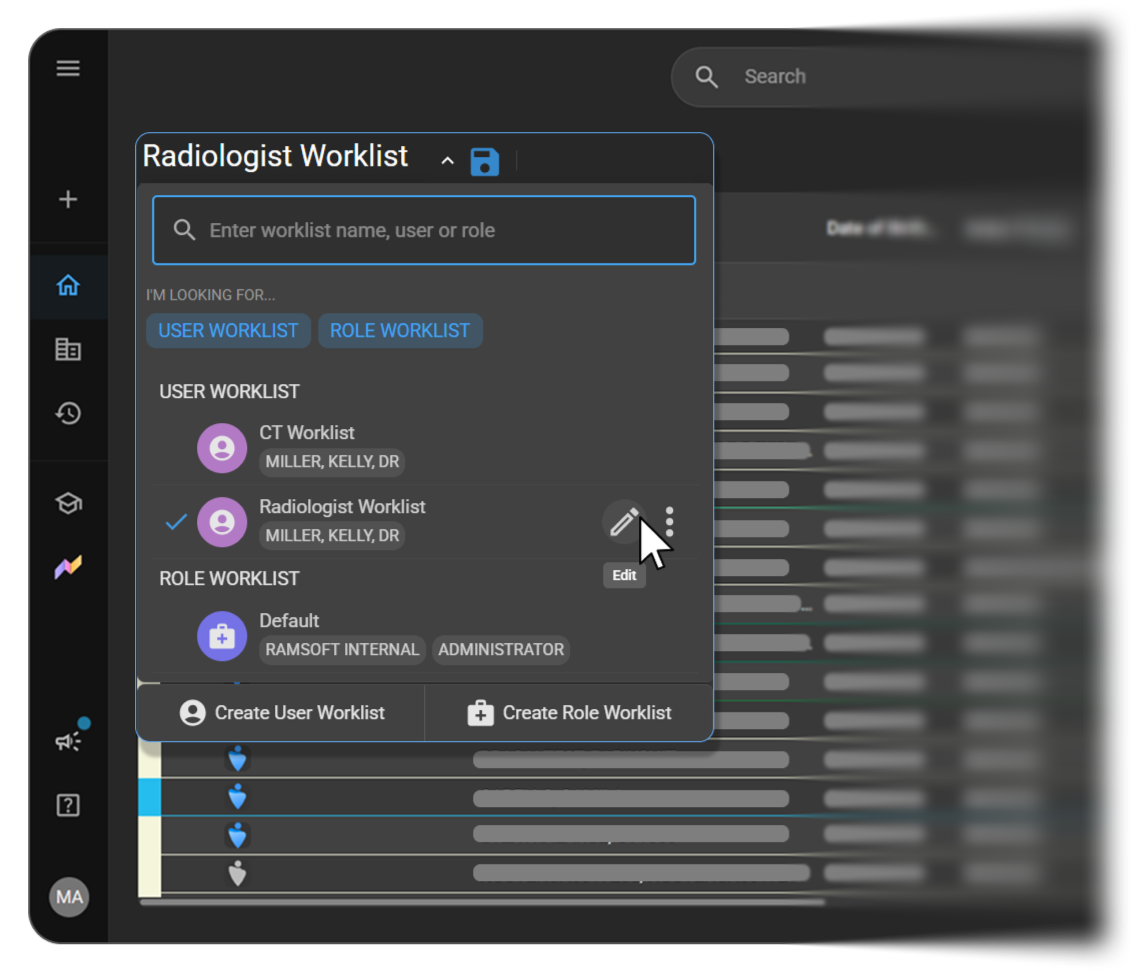
Expected result: The Worklist Settings panel opens along the right side of the screen.
Choose the user and worklist
|
|
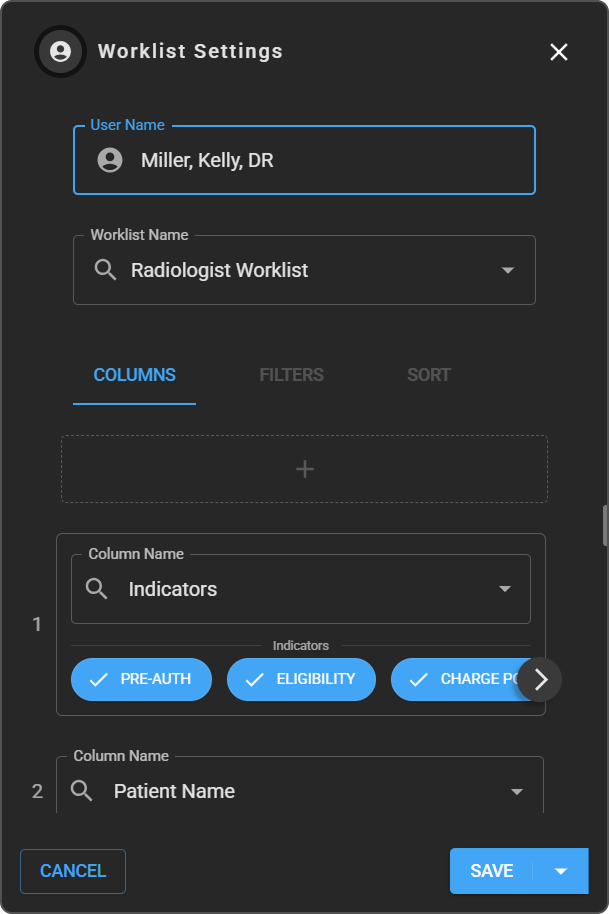
At the top of the panel are two fields:
Below these, three tabs — Columns, Filters, and Sort — appear, though only Columns is active; see Filter and sort studies below for why.
Manage columns
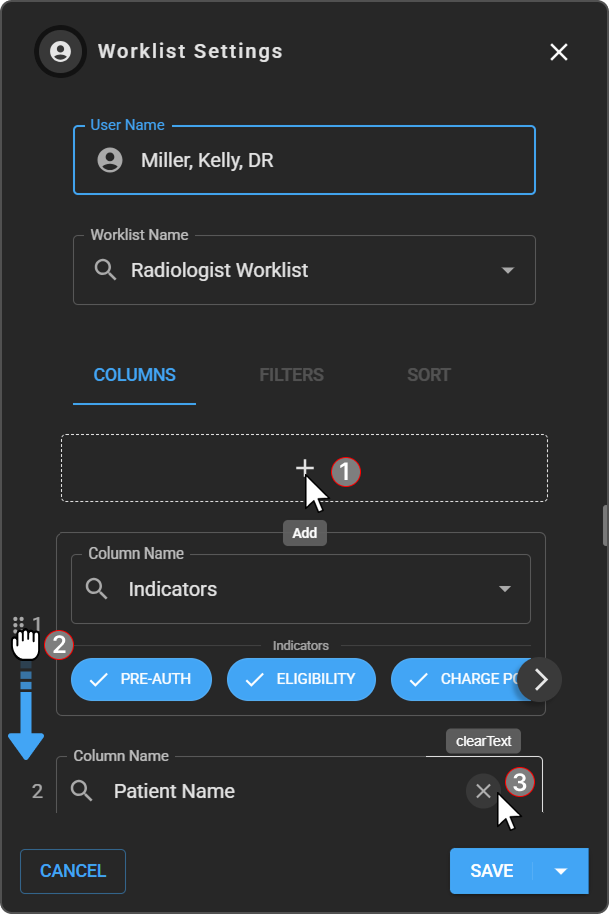
On the Columns tab, every current column is listed in order, each with a search field for changing what it displays.
|
|
Filter and sort studies
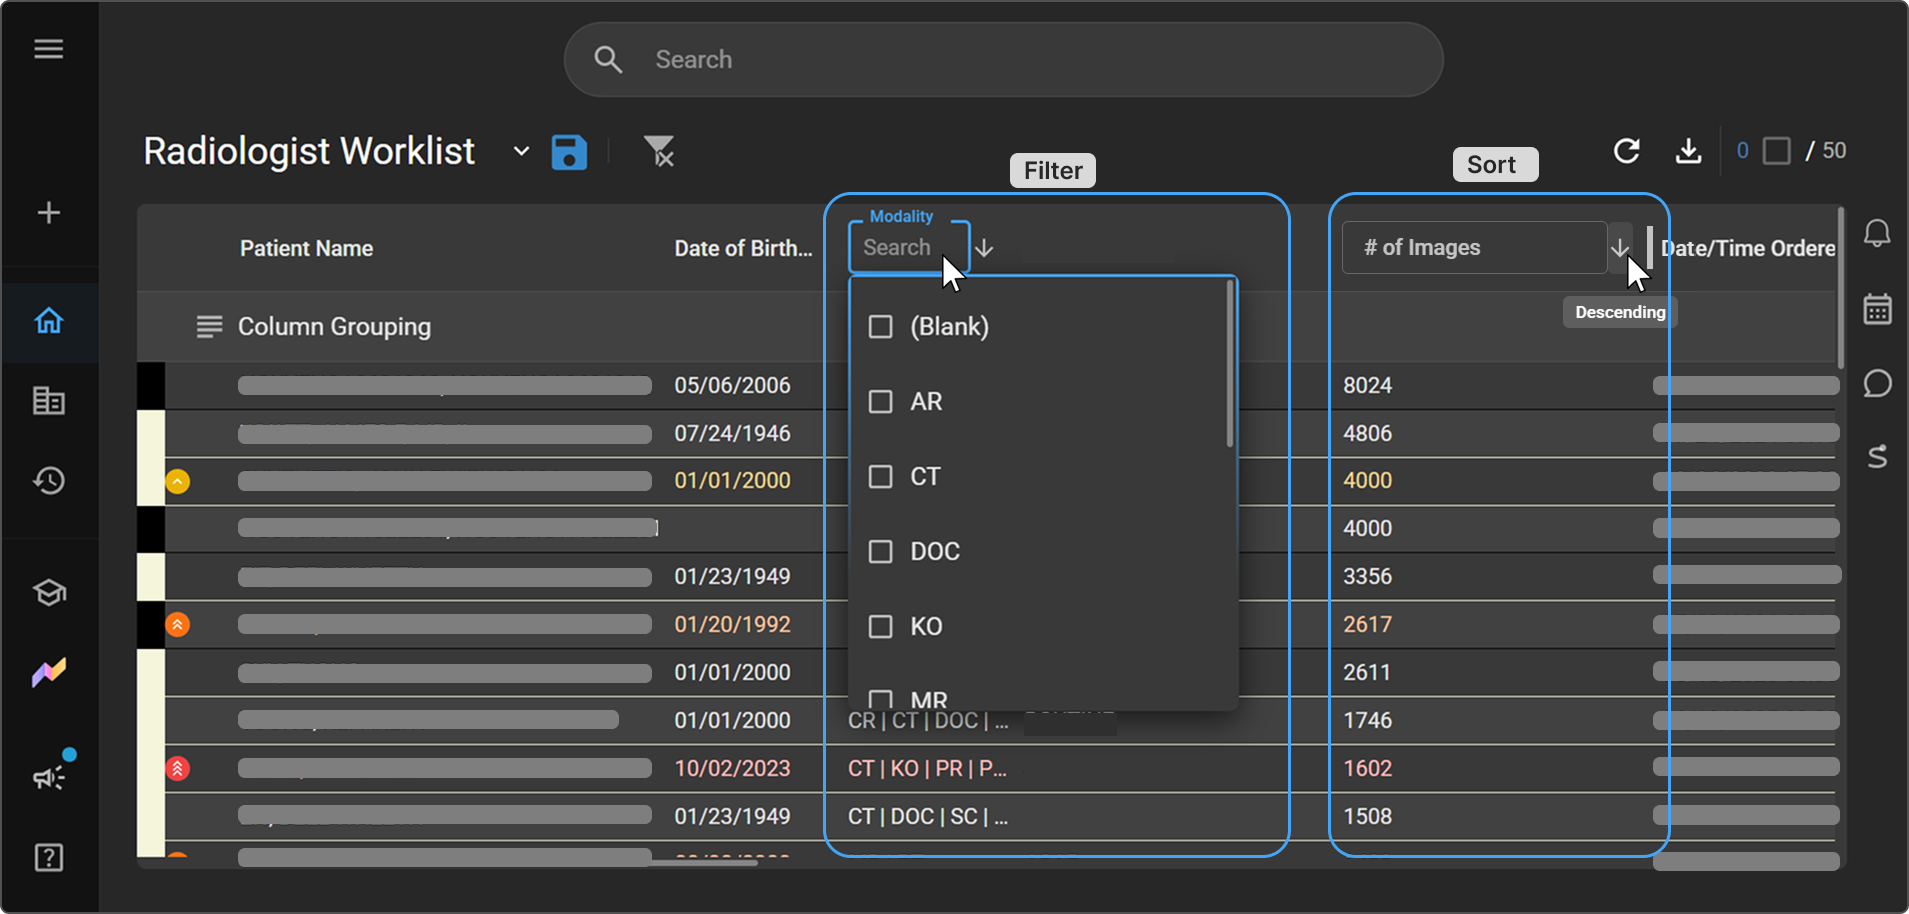
Important: The Filters and Sort tabs in Worklist Settings are disabled. Filtering and sorting both happen out on the worklist itself, not in this panel — use the interactive column headers on the table instead.
Filter by a column
- Click directly on a column header (for example, Patient Name) to open an inline search box.
- Type to see a live, checkbox-style list of matching values.
- Select a value to apply it.
Expected result: The active filter appears as a removable pill next to the worklist name (for example,
Patient Name = DOE JANE), with an × to clear it.
Sort by a column
Click the small arrow icon in that same column header box to toggle sort order for the column.
Expected result: The column sorts
AscendingorDescending, shown as a label next to the header while it's active. Click again to toggle to the other direction.
Clear all filters
When you've applied filters to more than one column, you can remove them all at once instead of clearing each filter pill individually.
To clear all filters:
- Locate the funnel icon with an × in the toolbar, next to the worklist name and any active filter pills.
- Click the icon.
- All active column header filters are removed, and the worklist refreshes to show its full, unfiltered result set.
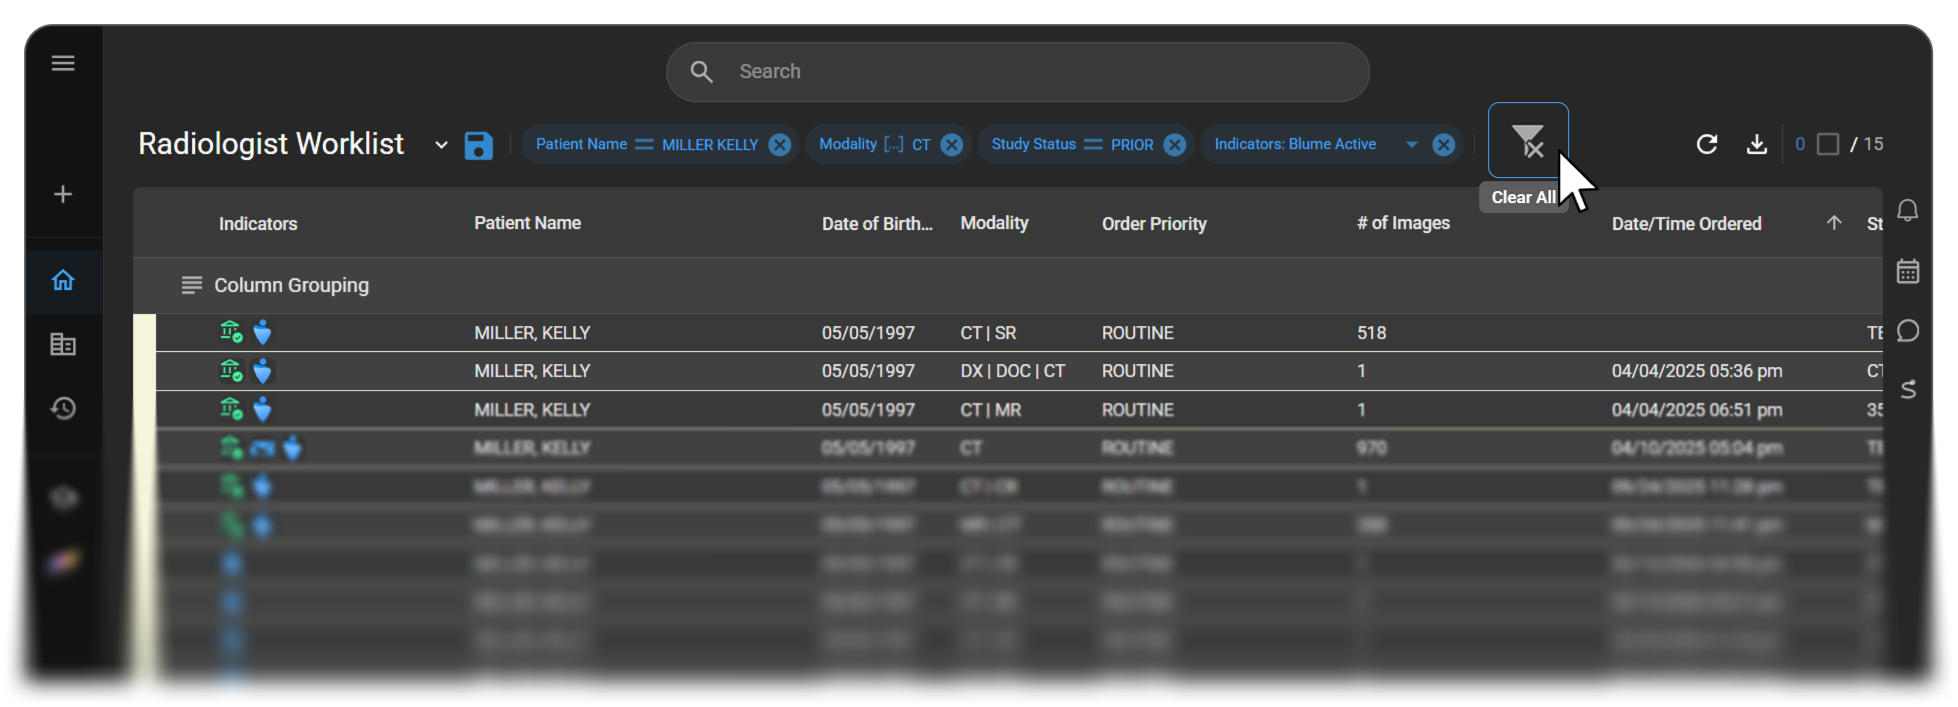
Note: To remove a single filter and leave the others in place, click the × on that filter's individual pill instead — see Filter by a column.
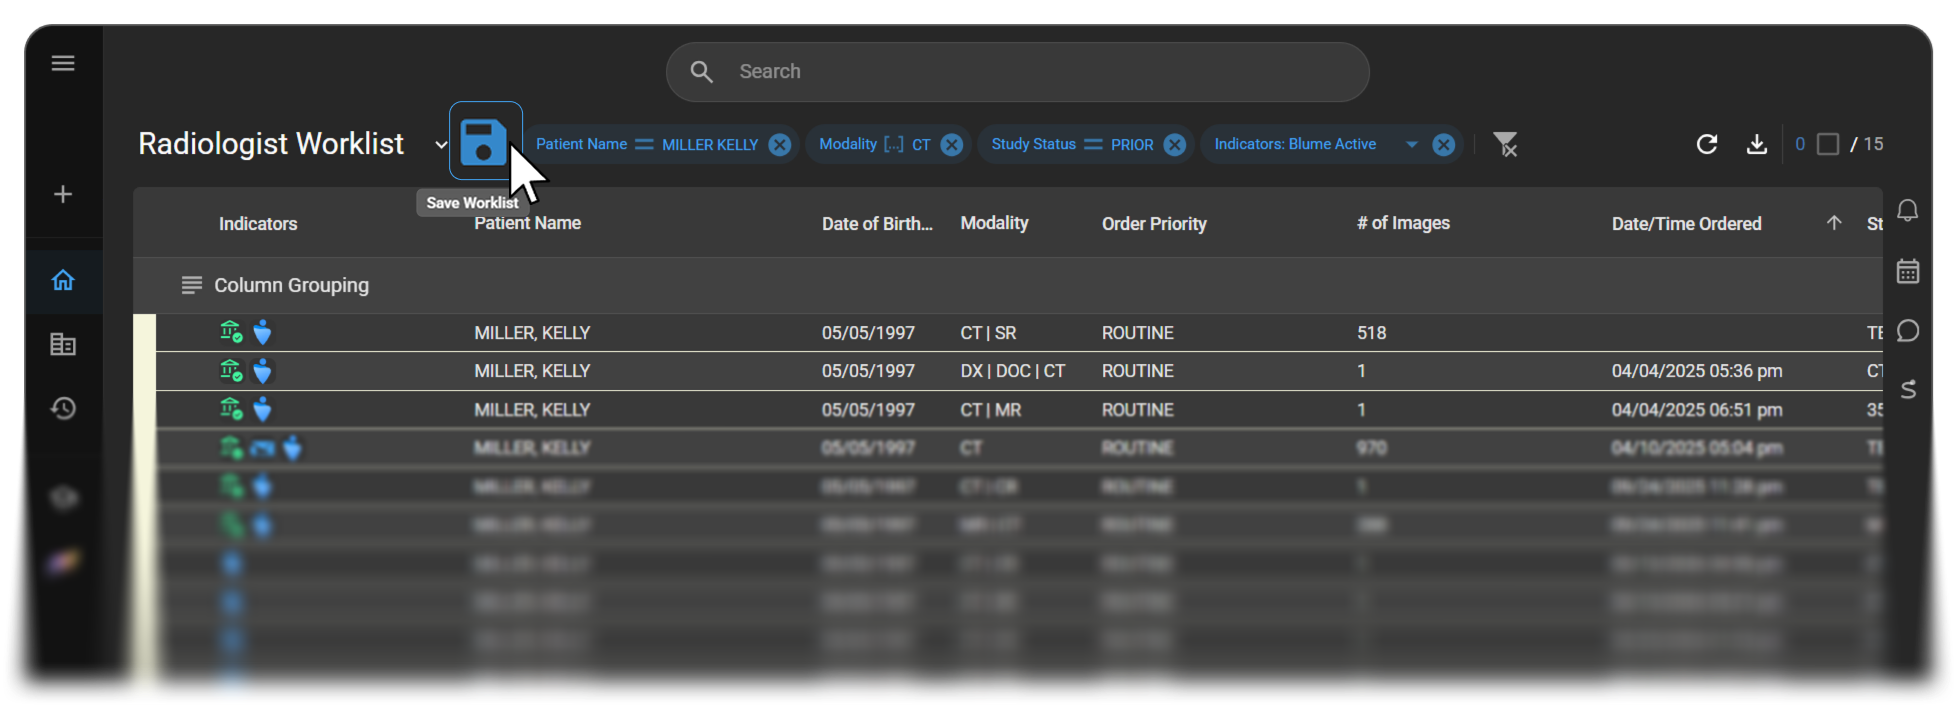
Save worklist (toolbar icon)
Once you've set up filters, sort order, or a column layout the way you want them, you can save that view as the worklist's default — without opening Worklist Settings — so it loads automatically the next time you open this worklist.
To save the current view:
- Apply the filters, sort order, and/or column layout you want to keep.
- Click the Save Worklist icon (the disk icon) next to the worklist name, above the column headers.
- The current view is saved. The next time you open this worklist, it loads with these filters, sort order, and columns already applied.
Rename a worklist
- Open Worklist Settings (see Open Worklist Settings above).
- Click the Worklist Name field and choose its edit option.
- Enter the new name.
- Click Save (see Save your changes below).
Save your changes
| Option | What it does |
|---|---|
| Save | Applies your changes to the worklist you're editing. |
| Cancel (or ×, top right) | Exits without saving. |
Related articles
- Worklist Overview — creating a worklist, setting a default, and permissions
- Using the Worklist Screen — the status colour bar, selecting studies, and the right-click menu
- Creating a Worklist — starting a new User or Role Worklist
- Table of Worklist Fields — the full list of fields available as worklist columns