Worklist Overview
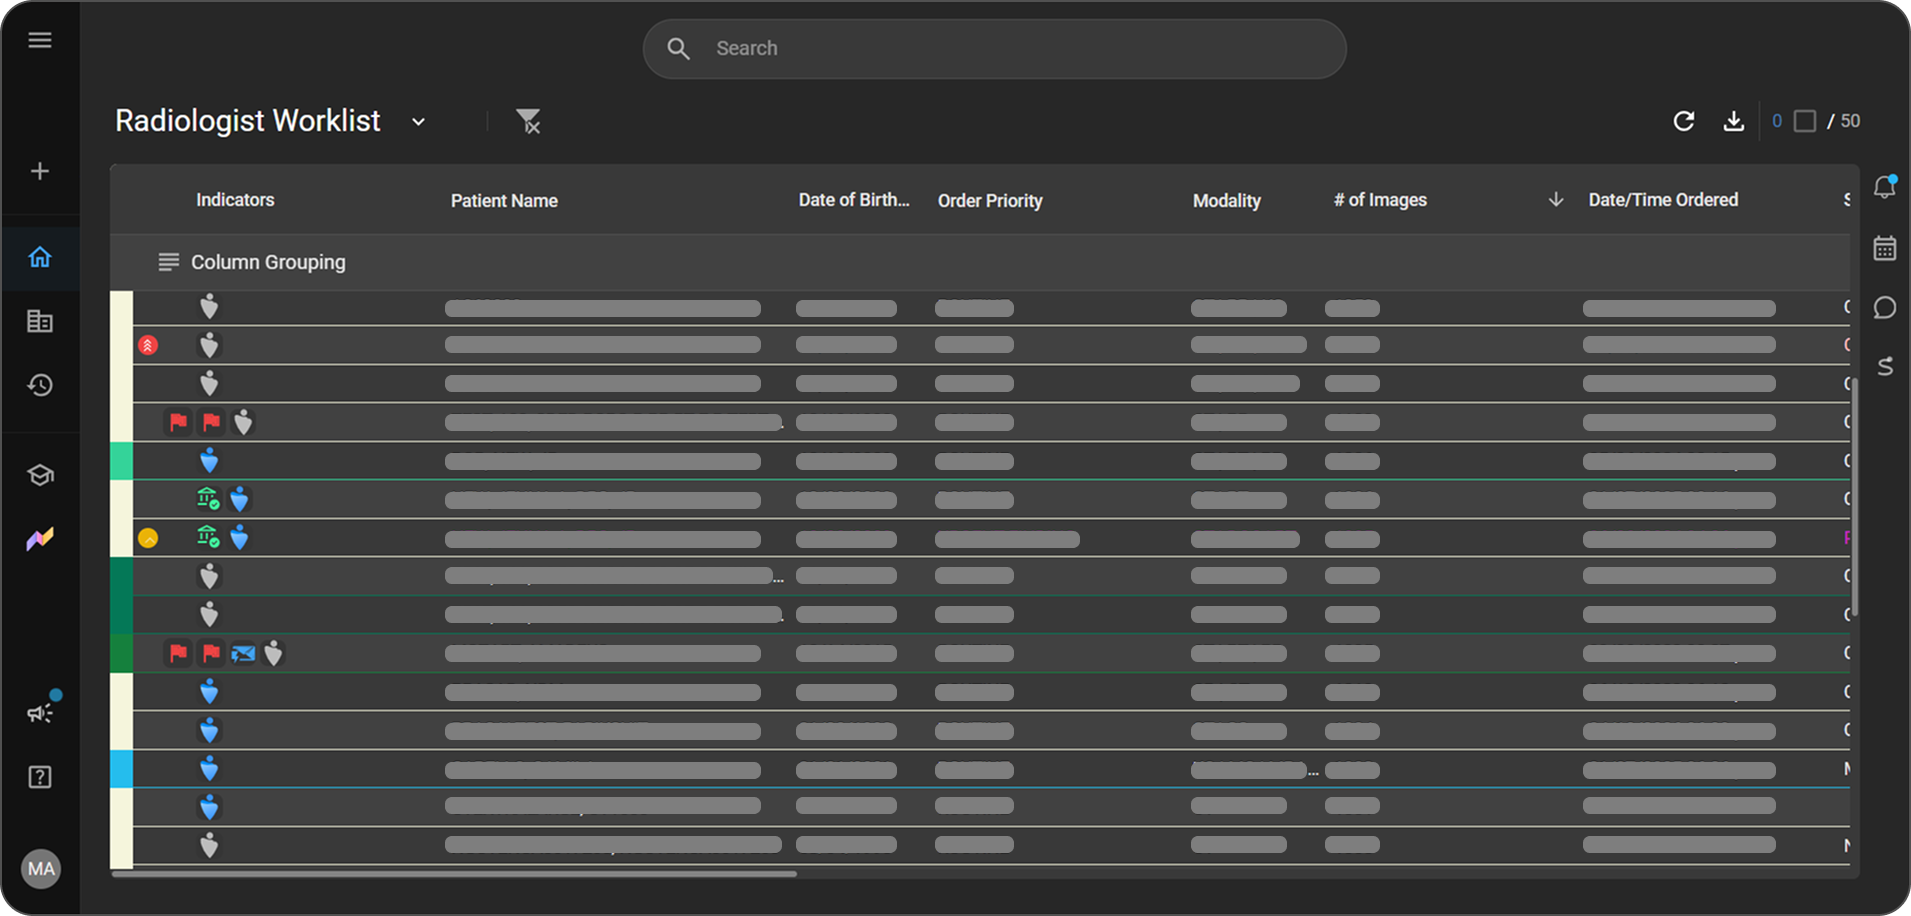
The Worklist is the main work queue in OmegaAI. It's the screen most users land on first, and it's the starting point for almost everything else in the system — viewing a study, sending a report, updating a study's status, or exporting data all begin from a row in a worklist.
Before you begin
- You need a valid OmegaAI login. Everyone can view and switch between their own worklists by default.
- Some actions covered in this article — editing another user's worklist, or creating and editing a Role Worklist — require additional permissions. See Permissions and access at the end of this article for the full breakdown.
User Worklists vs. Role Worklists
OmegaAI has two kinds of worklist:
- User Worklist — belongs to you personally. It's a private queue tied to your login (for example, a
CT Worklistowned by a specific user). You can have more than one, and you customize each one independently. - Role Worklist — shared across everyone assigned to a given role within an organization (for example, a
Radiology Worklistfor the Administrator role at an organization). Everyone in that role sees the same queue, with the same columns, filters, and sorting — set up once, used by the whole team.
Use a User Worklist for your own personal view of your work. Use a Role Worklist when a team needs a consistent, shared queue regardless of who's logged in.
Related: Creating a Worklist, Customizing a Worklist, Permissions and access
Open the Worklist Selector
- Locate the name of your current worklist at the top left of the screen (for example,
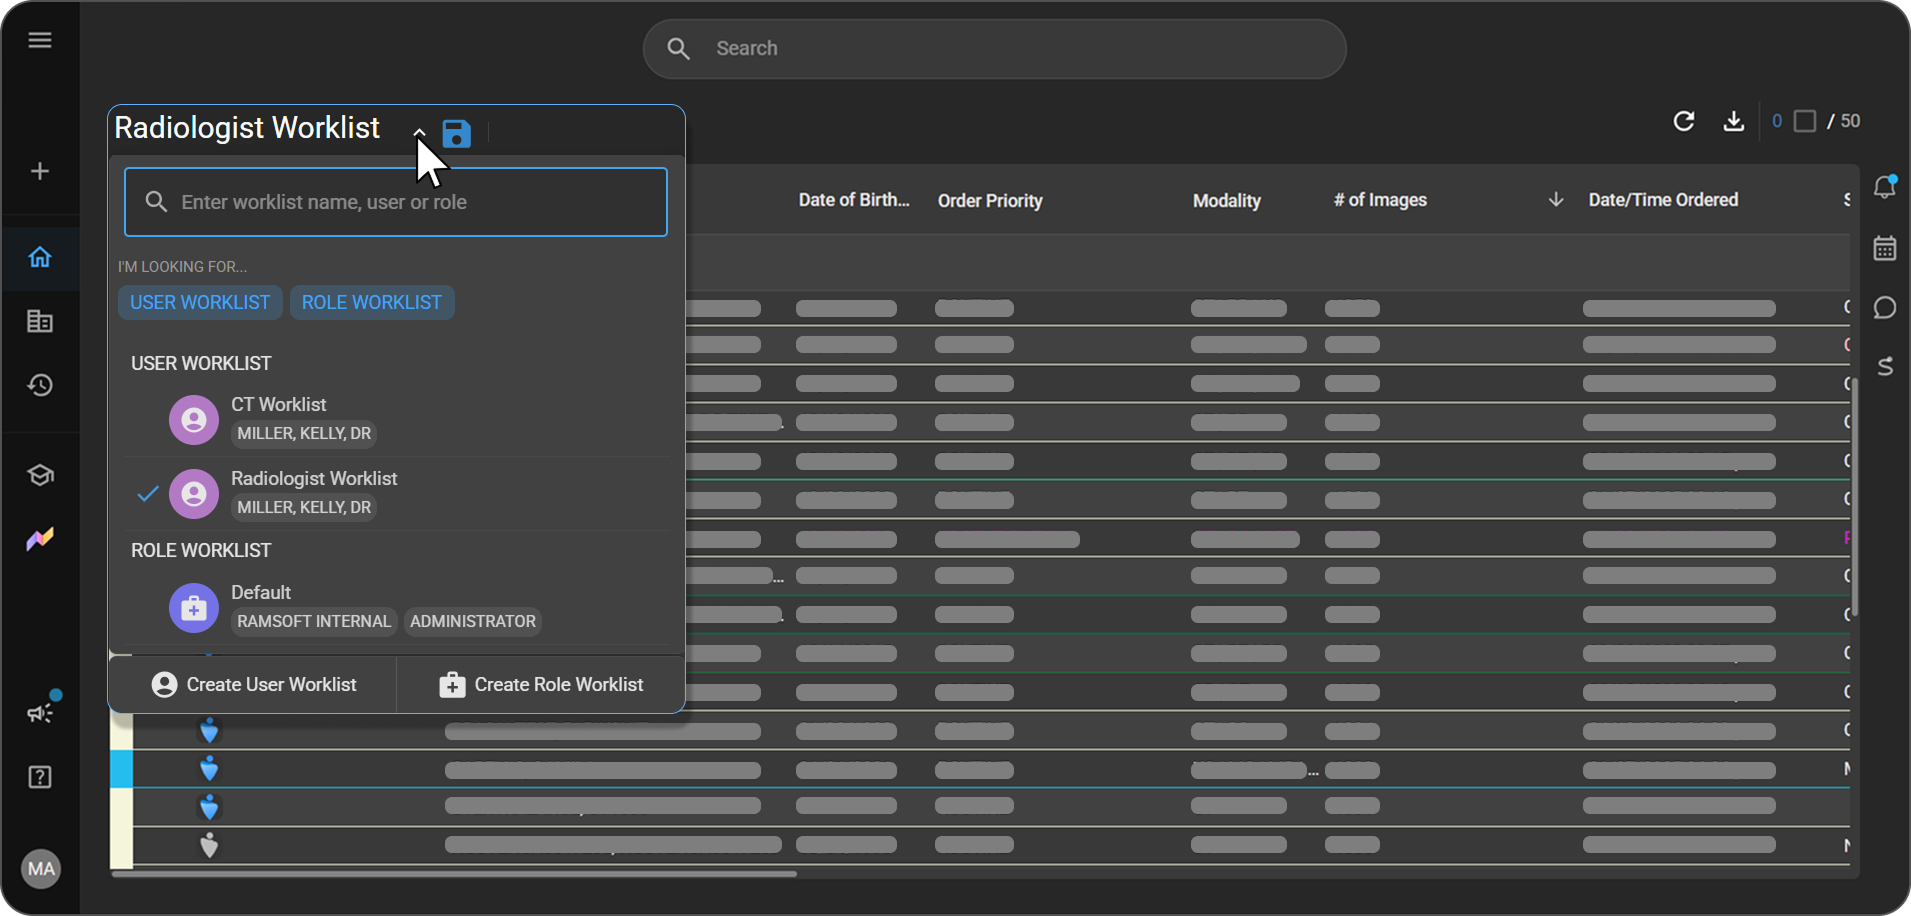
CT Worklist), next to an arrow icon. - Click the worklist name to open the Worklist Selector — a panel for finding, switching to, or creating a worklist.
Note: A Save icon (disk symbol) appears next to the worklist name whenever you have an unsaved change — for example, a new filter, a resorted column, or an adjusted layout. It's hidden when there's nothing pending. Click it to permanently save that change instead of letting it apply only to your current session. See Customizing a Worklist for full details on saving column, filter, and sort changes.
Find a worklist
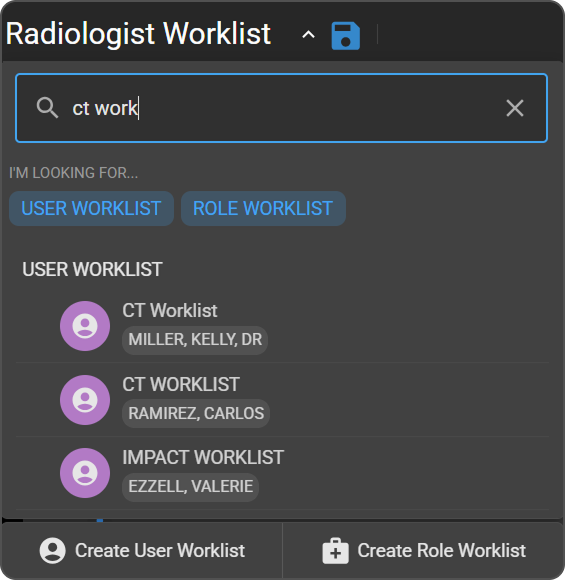
Inside the Worklist Selector, narrow the list two ways:
|
|
Switch worklists
|
|
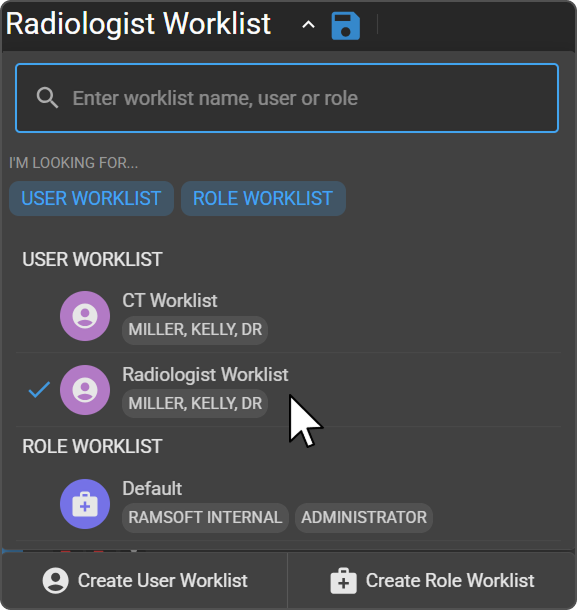
Expected result: The worklist screen refreshes to show the columns, filters, and studies configured for the worklist you selected, and the checkmark in the Selector moves to that worklist.
Manage a worklist from the Selector
Hover over a worklist in the Selector list to reveal two controls on that row:
|
|
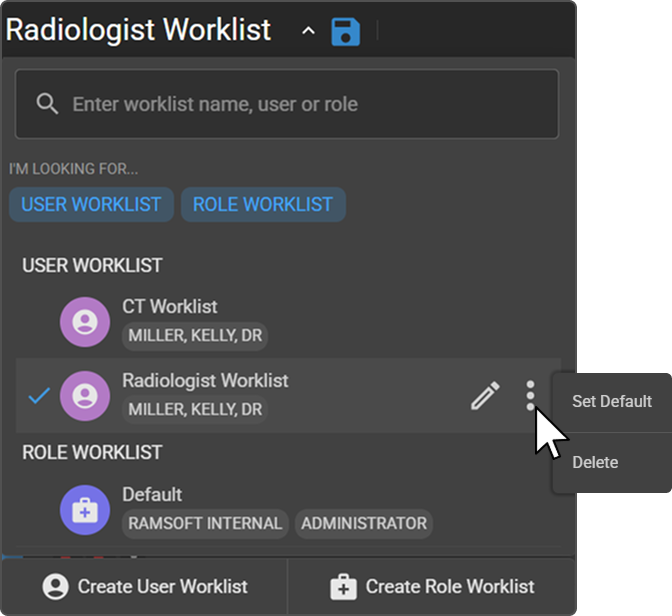
Create a new worklist
Two buttons at the bottom of the Worklist Selector start the creation flow:
|
|
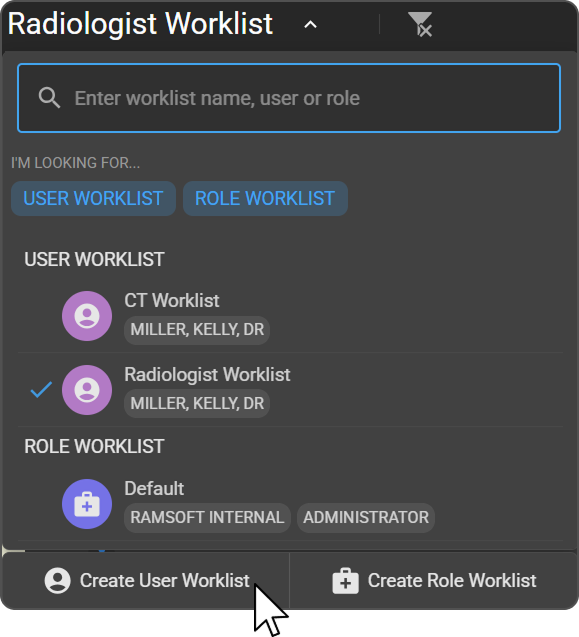
Full creation steps for both are covered in Creating a Worklist. Once a worklist is created, its columns, filters, and sorting work exactly like any other worklist's — see Customizing a Worklist for those mechanics.
Related articles
- Using the Worklist Screen — selecting studies and using the right-click action menu (physician and technologist assignment, priority, status, audit logs, download, burn, teaching folder, delete)
- Customizing a Worklist — personalizing columns, filters, and sorting on any worklist
- Creating a Worklist — starting a new User or Role Worklist
- User Access Control, Roles, and Privileges — how roles and permissions work across OmegaAI
Permissions and access
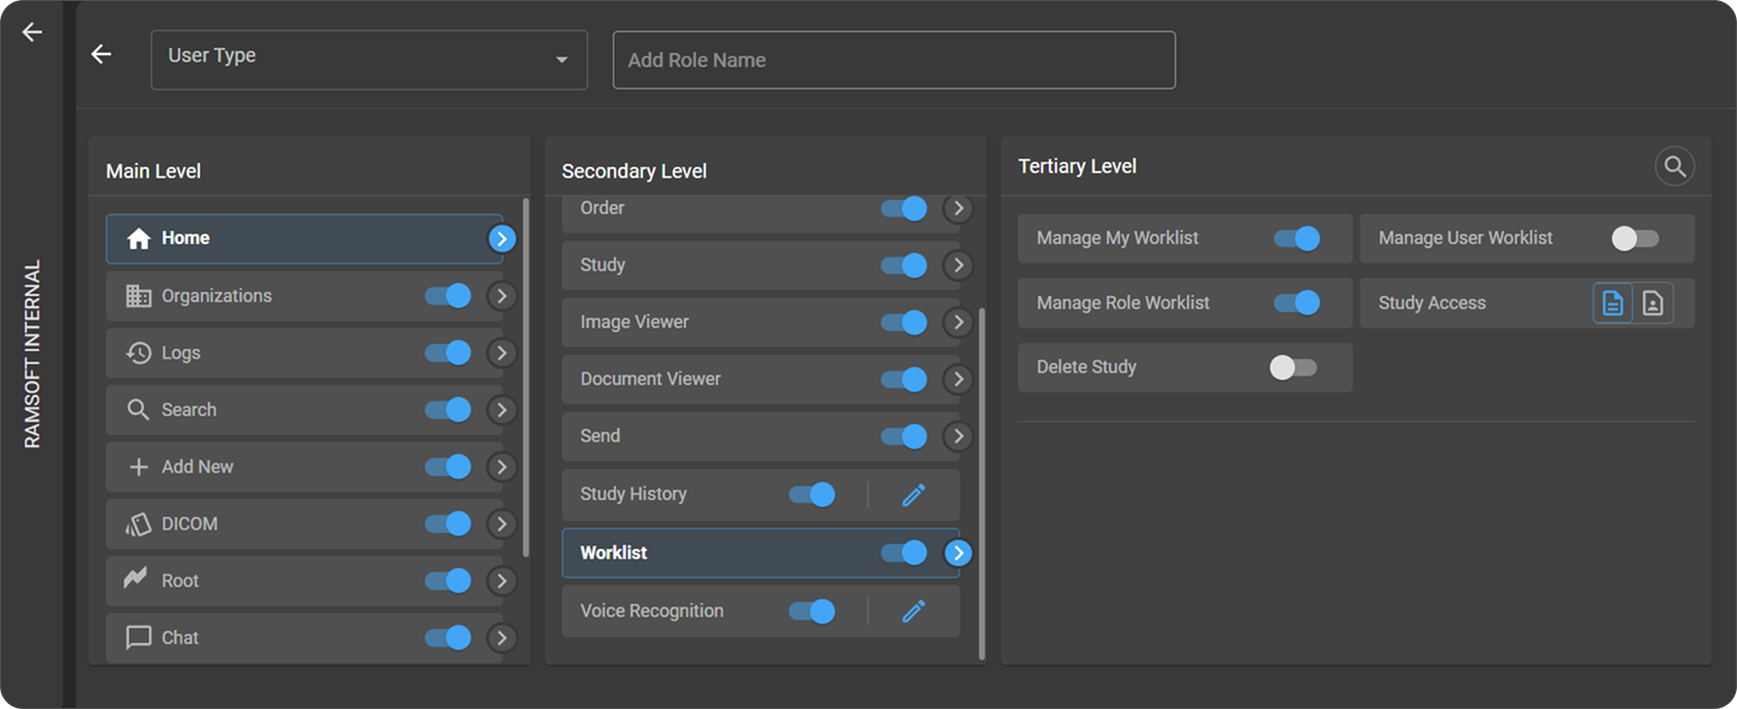
Not everyone gets the same level of control over a worklist. What you can do is governed by User Access Control (UAC), configured by an administrator under Home → Worklist in the role settings.
| Permission | Default | What it controls |
|---|---|---|
| Manage My Worklist | On for most users | Full control over your own User Worklists: rename, delete, create new ones, and permanently save column, filter, and sort changes. Also lets you save a Role Worklist you're viewing as a new personal User Worklist, so you can keep changes to it without editing the shared original. |
| Manage Role Worklist | Off | Full control over every Role Worklist in your organization: create, edit, rename, delete. |
| Manage User Worklist | Off | Lets an administrator search for and manage other users' User Worklists across the organization, not just their own. |
| Study Access: All Studies vs. Assigned Studies | Varies by role | Controls which studies show up in a worklist at all: every study in the organization, or only studies specifically assigned to that user. |
Note: A related permission, Delete Study, controls whether the Delete Study option appears in the right-click menu described in Using the Worklist Screen.
Troubleshooting
| Symptom | Likely cause |
|---|---|
| Changes you make to a shared Role Worklist (sorting, filtering, columns) don't stick after you log back in. | You don't have the Manage Role Worklist permission. Without it, changes to a shared worklist only last for your current session. |
| Two users' worklists look like they should show the same studies, but don't. | Their Study Access settings differ — one may be set to All Studies, the other to Assigned Studies only. |
For the full picture of how roles and permissions work across OmegaAI, see User Access Control, Roles, and Privileges.