User Access Control, Roles, and Privileges
In OmegaAI, users are associated with managing organizations. The organization they are affiliated with will determine what information the user is able to access. Furthermore, each user or device has a role. A role determines what privileges the user has within the system.
However, referring and Consulting Physicians can access multiple organizational studies even if they are not associated with any organization. If their names are assigned under the Referring or Consulting Physician field, they are granted the following privileges:
-
Image Viewer: Read only
-
Worklist: View studies they are assigned to
-
Diagnostic Report: Read only, access to final reports only
-
Study Search: Full access to records they are associated with
-
Patient Search: Full access to records they are associated with
User Access Control (UAC)
UAC is an essential part of OmegaAI that restricts the ability of users to access only the information that they are authorized to access.
Since a user is part of the managing organization, the user can access all information, including that of the sub-organization(s) associated with it, if any. However, the user's access to information is determined by the role assigned to the user.
Roles
The combination of roles and user privileges determines what functions a user will perform on the system. OmegaAI has pre-configured roles and user types based on the general tasks performed by users at medical facilities.
Accessing Role Configuration
To manage user roles within OmegaAI, follow these steps:
-
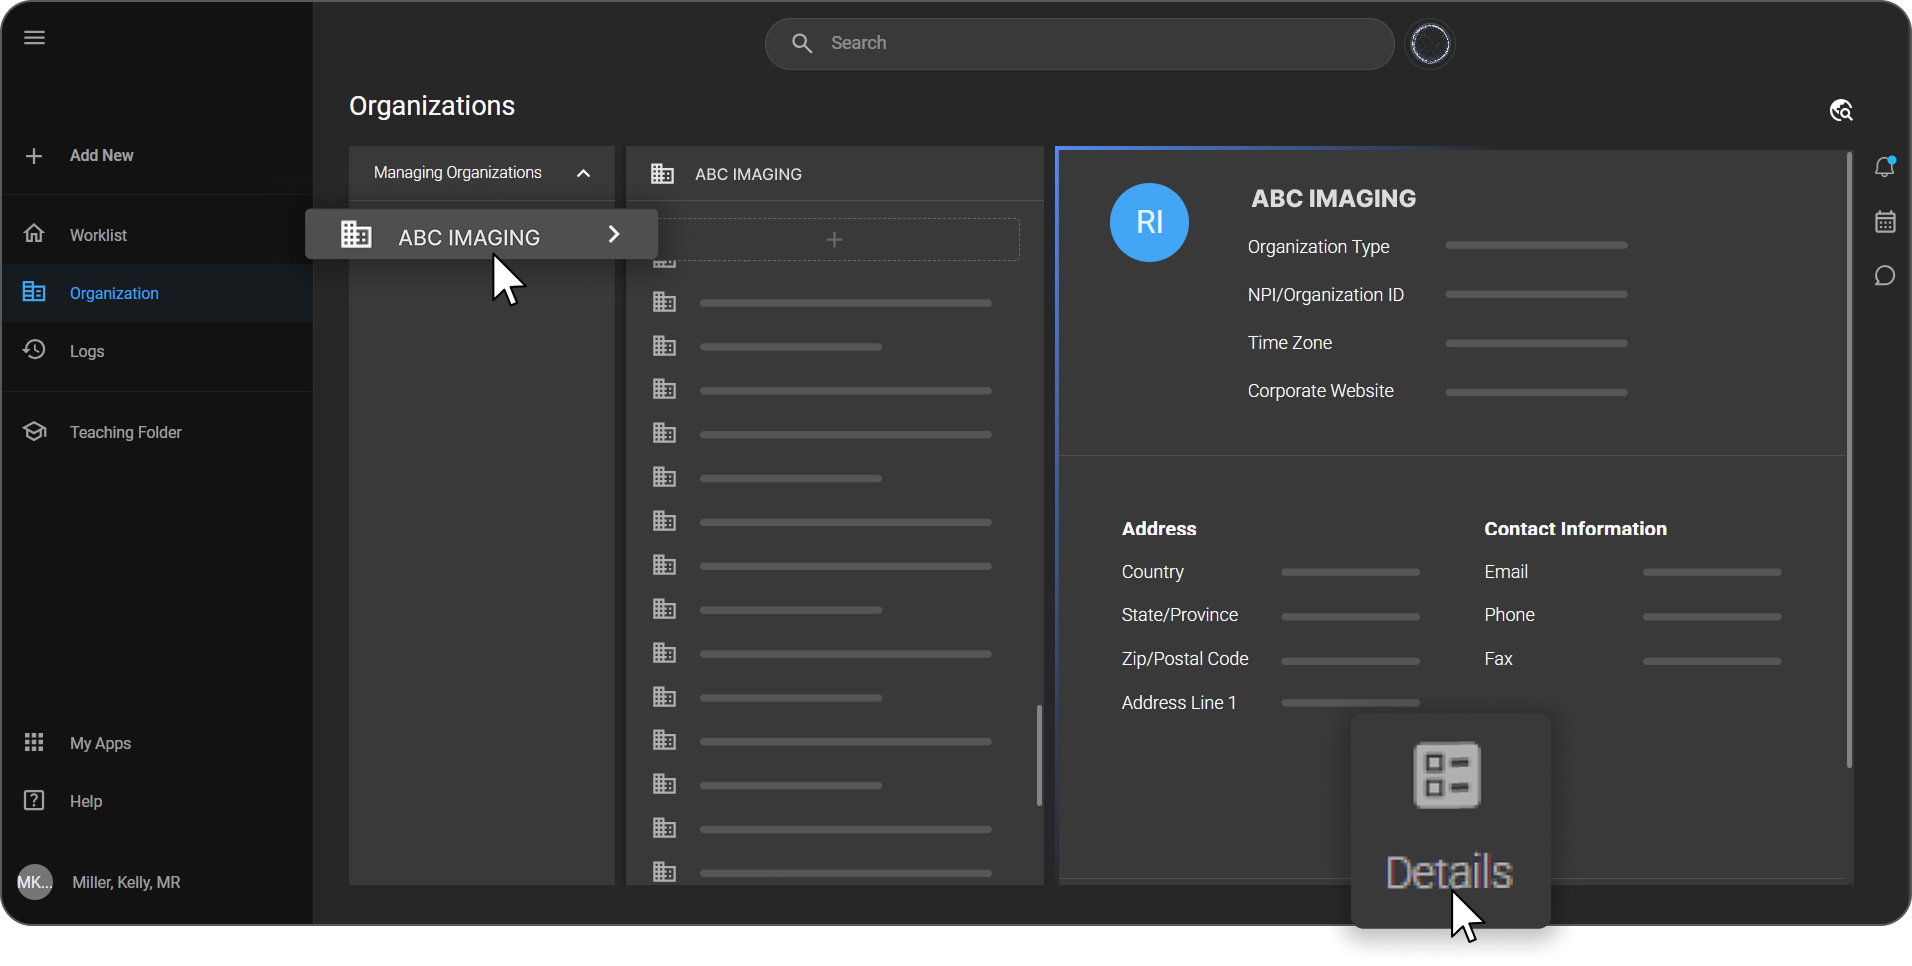
Select the Organization:
- Click Organization from the left navigation panel and open the required organization's Details page. Note that user role configuration can only be performed at the top-level or master organization.
-
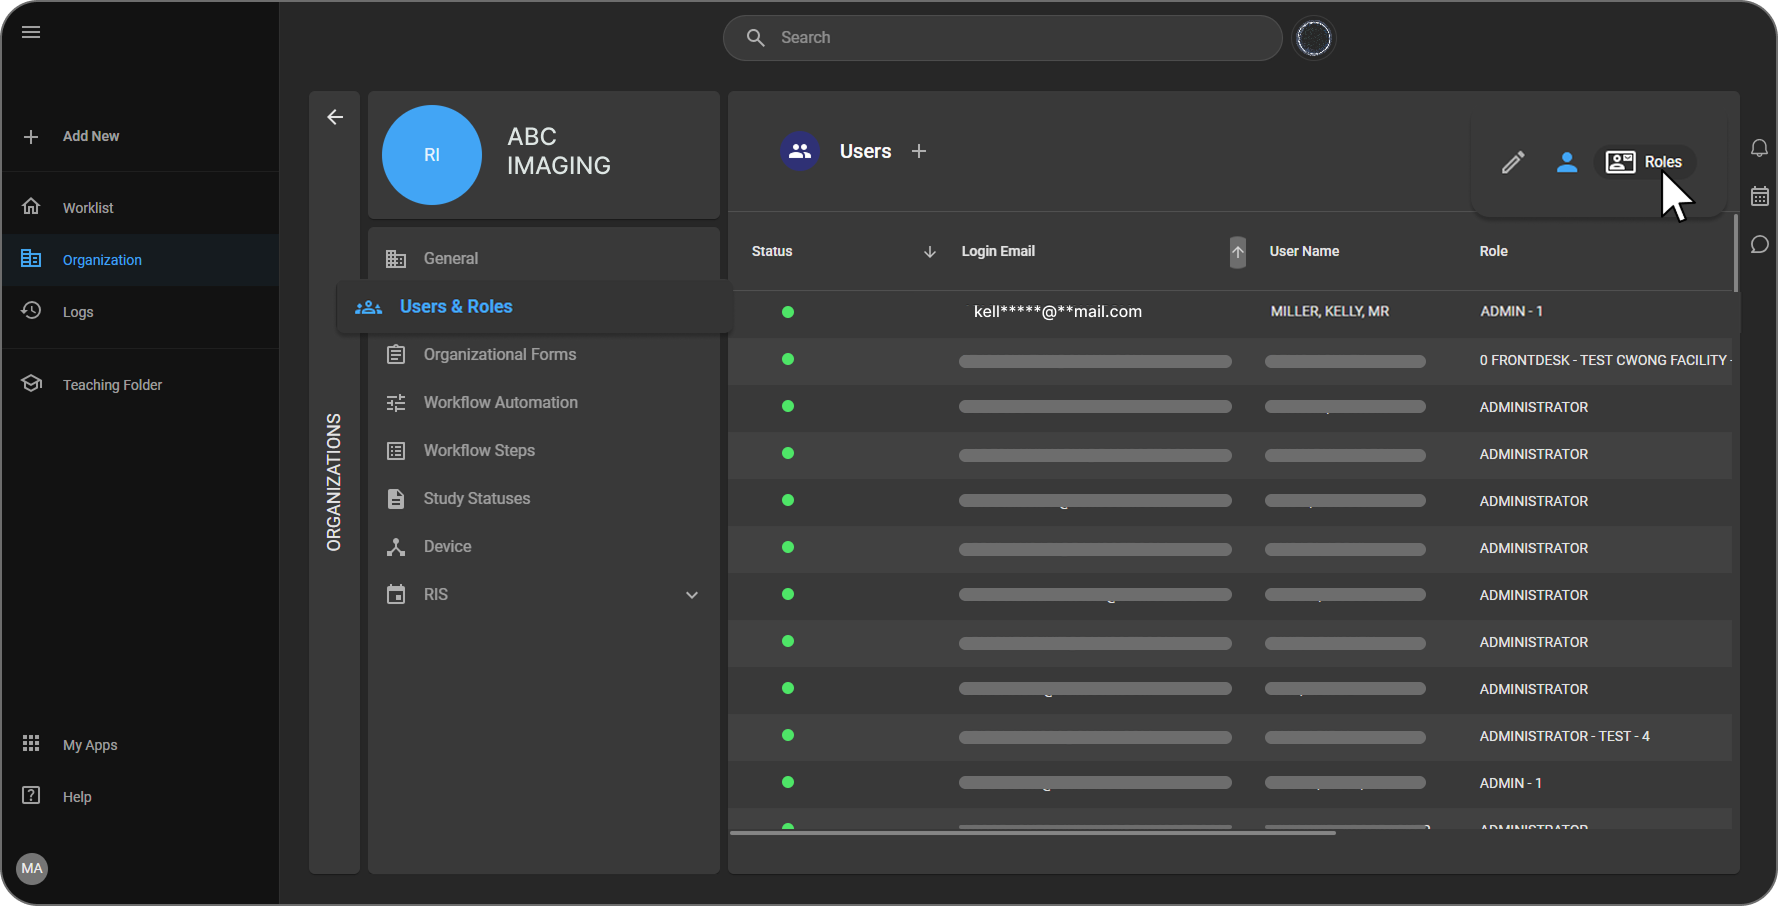
User Page:
- From the organization's dashboard, go to the Users and Roles page.
-
Role Configuration Icon:
- Click on the roles icon located at the top right of the screen to open the role configuration screen.
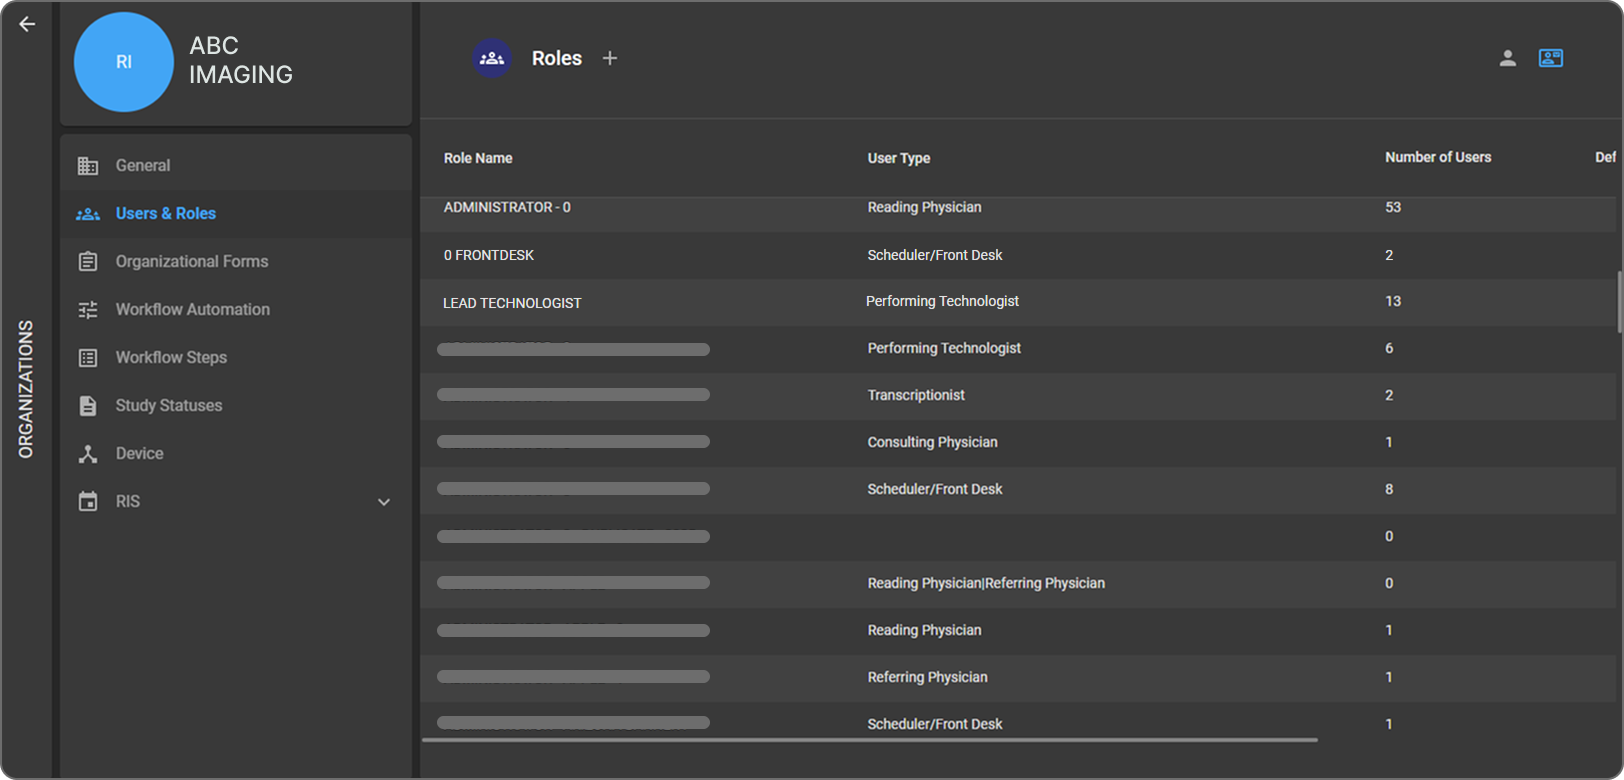
Role Configuration Screen
The Role Configuration screen displays the following details for each role:
-
Role Name: The name assigned to the specific role.
-
User Type: Indicates the category of users associated with the role.
-
Number of Users: Displays the total number of users currently linked to the role.
-
Default: Indicates whether the role is set as the default role for newly created users.
Managing Roles
Add a New Role
- To create a new role, click the + (Plus) icon next to the Roles header at the top of the screen.
Role Actions
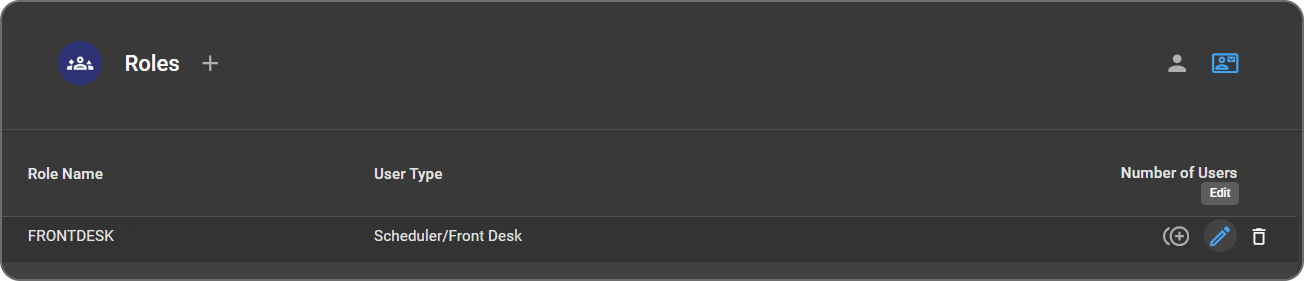
When you hover over a role, the following action icons appear:
-
Duplicate: Click the first icon to create a copy of the selected role.
-
Edit: Click the second icon to modify the role settings.
-
Delete: Click the third icon to delete the role.
Note: A role can be deleted only if no users are currently assigned to it.
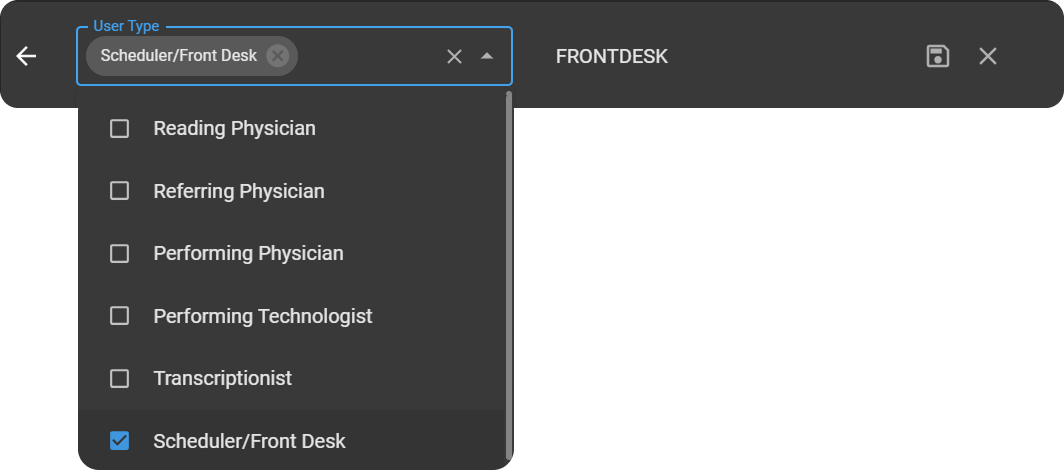
User Types and their Roles
OmegaAI supports several user types, each corresponding to different roles within the healthcare workflow:
-
Reading Physician
-
Referring Physician
-
Performing Physician
-
Performing Technologist
-
Transcriptionist
-
Scheduler/Front Desk
Purpose:
-
These types are used to group users and define what data populates in specific fields, like assigning a study to a reading physician.
Editing Roles
The Role Editing screen allows administrators to configure what features and actions are available to a specific user role. Permissions are structured in three hierarchical levels---Main, Secondary, and Tertiary---to provide fine-grained access control across the application.
This setup ensures users can only view or perform actions relevant to their responsibilities.
-
The Main Level represents the top-level modules or primary screens of the application.
-
The Secondary Level displays features or functional areas within the selected Main Level.
-
The Tertiary Level provides fine-grained, action-based permissions within a selected secondary feature.
Clicking on any level expands it to display the associated permissions and configuration options.
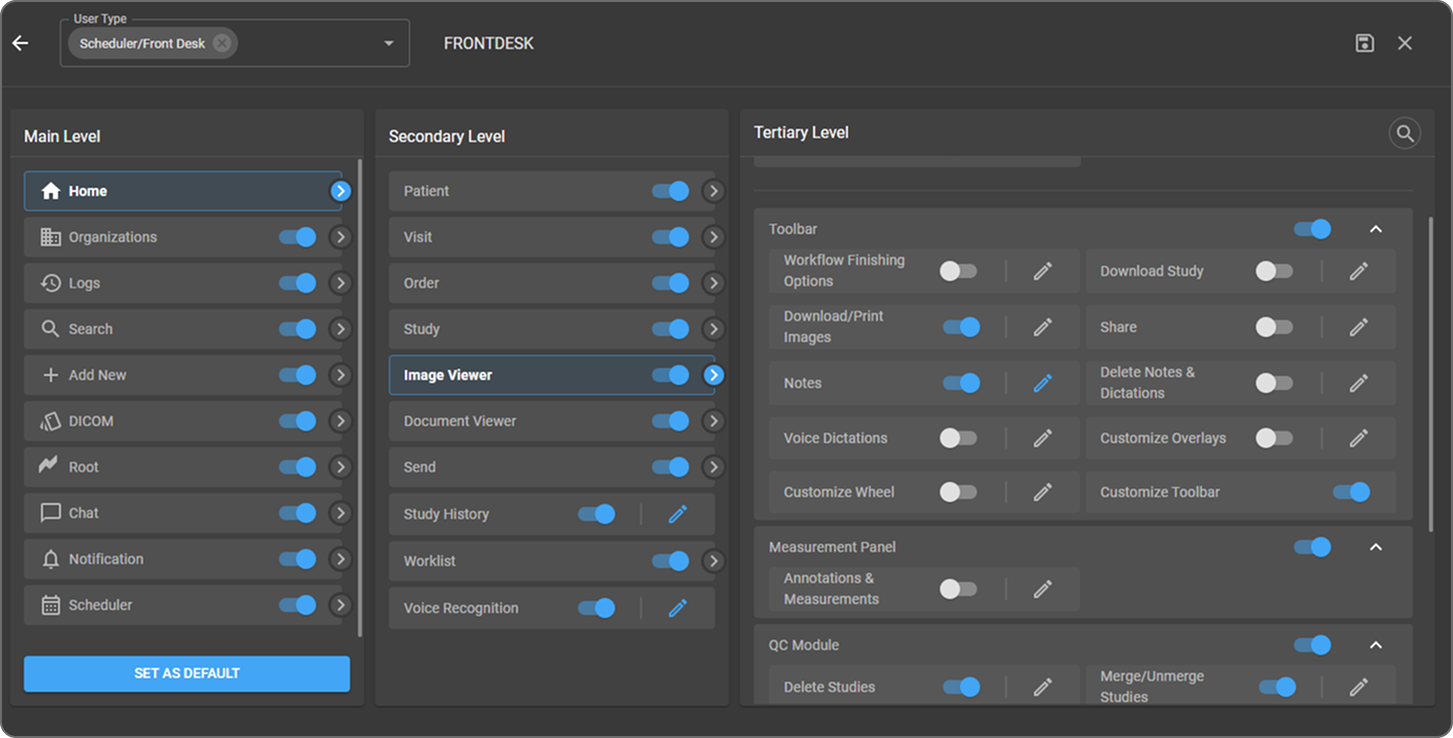
Functionalities:
Toggle
-
Toggle switches are used to enable or disable access to specific features for a selected role.
-
Toggles are available at Main, Secondary, and Tertiary levels.
-
When a toggle is:
-
ON (enabled): The feature is accessible to users assigned to the role.
-
OFF (disabled): The feature is hidden or restricted for the role.
-
-
Disabling a higher-level toggle automatically restricts access to its associated lower-level options.
Edit (Pen Icon)
-
Edit (pen) icon allows editing at the tertiary level, not applicable to all items.
-
When the edit control is:
-
Blue (ON): Editing is enabled, and the tertiary-level permissions can be modified.
-
Grey (OFF): Editing is disabled, and the permissions cannot be changed.
-
Search: Use the search function to locate specific fields within the tertiary level.
Workflow Implications:
-
Reading Physician: Completing an action in an image or document viewer might sign off a final version of a report.
-
Technologist: Similar actions signify the completion of their workflow, progressing the study from Completed to Verified.
In setting up a workflow, understanding how user types interact with automated processes is essential. For instance, identifying the appropriate user type for triggering specific actions can help in fraud prevention and streamline operations.
Study Access (UAC)
Study Access controls which imaging studies a user can view and interact with in the application. Using User Access Control (UAC), administrators can define whether users can access all studies or only studies explicitly assigned to them, ensuring appropriate data visibility and compliance with access policies.
This setting is configured at the Tertiary Level under the Worklist module.
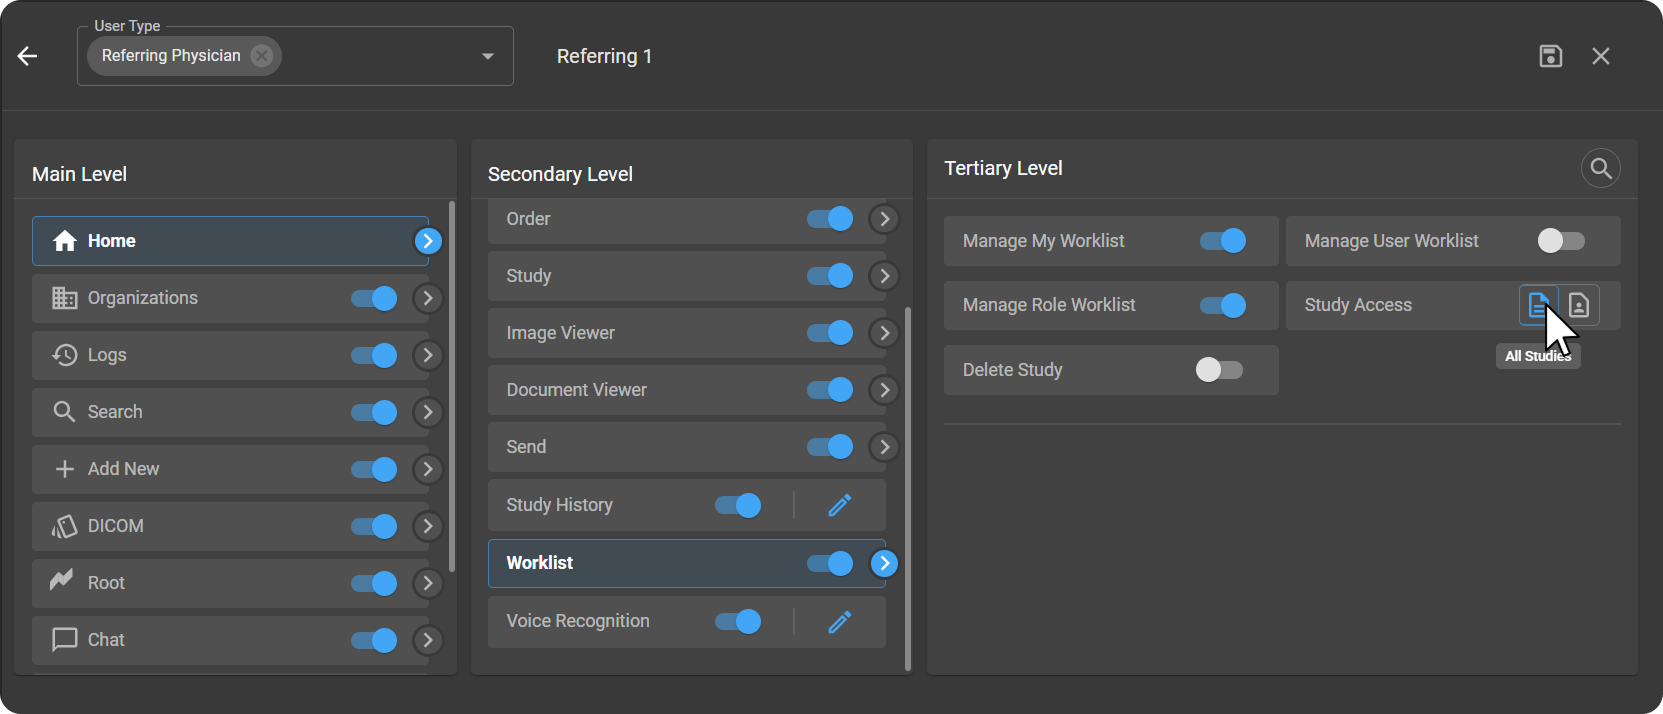
Study Access Options
The Study Access section provides two mutually exclusive access modes:
1. All Studies
-
Allows users to view all available studies that are part of imaging organizations.
-
Users are not restricted by assignment and can access every study they are authorized to see within the system.
-
Suitable for roles that require broad visibility, such as administrators or senior reviewers.
2. Assigned Studies
-
Restricts users to view only studies assigned to them.
-
Users cannot see unassigned studies in the Worklist.
-
Ideal for referring physicians or roles requiring limited, controlled access.
Restrict User Deletion in OmegaAI
The Restrict User Deletion feature enhances data security and consistency in user management by preventing the deletion of user accounts across the application. This ensures:
- Auditability & Traceability: User records remain intact for compliance and historical reference.
- Visibility: Administrators can view both active and inactive users at the organizational level.
Notes: - User account deletion is disabled in both the User Interface and the FHIR API. - Hard deletion of user records is not allowed in OmegaAI.
Activation & Deactivation of Users
Instead of deleting users, OmegaAI allows administrators to activate or deactivate accounts.
Steps to Deactivate a User
-
Click Organization from the left navigation panel and open the required organization's Details page.
-
From the organization's dashboard, navigate to Users & Roles.
-
Click the Users button in the top-right corner to open the User Information page.
-
Click the Edit (pencil) icon in the top-right corner.

-
Locate the Active/Inactive toggle.
-
Switch the toggle to Inactive.
- The user's access is revoked.
- Their role is marked as Inactive for the respective organization.

Steps to Activate a User
- Navigate to the User Information page.
- Switch the toggle to Active:
-
Access is restored only if you have the required User Access Control (UAC) privileges.
-
Note: Deactivated users remain visible in the Users List with a status of Inactive.
-
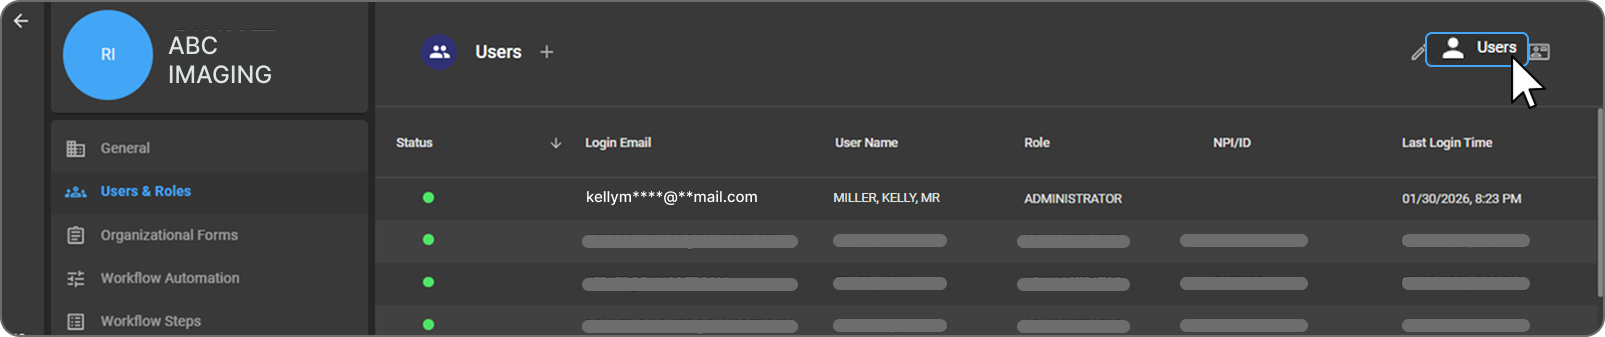
User Status
The Status label indicates whether a user is active or inactive.
Note: The status is visible on the Users List Screen and the User Profile Screen. Active users appear at the top of the list, while Inactive users are displayed below the active users.
Status indicator
- Active (green dot): The user's access and permissions are enabled for this organization.
- Inactive (grey dot): The user's access and permissions are disabled for this organization.