Teaching Folder
Overview
Teaching Folder is designed for professionals in the healthcare and academic space, particularly radiologists and doctors. It enables users to create and manage folders and subfolders to curate and share studies (i.e. these will not be copies, but the original studies) for teaching/training, and organizational purposes.
How to Manage Teaching Folders
Access Teaching Folder
-
From the left side navigation bar, select the Teaching Folder icon (graduation hat).
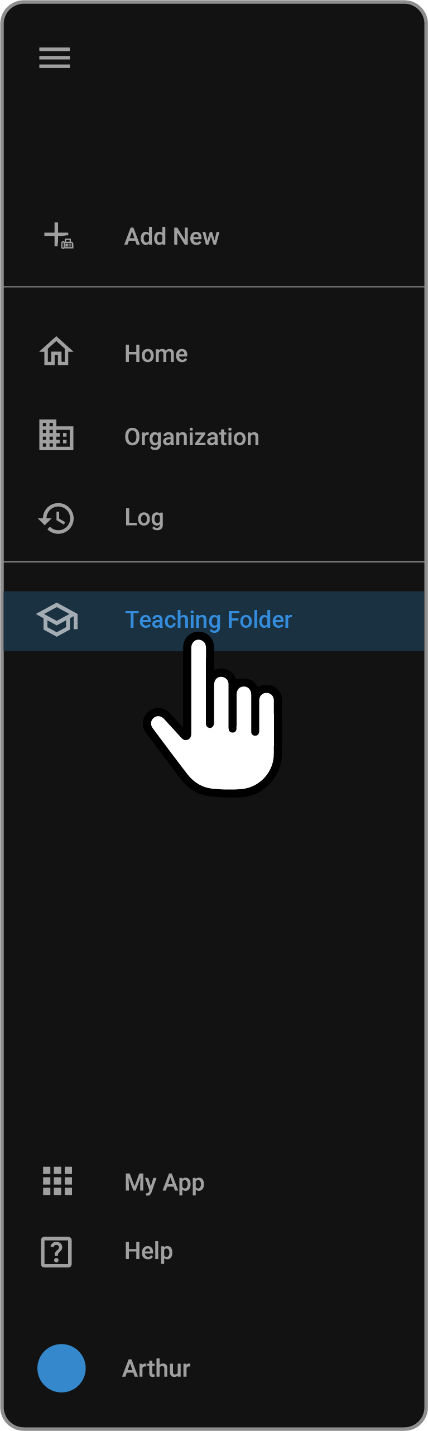
You will now be directed to the Teaching Folder screen (below is a visual of the default screen).

Teaching Folder Components and Functionalities
My folders
The My folders section is used to add and modify your teaching folders.
Note: This is a private folder, only the user has access to it.
Add a Master folder
-
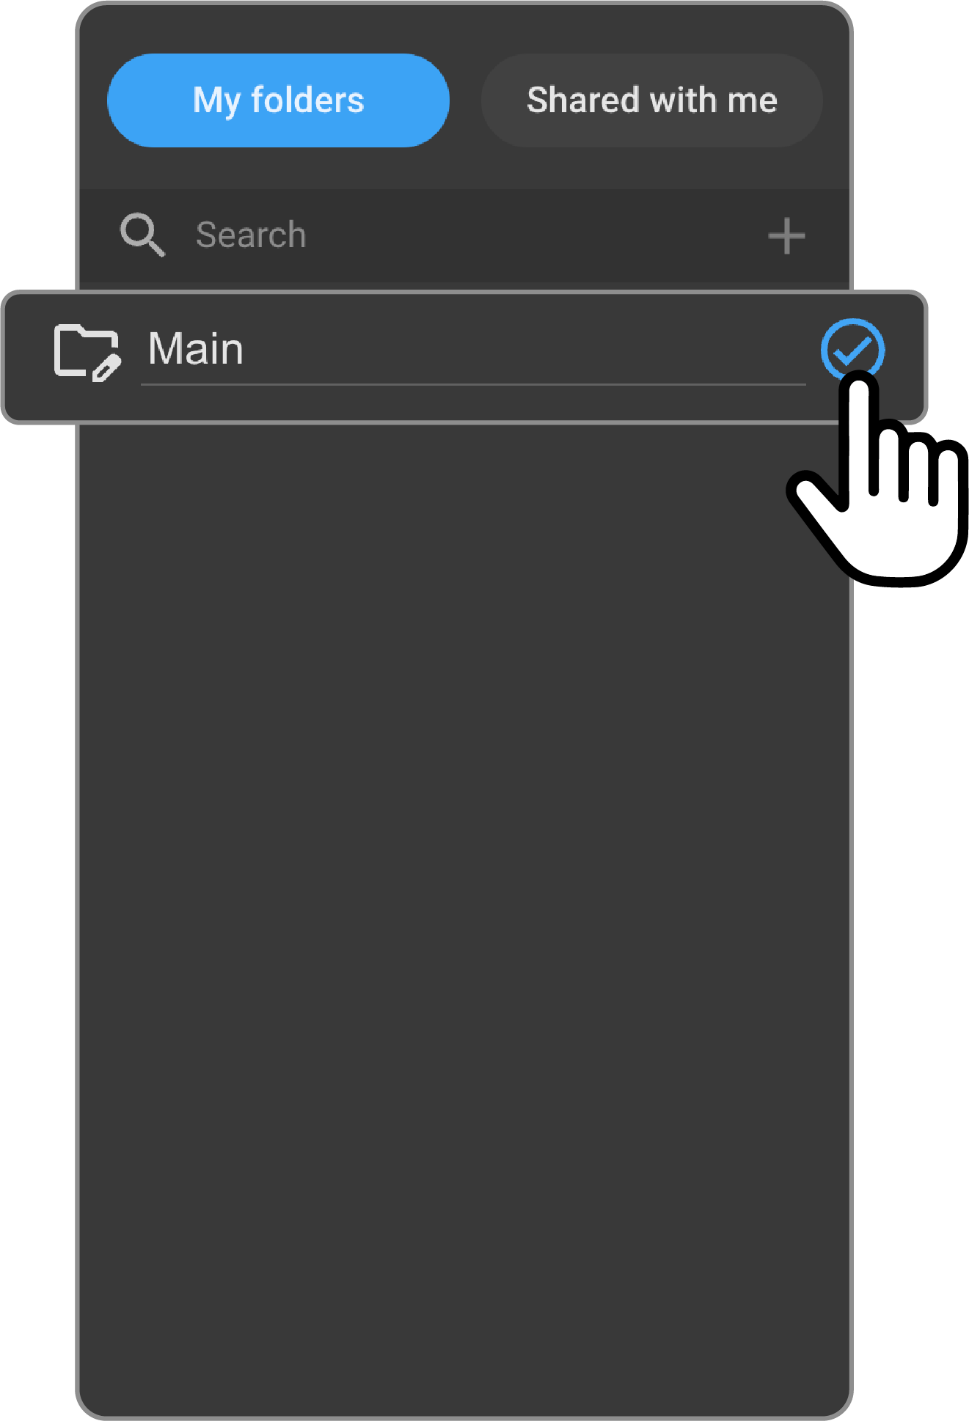
Hover over the + icon (it will read, Add Folder), click.

-
Enter the folder name.
-
Press enter or click the check mark (by default it is grey, as soon as the folder name is filled it will turn blue) to save the name. Once it is saved the check mark will disappear.
Add a Subfolder
-
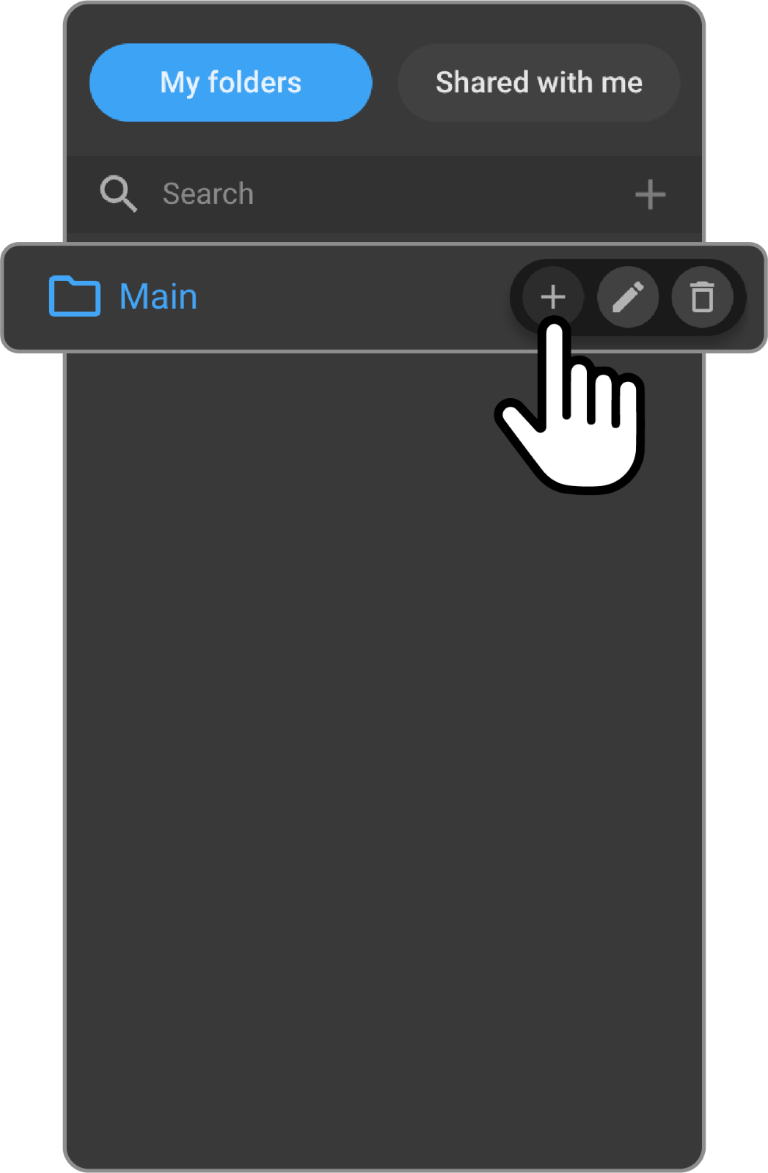
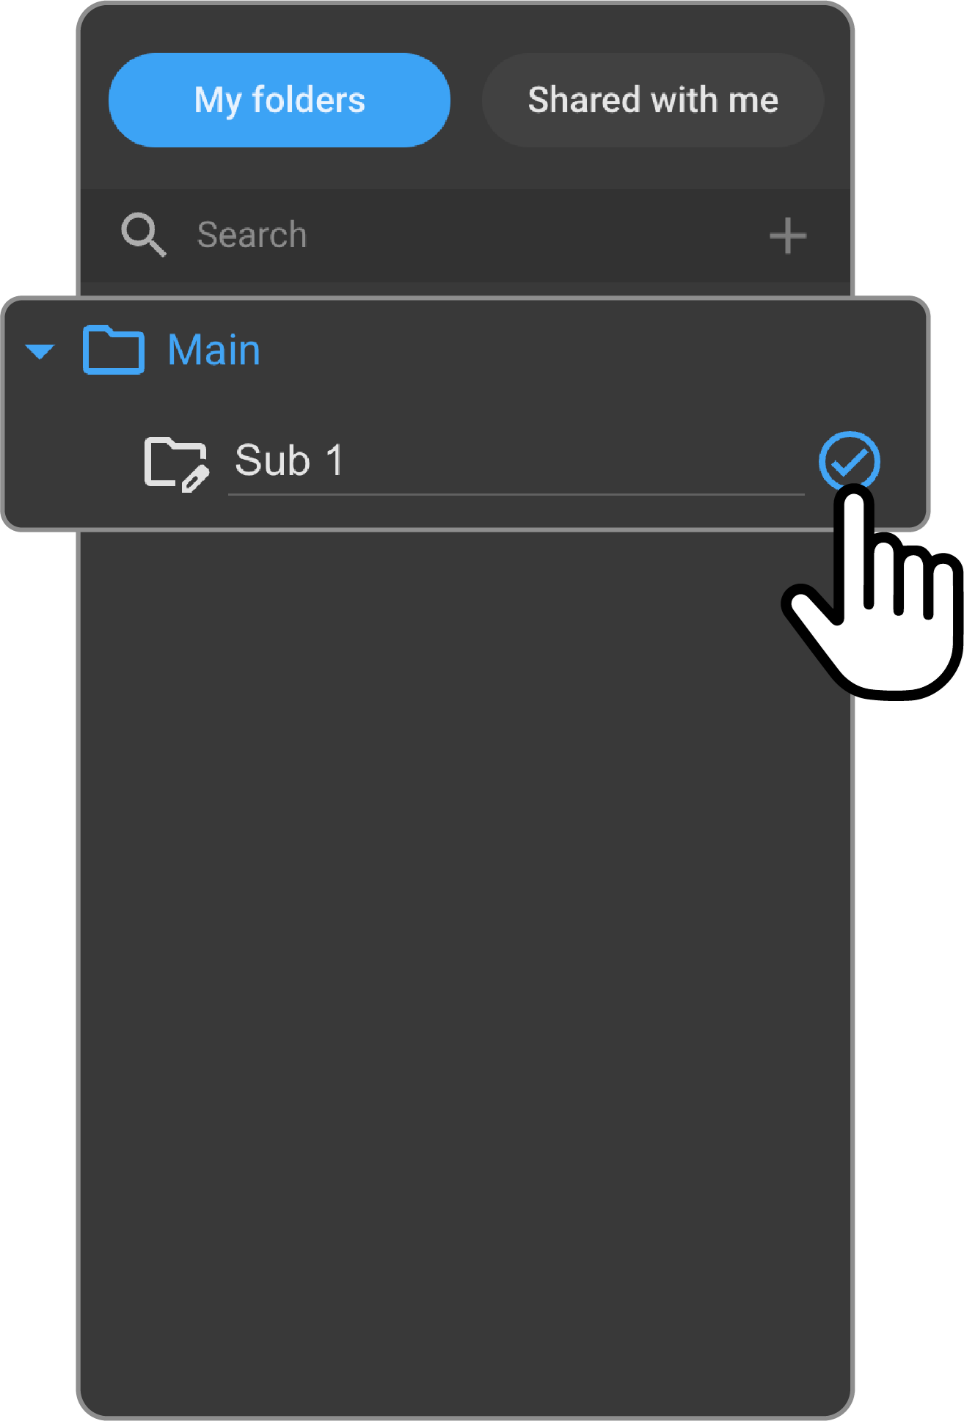
Hover over the master folder, Main, and click the + icon to add a subfolder.
-
Enter the subfolder name, and press enter or click the check mark to save it.
Add a Study to a Teaching Folder
-
Click the Home icon to navigate to the Worklist.
-
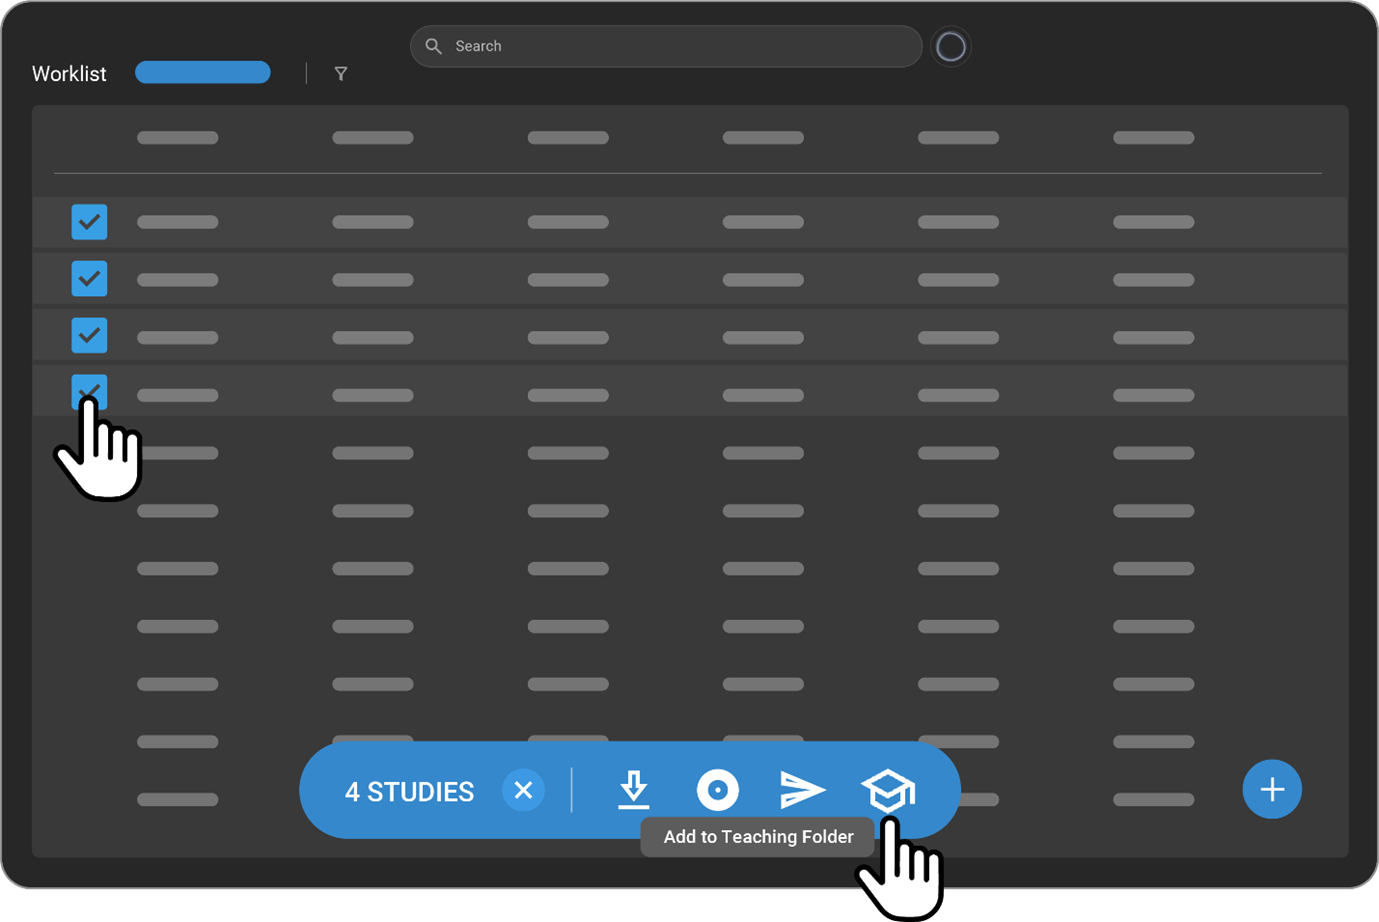
Via the Worklist, hover over the left side of the study you wish to add to the Teaching Folder and click the empty box.
A blue check mark will appear as well as the blue Worklist menu (at the bottom of the Worklist page).
-
Hover over the graduation hat (it reads, Add to Teaching Folder) and click it to add the selected study to the Teaching Folder.
-
The Teaching Folder panel will open on the left of the Worklist. You can create a new master/subfolder or click an existing folder and click SAVE to save the selected study.
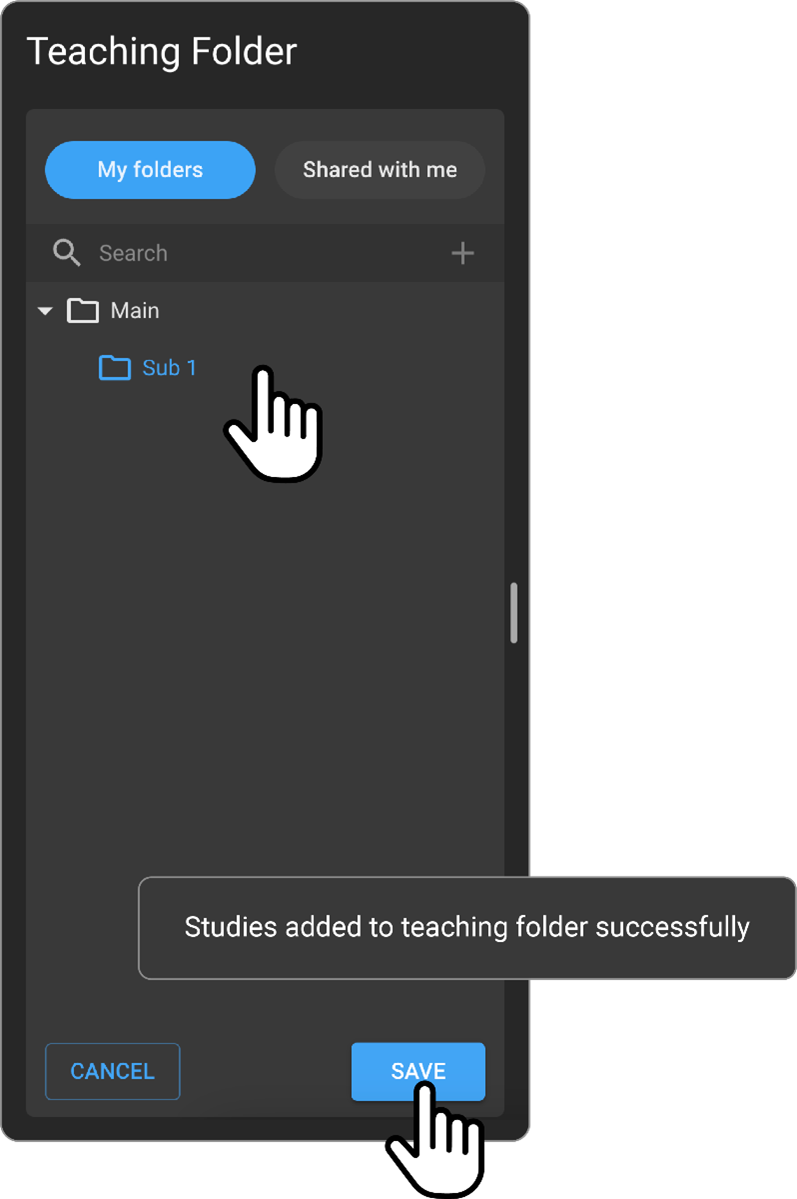
Once saved, a confirmation message will appear in the bottom left-hand corner of the screen.
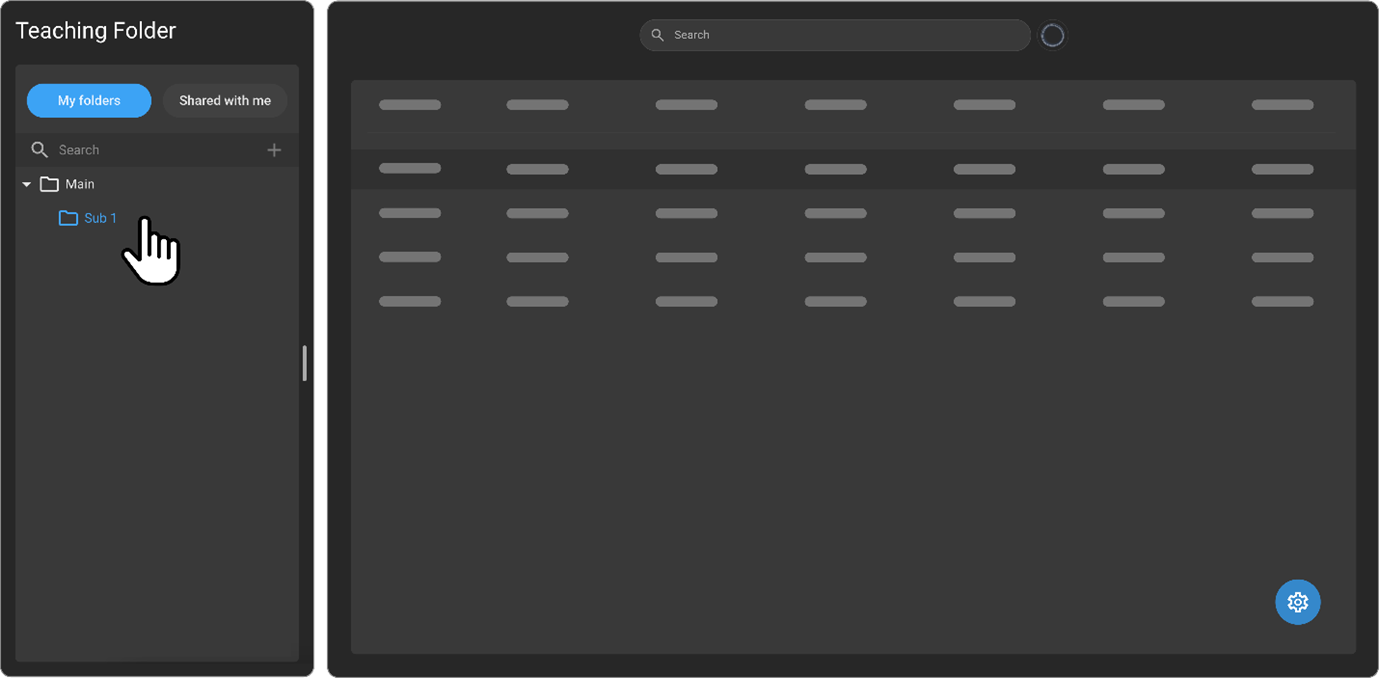
Once you navigate back to the Teaching Folder screen, the study will appear in your selected folder (the number in the brackets indicates how many studies are stored within the respective folder) and via the Teaching Folder Worklist.
Collapse Folders
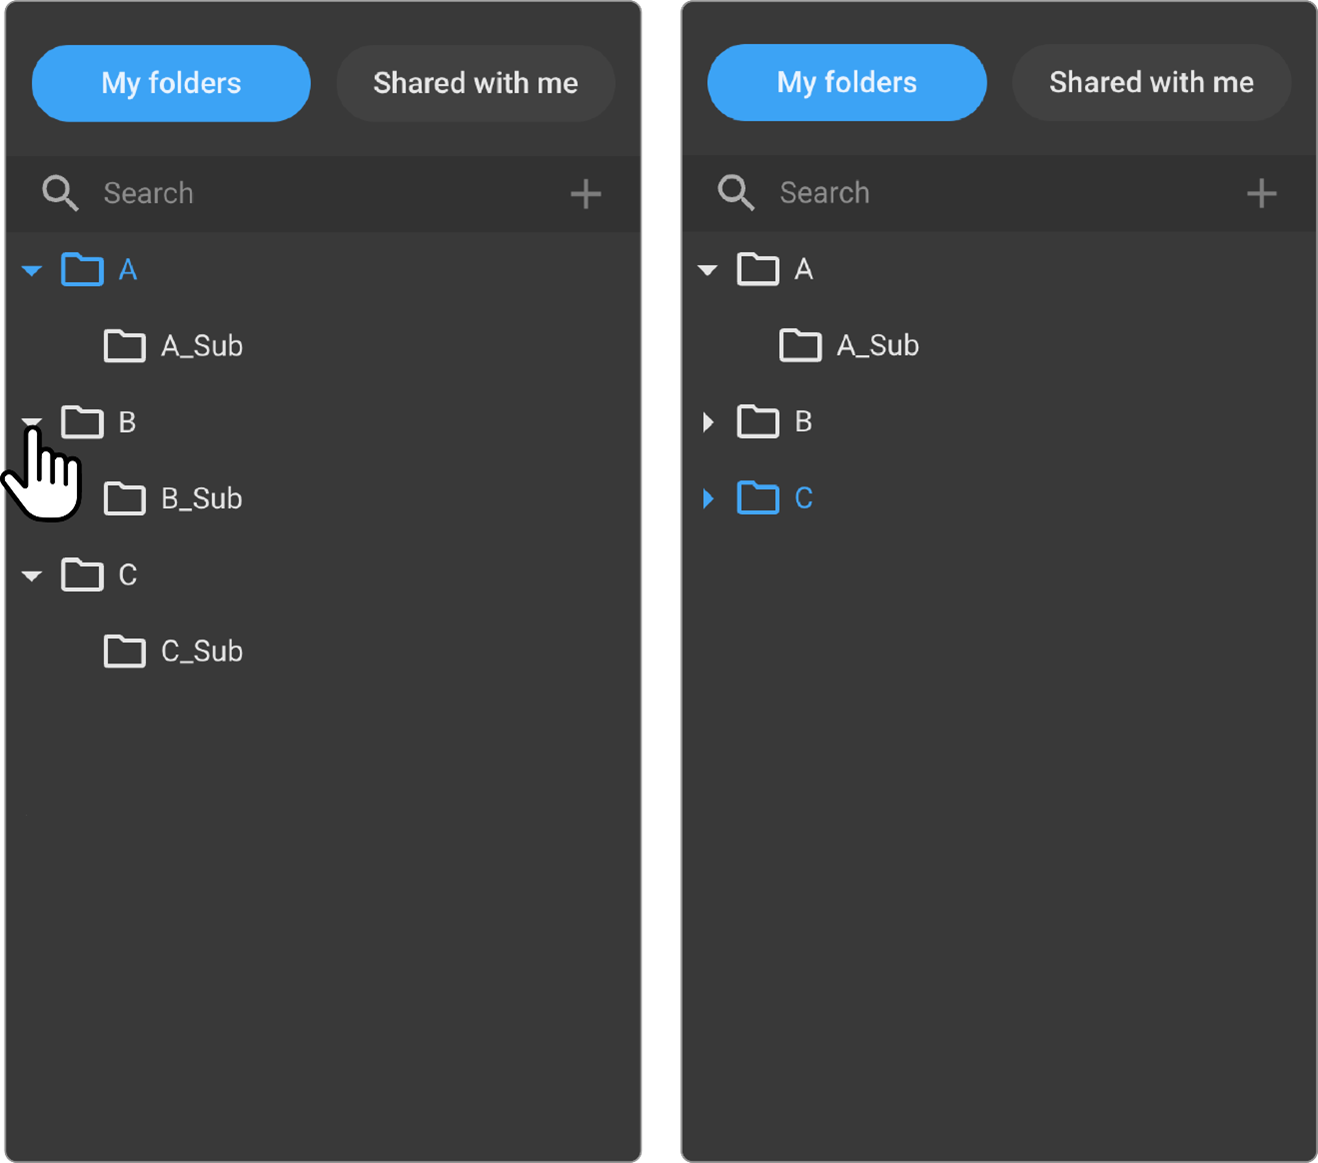
- In the case that you have an array of master folders and subfolders you can collapse a folder that you are not using and view only the folder(s) you are analyzing at the respective time.
To do so, click the upside-down arrow beside the master or subfolder you would like to collapse. Below you will see subfolders B and C collapsed.
Edit Folder Name
- Hover over the master or subfolder you wish to rename and click the pencil Edit icon.
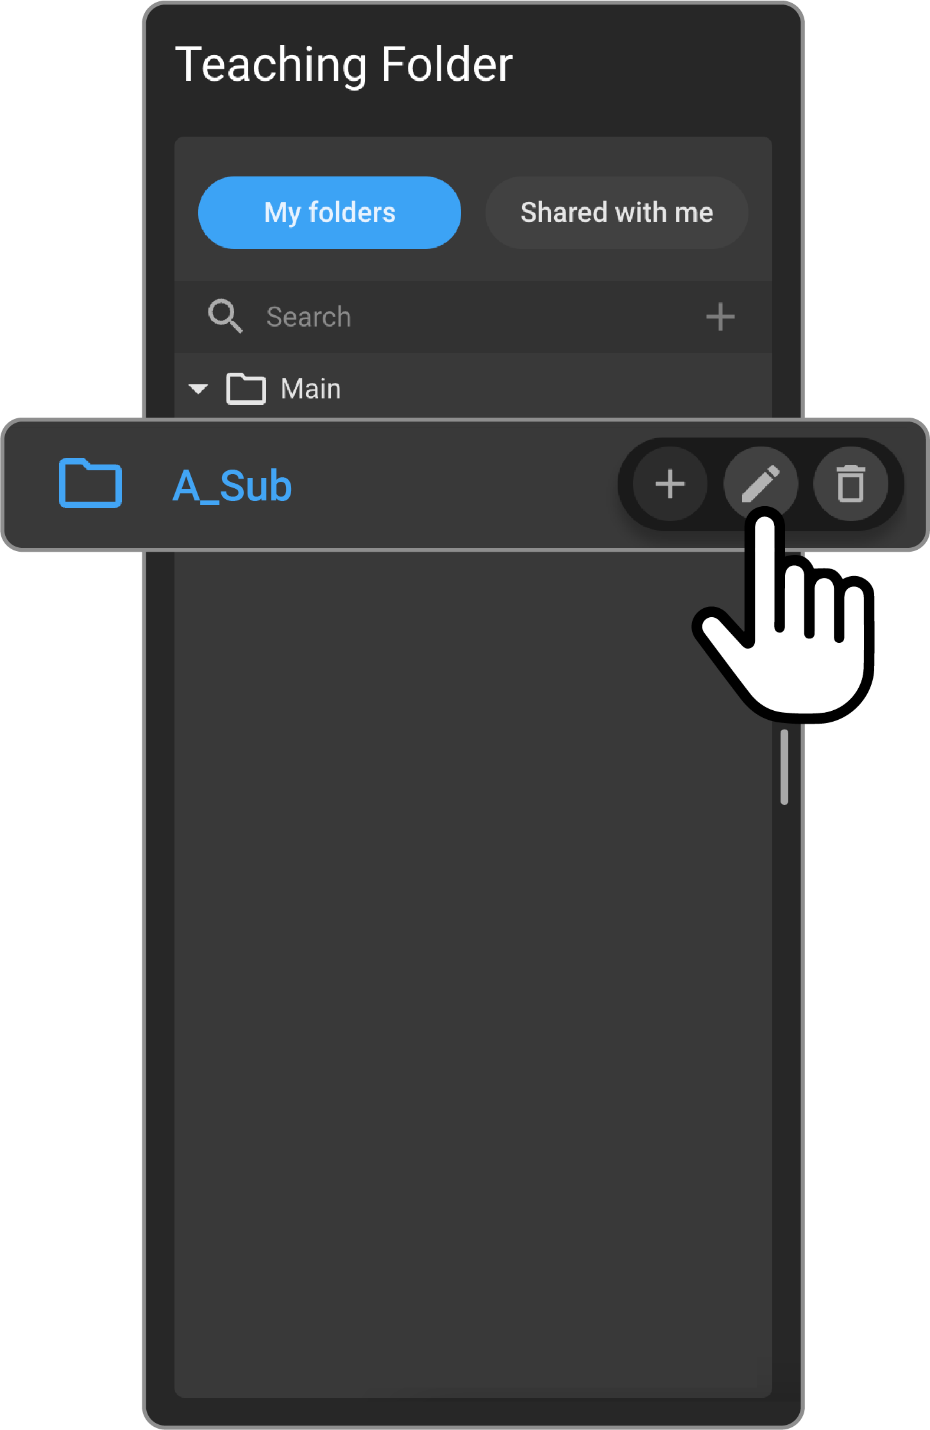
- Enter the folder name and press enter or click the check mark to save the new name.
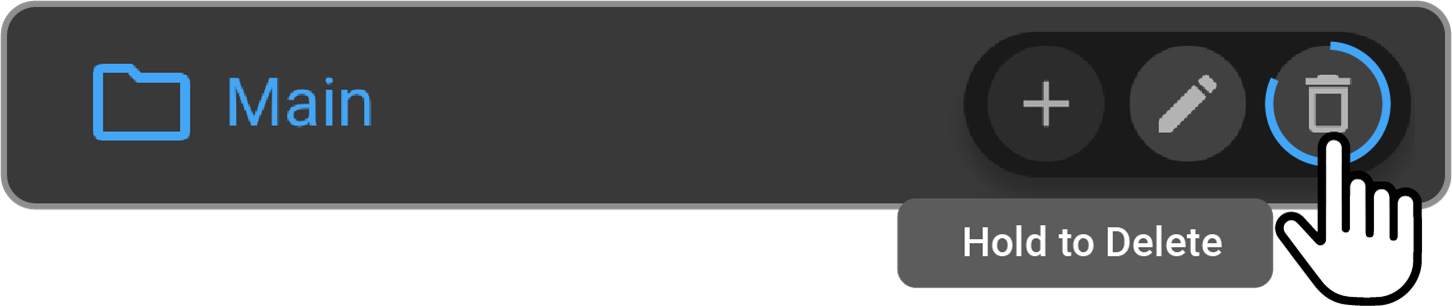
Delete a Folder
-
Hover over the master or subfolder you wish to delete and press and hold down on the trash icon until the grey circle turns completely blue. Release finger off mouse. The folder will now no longer exist.
Teaching Folder Study Management
The Teaching Folder Study Management section is used to view, remove, and track studies as well as manage settings.
View Studies
Studies that have been added to the Teaching Folder panel will appear in the Teaching
Folder Study Management
Remove Studies
- To remove a study from a folder/Teaching Folder Study Management, select the folder that holds the respective study and hover over the study in the worklist. Click the empty box.
A blue check mark and the blue Worklist menu will appear.
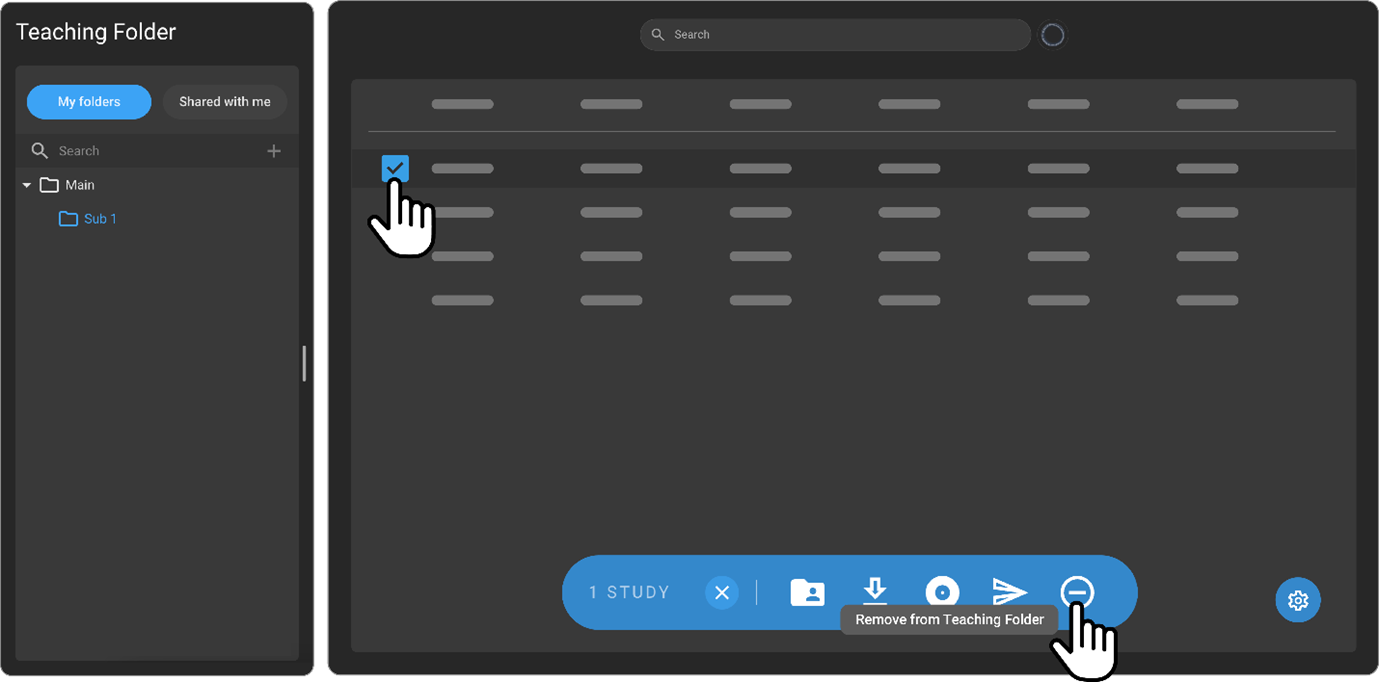
- Click the - icon from the Worklist menu.
Important Note: The study will disappear from the Teaching Folder yet will still be available in the OmegaAI homepage Worklist.
Access the Omega Dial via the Teaching Folder Worklist
-
Click once on the desired study, the Omega Dial will appear then click on respective icon to navigate to desired section.
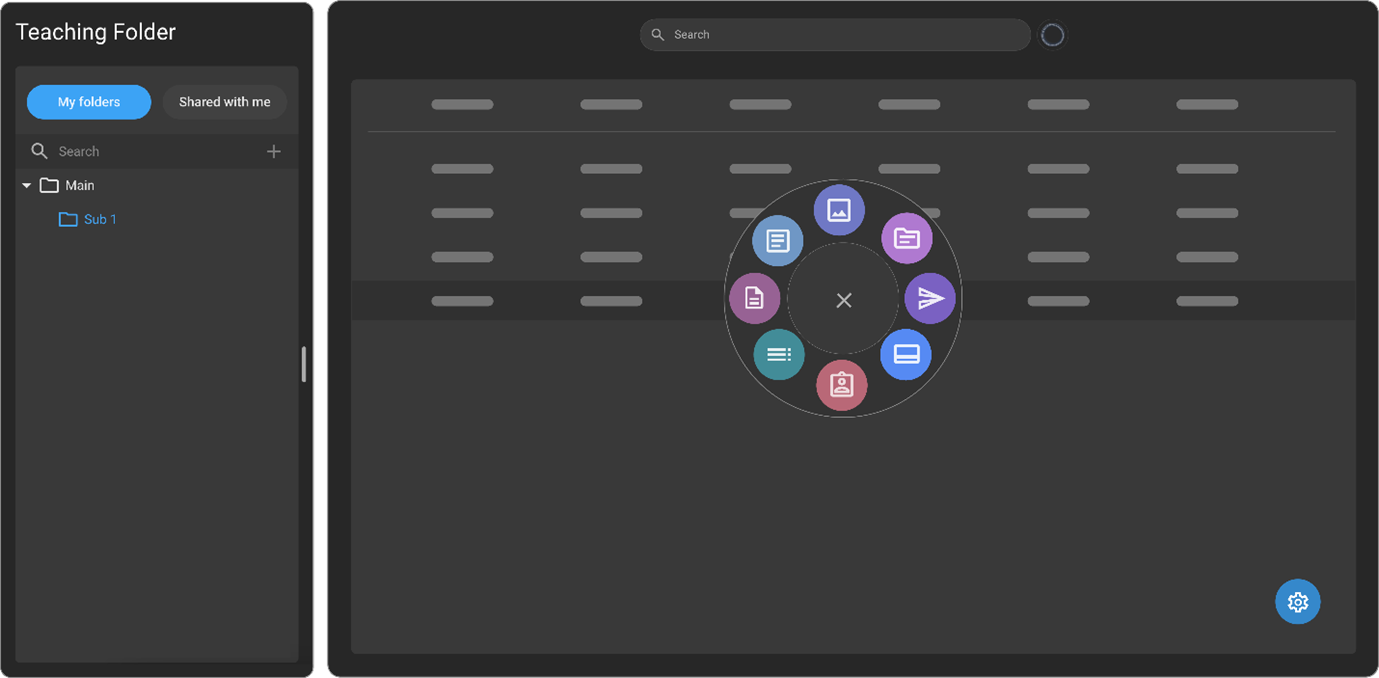
Note: to access the Image Viewer without having to summon the Omega Dial, click twice on the study. You will be directed to the Image Viewer screen.
Edit Columns via the Teaching Folder Worklist
-
Hover over the column field you wish to edit and follow the prompts.

-
To reorder the columns directly from the Worklist, hover over the column field you wish to swap and drag and drop it accordingly.
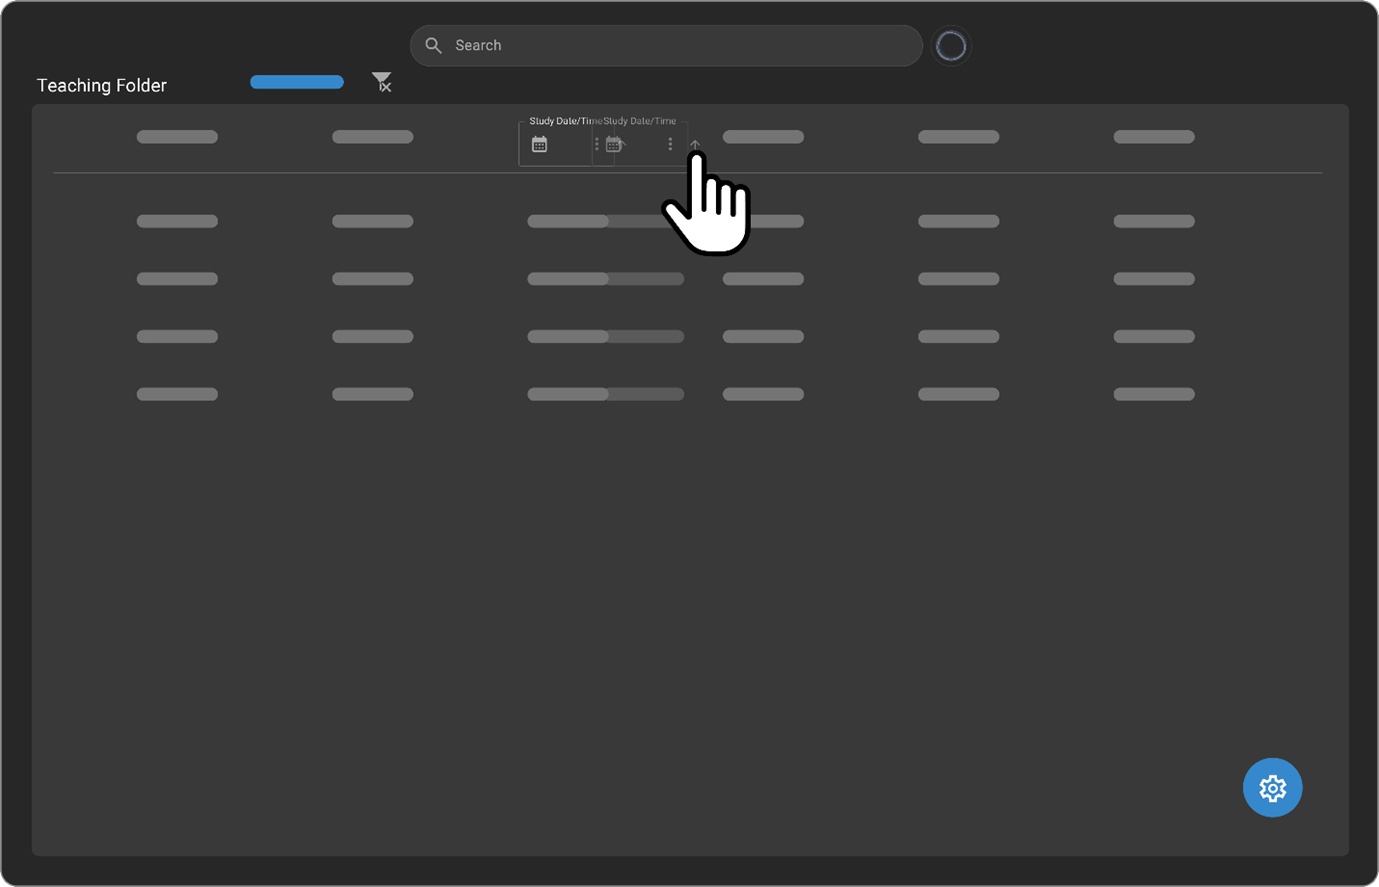
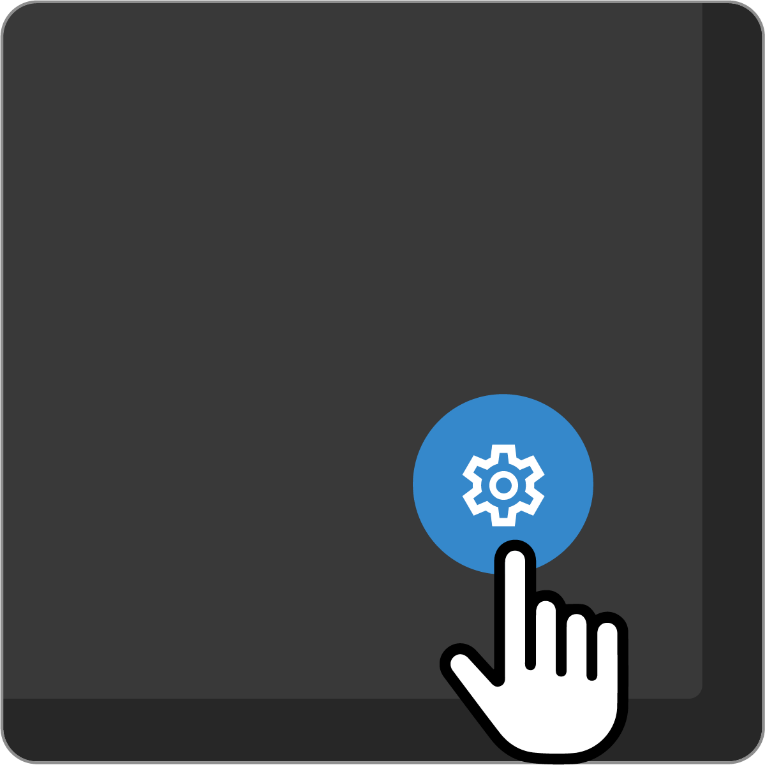
Manage Teaching Folder Worklist Settings
-
Click the blue Settings icon found in the bottom right-hand corner of the Teaching Folder Worklist.
The Teaching Folder Settings panel opens on the right-hand side.

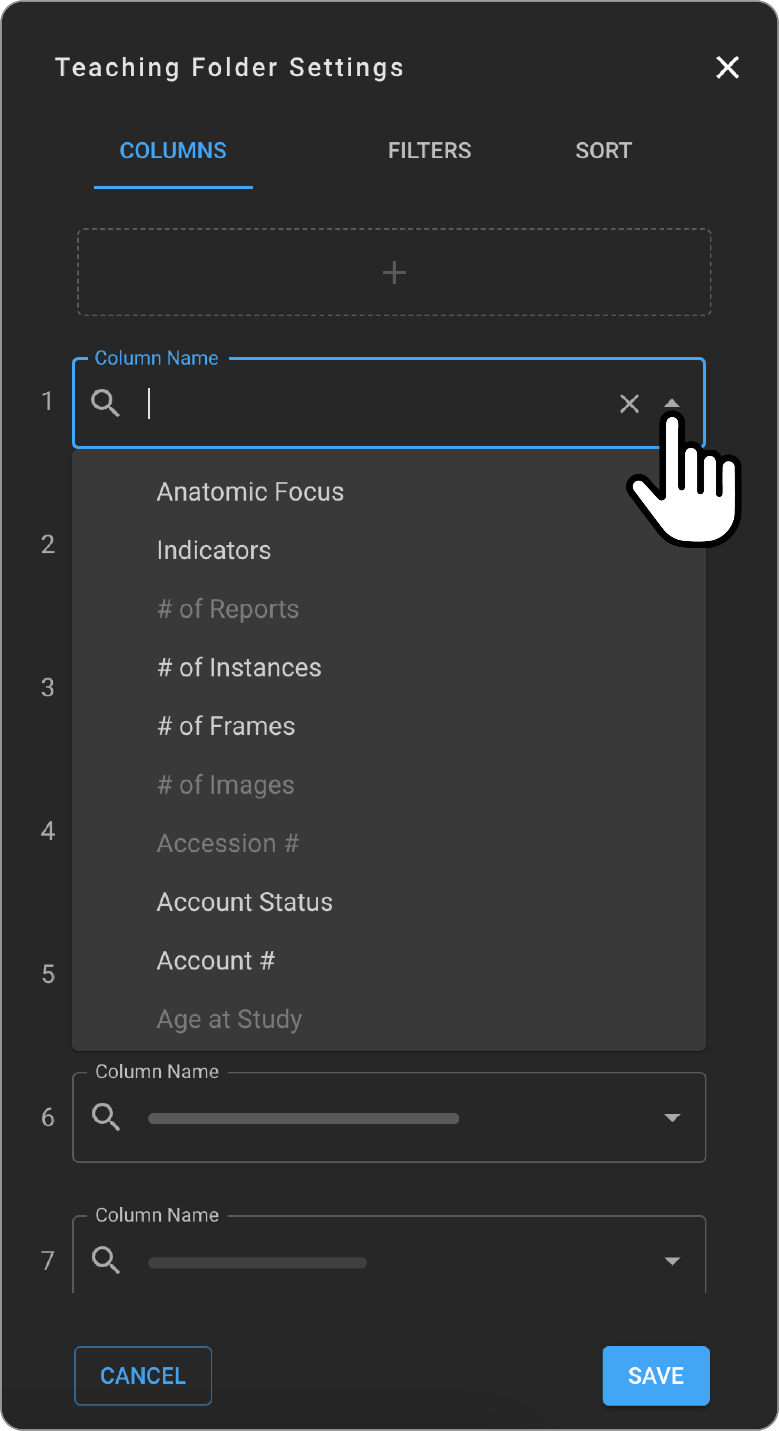
- Customize existing columns via the dropdown menu accessible by the upside-down white arrow next to the Column Name field.
Once you click the arrow, a dropdown with column options will appear. Select the one you wish to add to your Teaching Folder Worklist.
-
To add a new column, click the + icon and enter the column field details via the dropdown or via direct text.
-
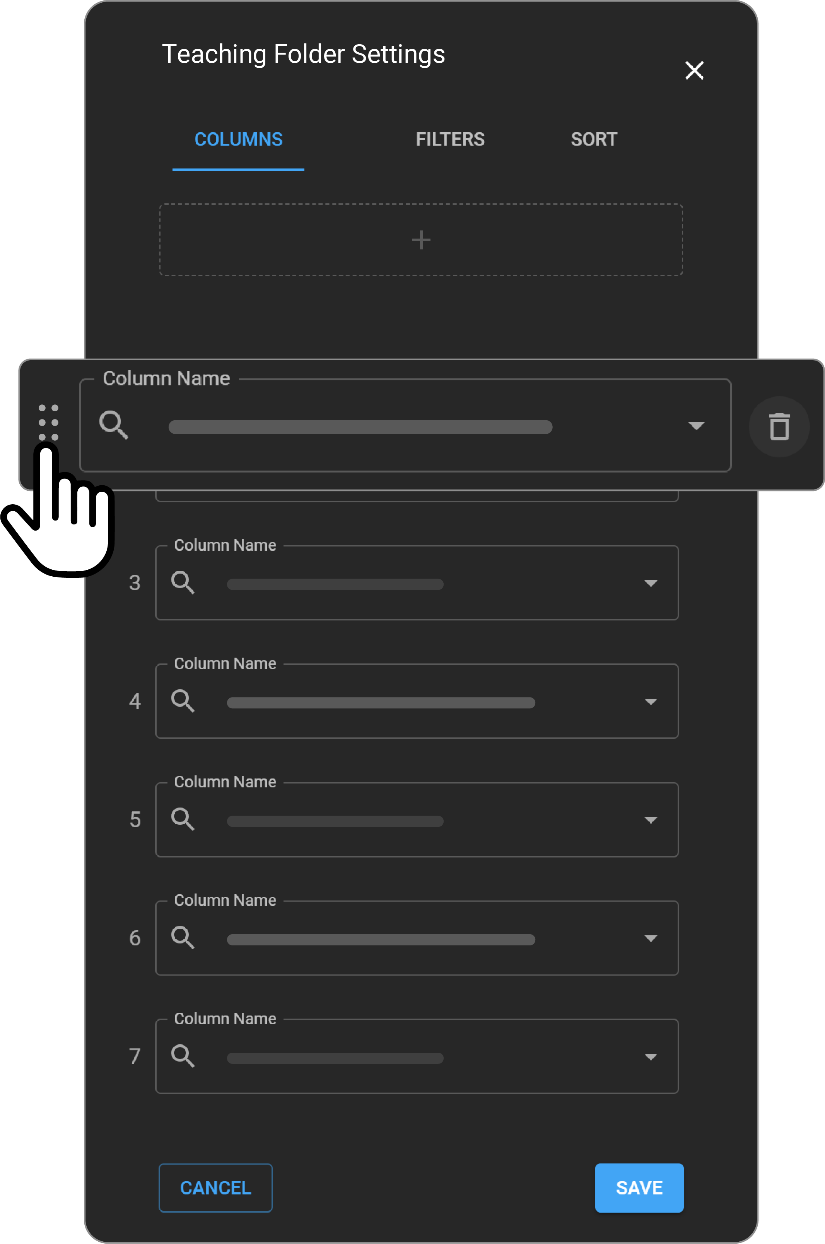
To delete a Column Name, hover over the respective field and click the trash icon (reads, Remove).
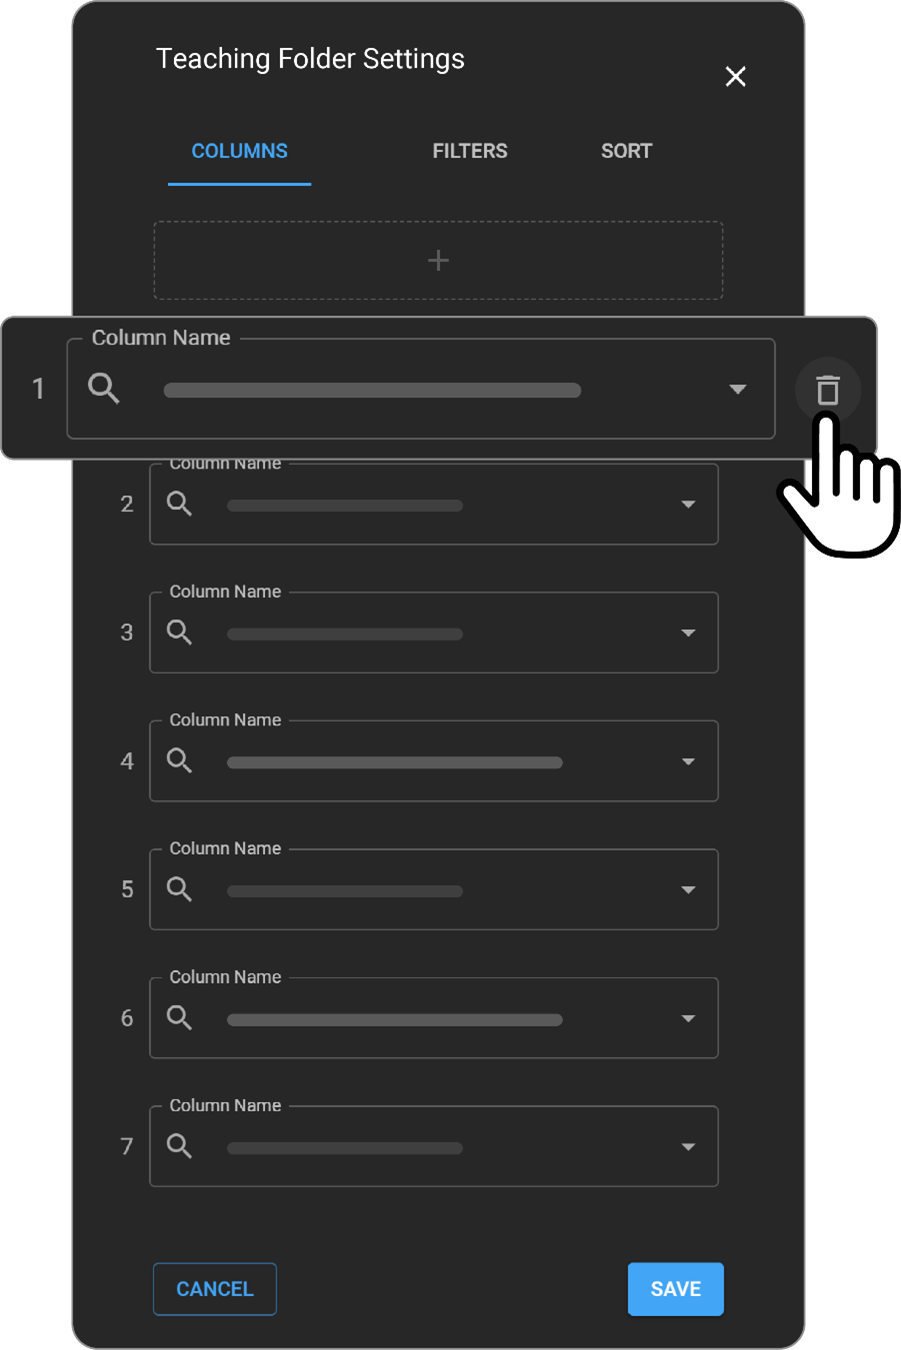
-
To change the order in which the Column names will appear in the Teaching Folder Worklist, hover over the Column Name field you wish to reorder, an icon with 6 dots will appear. Drag and drop the field to desired place.
-
Click SAVE to save changes or CANCEL to discard.
-
To edit filters, click the FILTERS section.

Note: The same editing logic applies as for the COLUMNS section (as per steps 2-4, and 6).
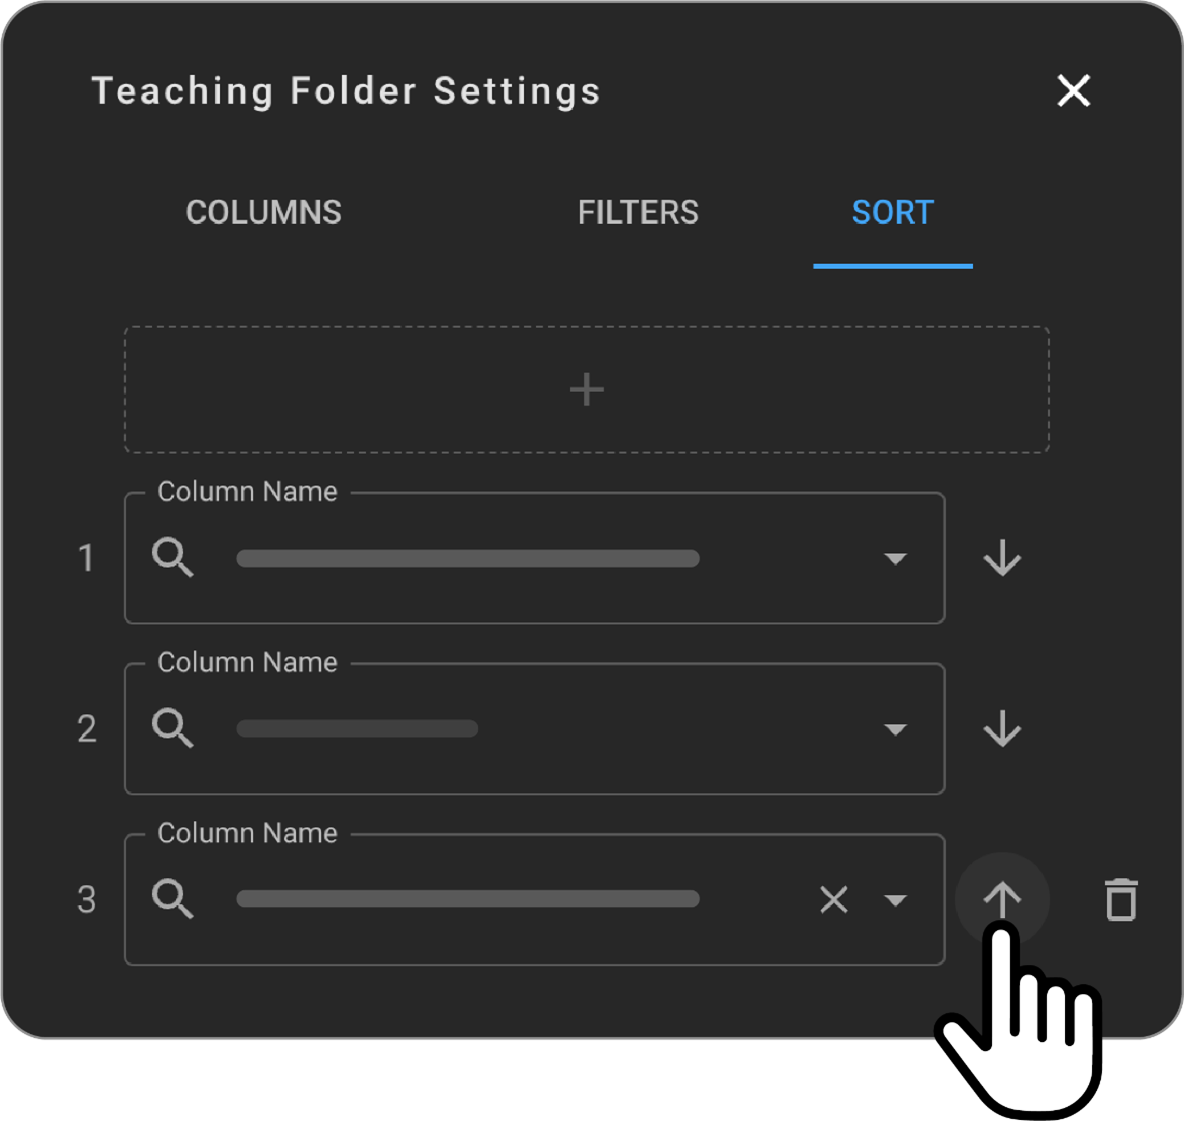
- To apply sorting logic to the Teaching Folder Worklist Column Names, click the SORT section.
Note: The same editing logic applies as for the COLUMNS section (as per steps 2-4, and 6)

-
Click the down arrow icon (i.e. decending order) to change from decending order to acending order (upward arrow).  
Shared with me
The Shared with me section is used to keep track of folders that other users have shared with you. A list with all the shared folders will appear within the Shared with me panel.
Share Teaching Folders with Users (Contacts) & Organizations
Users can share master folders or individual subfolders with users and organizations via the Share button.
Sharing Folders with Contacts
-
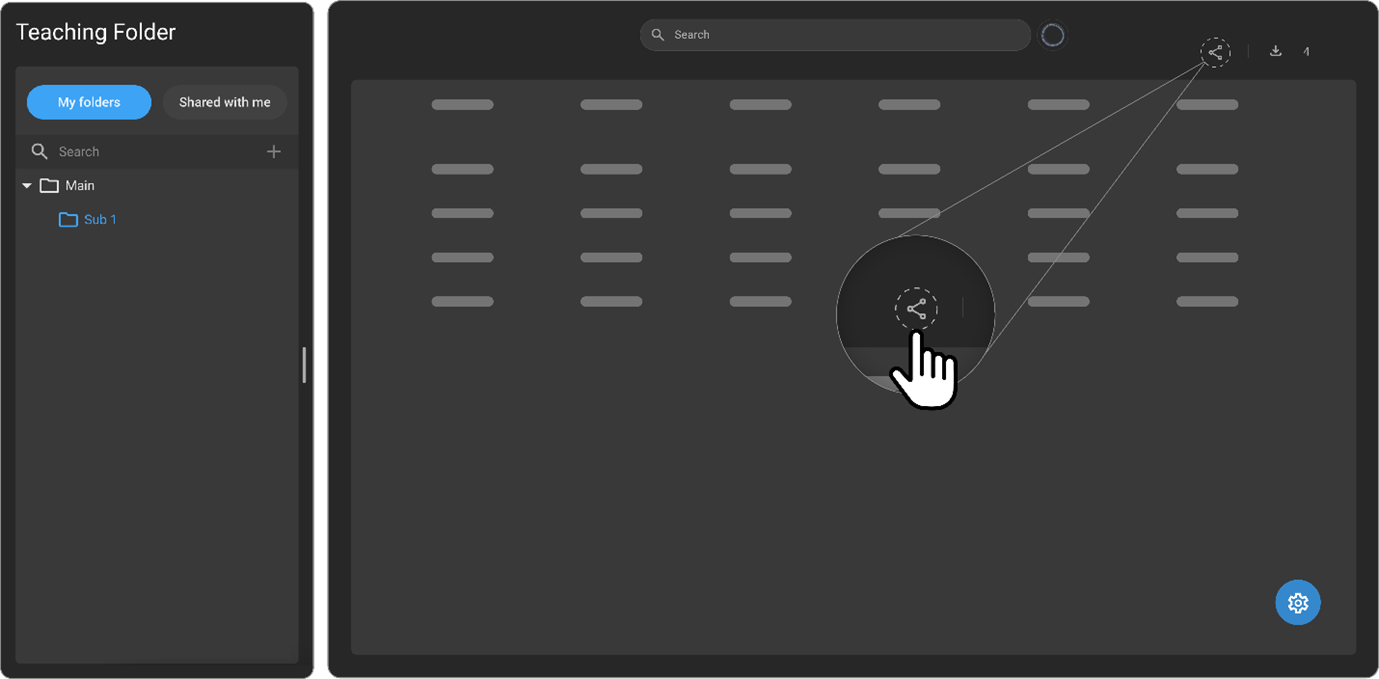
Select the folder you want to share by clicking on it from the left panel.
-
Click the Share button. The Share panel will appear on the right side of the screen.
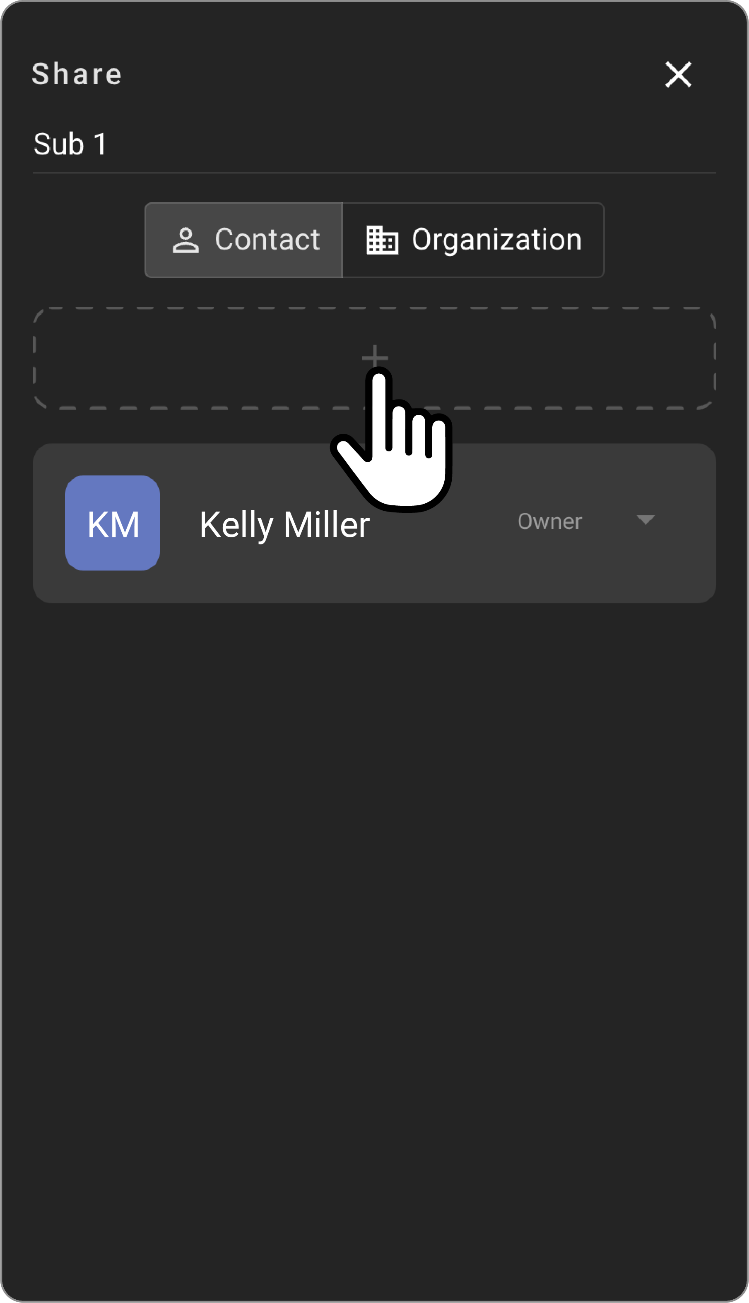
-
The Contact section will be selected by default. To share with a contact, click the + icon.
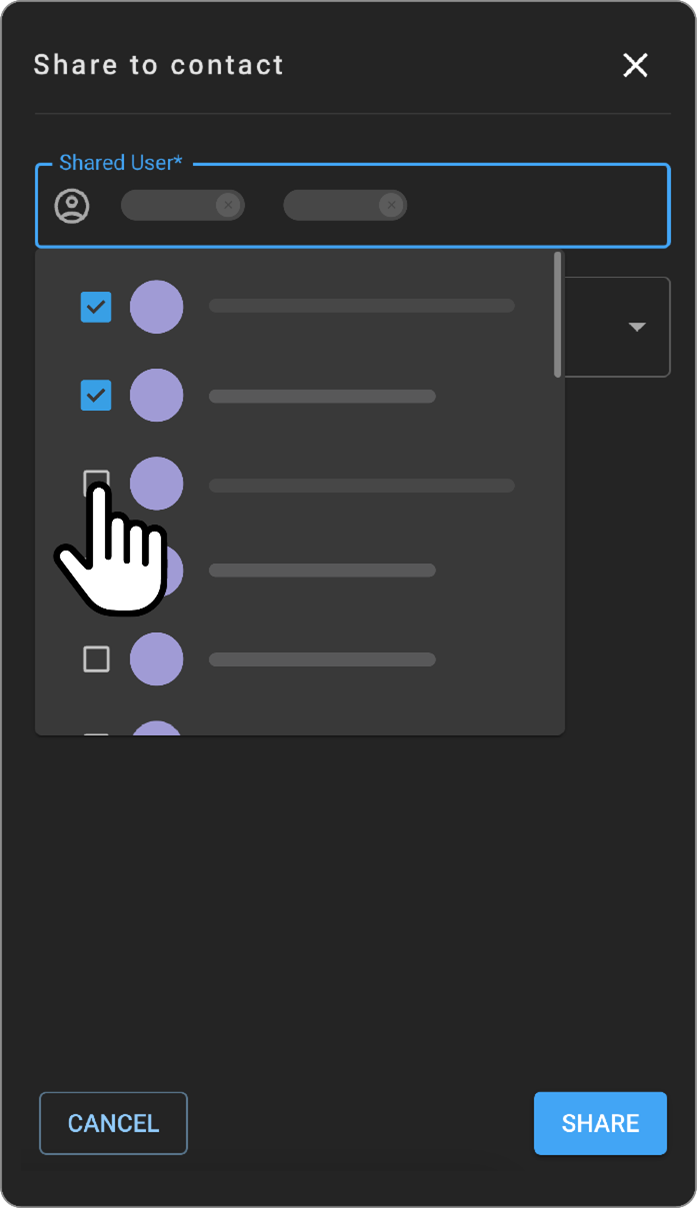
The Share to contact panel will appear.
-
In the Shared User* field, search for your contact by entering their user name, email and dropdown will appear, select your desired contact.
-
Via the Access field you can choose what permissions you allow the user to have when accessing your shared folder(s). Select Can view or Can edit.
Note: Can edit access allows users to add or remove studies and share the folder(s) with other users. While Can view only enables recipients to view the folder(s).
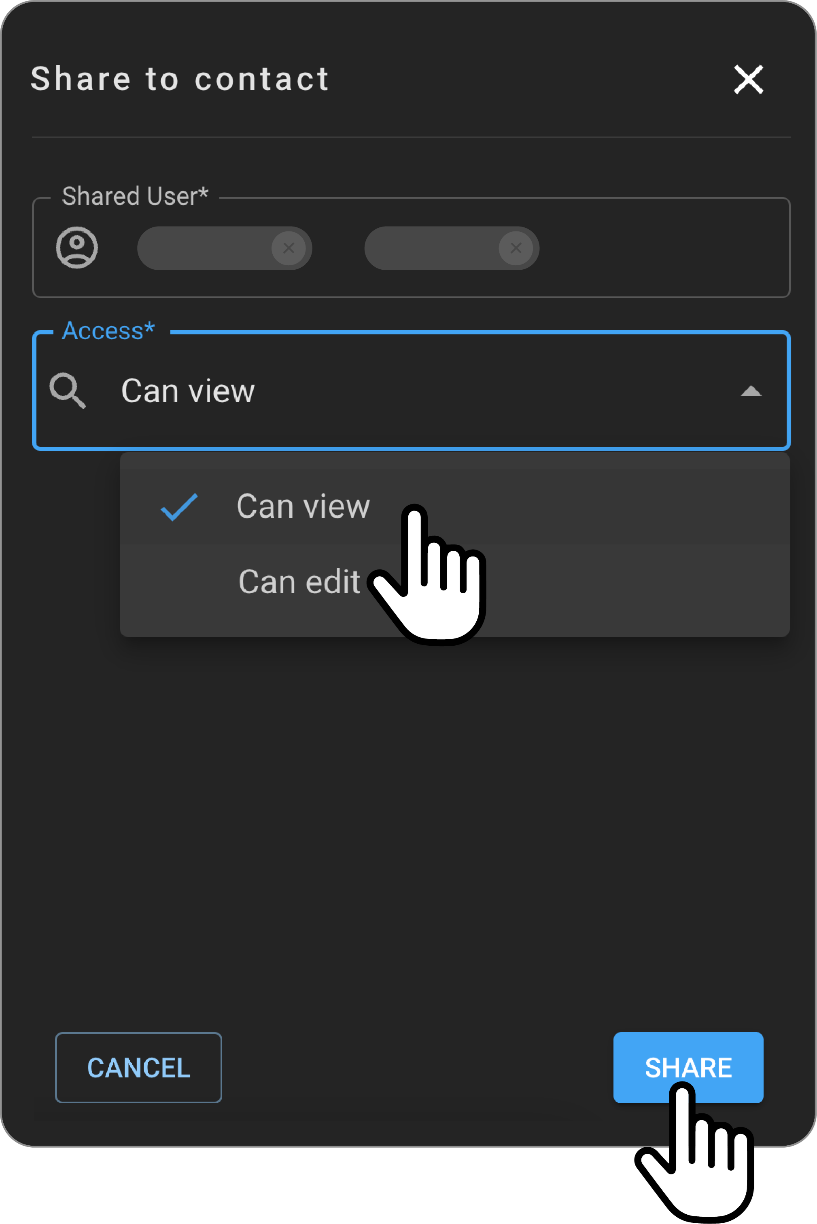
- Click SHARE to share the folder, or CANCEL to discard changes.
Sharing Folders with Orgaizations
-
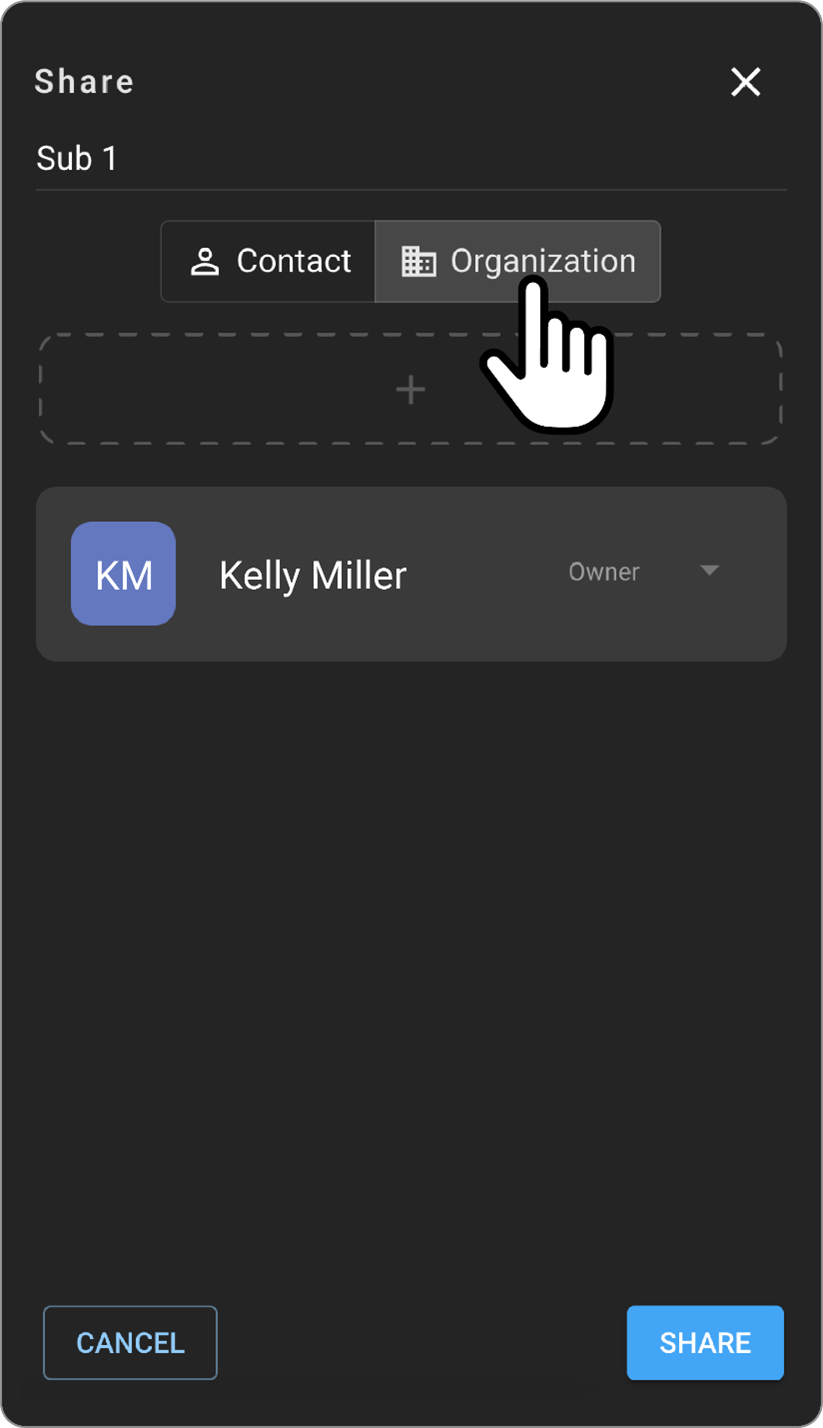
Click Organization from the Share panel.
-
Click the + icon. The Share to organization panel appears.
-
In the Shared Organization* field, search for the desired organization by typing its name (there is a search as you type functionality, thus you can select from the dropdown).

-
In the Access* field you will see there is only 1 permission available, Can view. As Organization-wide access is view-only by default. To grant edit access, users must be individually selected and given permissions.
-
Click SHARE to share the folder, or CANCEL to discard changes.
Other Functionalities
Teaching Folder retains all the functionalities of the worklist, including exporting, study count, and applying filters.
Note:
-
When a folder is shared, all its subfolders are also shared.
-
The studies saved in the folders are not duplicates; they are references to the studies on the main worklist. Any changes made to a study in the main worklist will reflect in the teaching folder.
-
Once permissions (Can view or Can edit) are granted, they do not expire or have a time limit. They can be changed or revoked by the user who shared the folder.