Link and Merge Patient Workflow
Linking associates related patient records across organizations. This allows radiologists to view studies from linked records while keeping the records themselves separate.
Merging consolidates duplicate patient records within the organization into a single record, transferring all associated orders and studies to the retained record.
In both cases, review the patient details on each record carefully before confirming the action to ensure the correct patient records are selected.
Accessing the Link & Merge Patient Panel
-
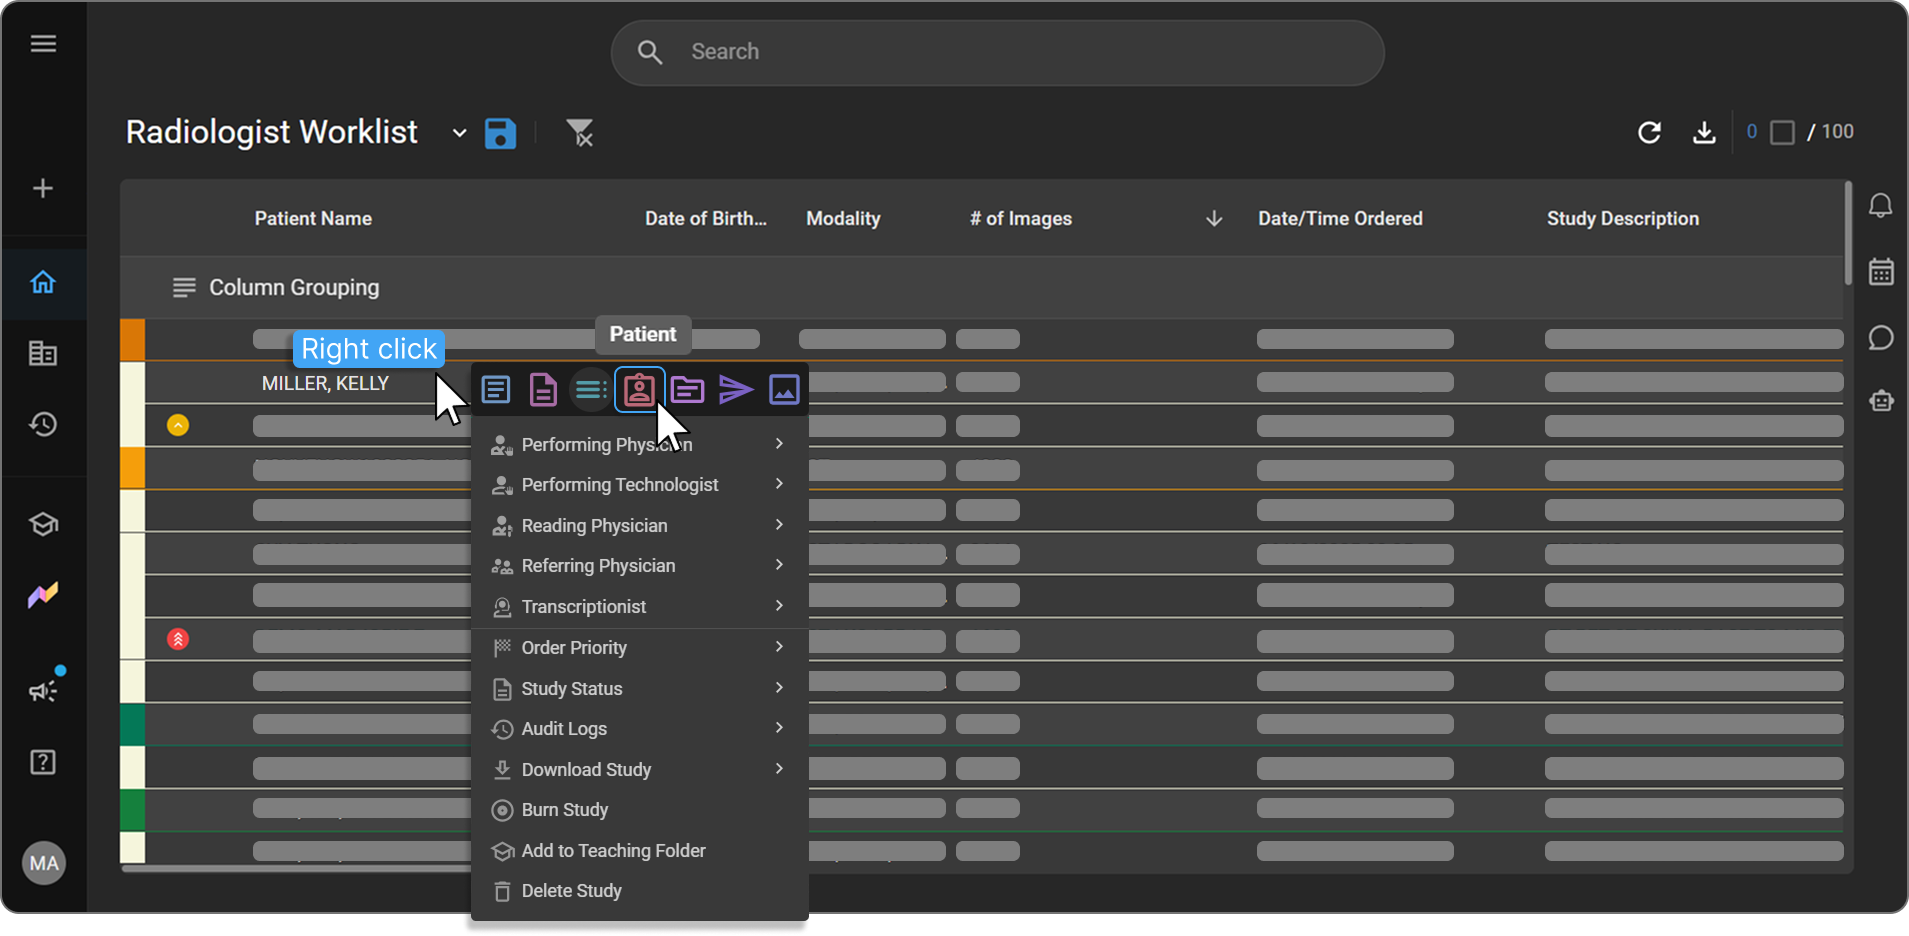
In the Worklist, right-click a study to open the context menu.
-
In the icon row at the top of the context menu, click the Patient icon to open the Patient Info page.
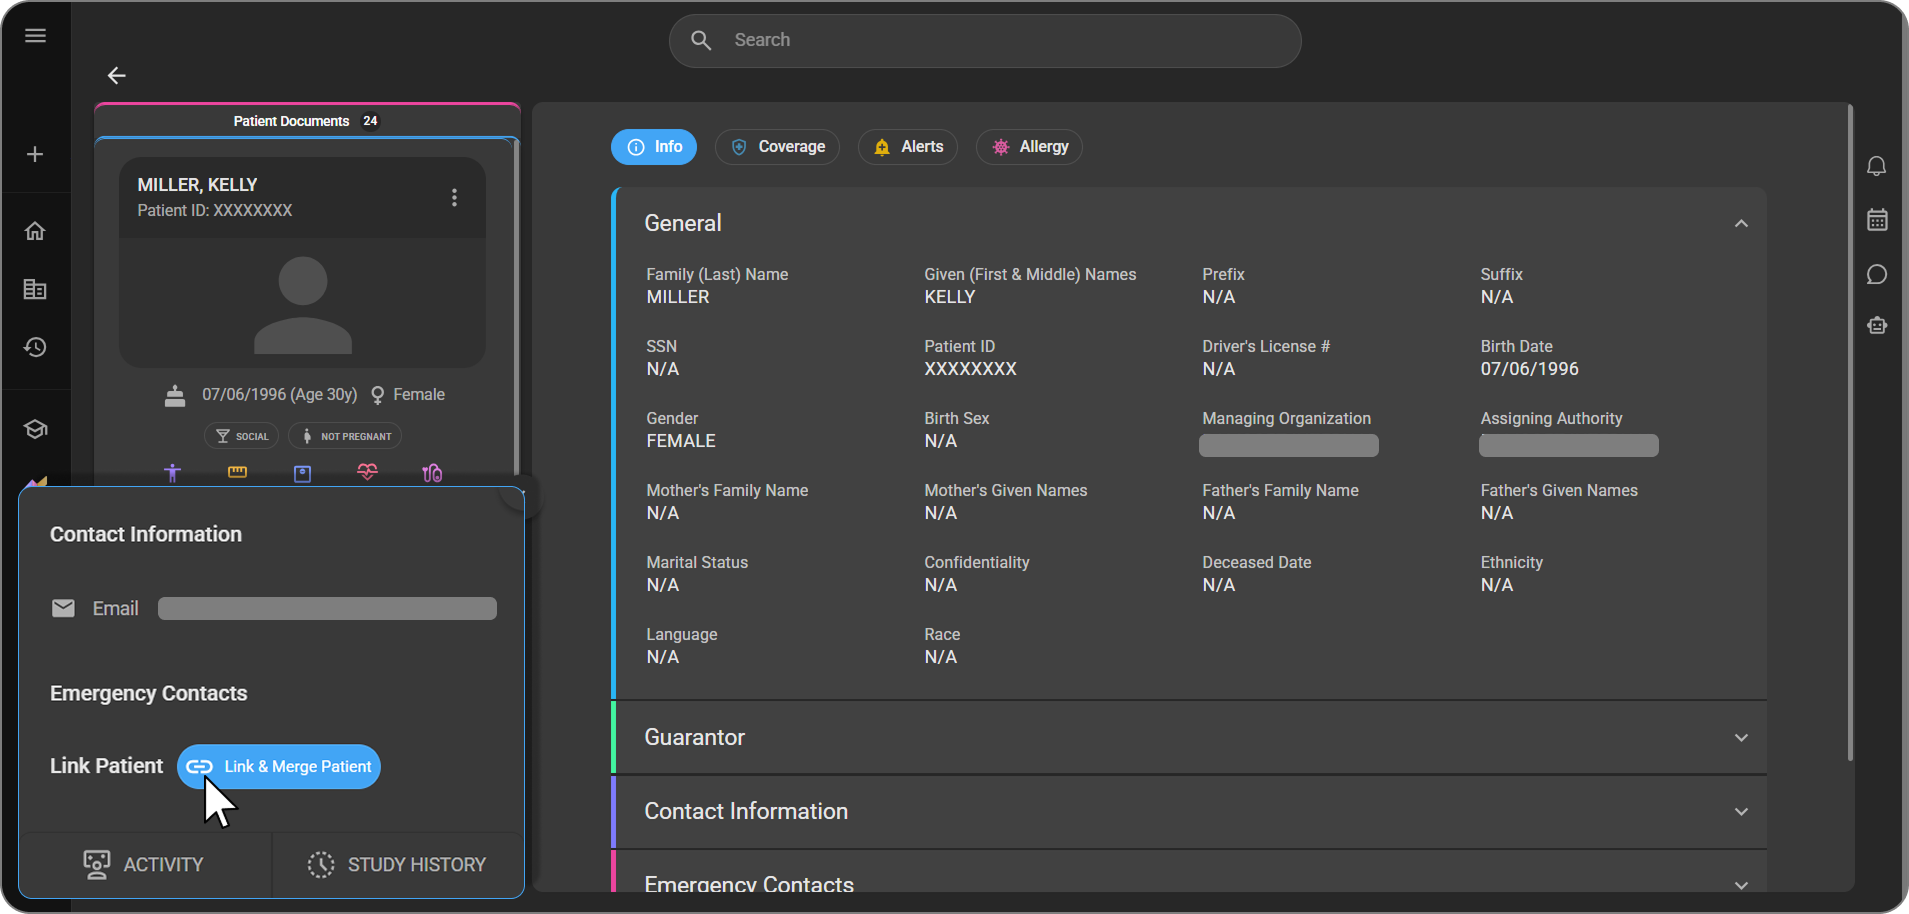
- In the Contact Information panel on the left-hand side of the Patient Info page, click Link & Merge Patient.
-
A search field appears in the same panel. Search for the patient record you want to link or merge.
-
As you type, matching patient records appear in a results table in the main content area, displaying details such as Patient Name, Gender, DOB, Phone Number, SSN, PID, Managing Org, and Address. Review these details carefully to confirm you have located the correct patient record.
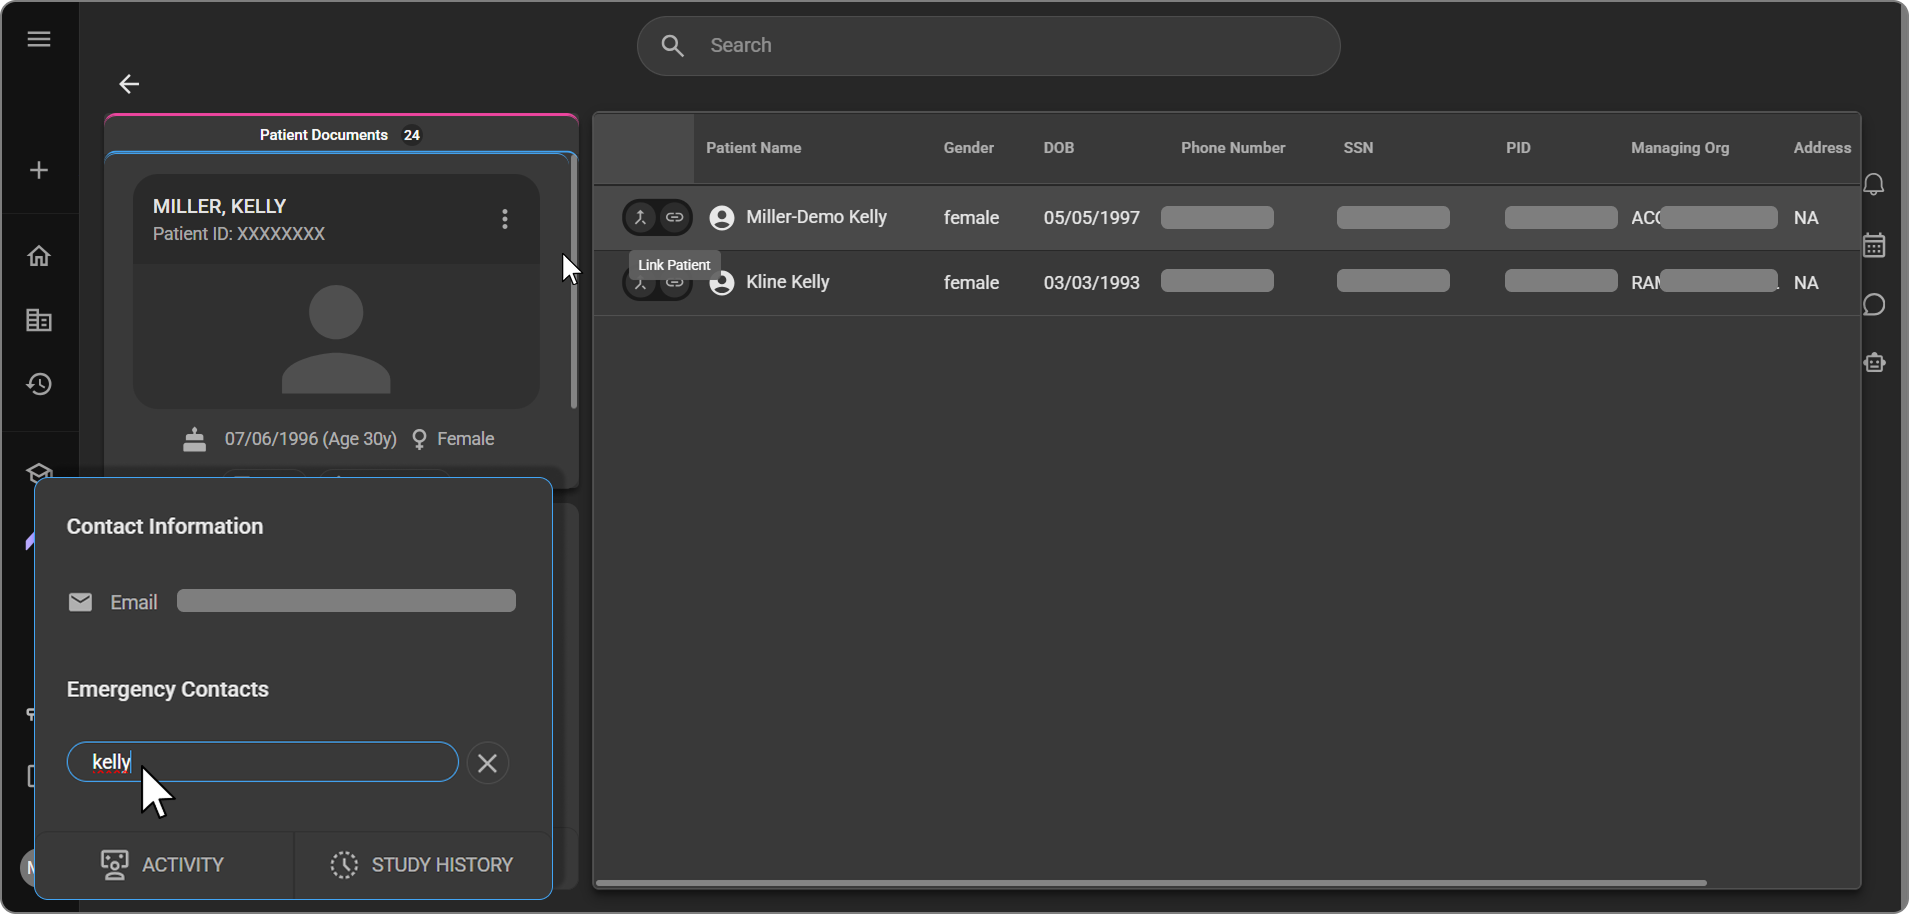
- Each row in the results table displays Link and Merge icons. Continue to Linking a Patient Record or Merging a Patient Record depending on the action you want to perform.
Linking a Patient Record
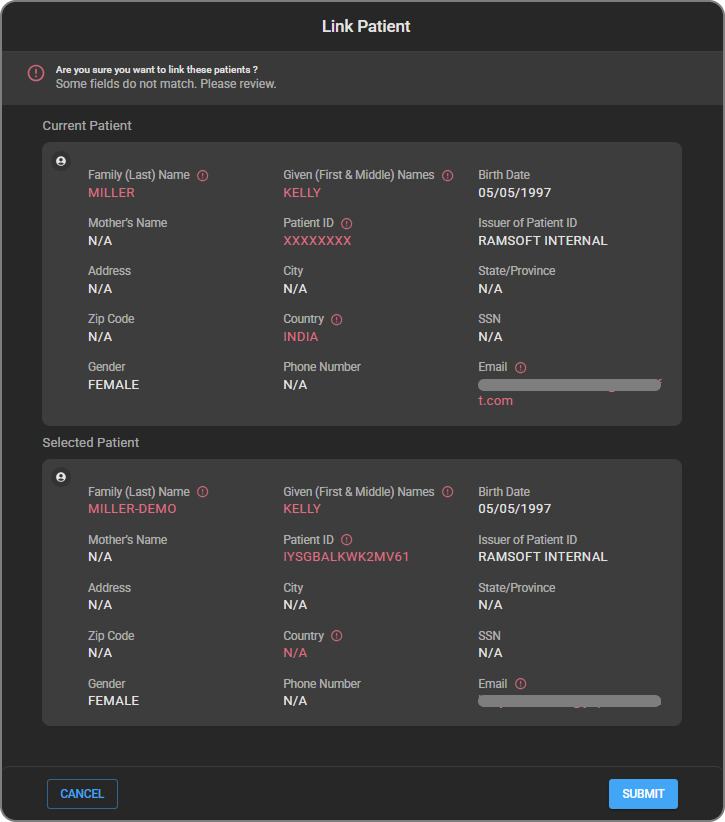
- In the results table, click the Link icon for the desired record to open the Link Patient screen, which displays the Current Patient (the original record) alongside the Selected Patient (the record to be linked).

-
If any fields do not match between the two records, a warning message prompts you to review them before proceeding:
- Fields that differ between the two records are shown in red.
- Fields that match are shown in white.
Review all fields carefully before linking.
-
The Link Patient screen provides a Close (X) icon at the top and Cancel and Submit buttons at the bottom. Clicking Close (X) or Cancel dismisses the screen without linking the records.
-
Click Submit to link the two patient records. Once linked, the linked record is created and reflected on the Patient Info page.
Display of Linked Patient Record on the Patient Info Page
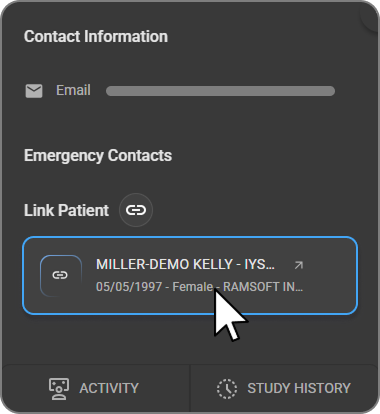
- Linked patient records appear as a card in the Contact Information panel, below the Link Patient heading.
-
Clicking a linked patient card opens the corresponding linked patient record.
-
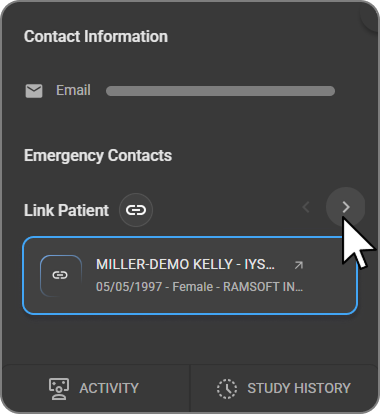
If more than one patient record is linked to the current patient, left and right arrows appear beside the Link Patient heading, allowing you to navigate between the linked patient cards.
Unlinking a Patient Record
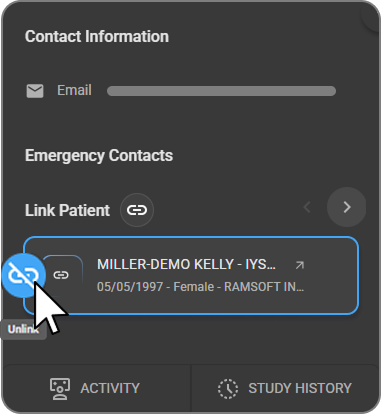
- Hovering over a linked patient card reveals an Unlink icon next to the existing link icon on the card. Clicking the Unlink icon unlinks the two patient records.
Merging a Patient Record
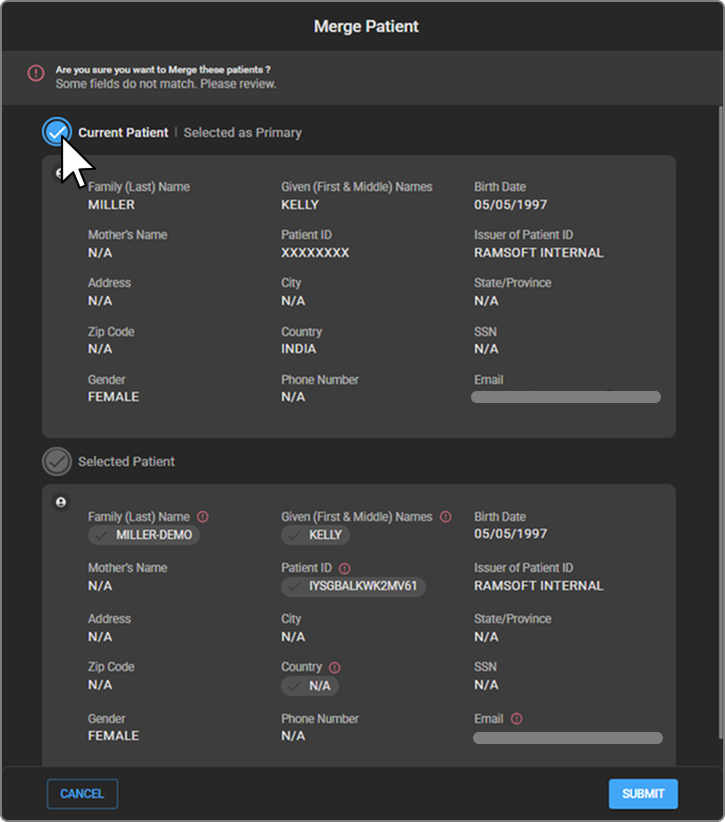
- In the results table, click the Merge icon for the desired record to open the Merge Patient screen, which displays the Current Patient (the original record) alongside the Selected Patient (the record to be merged).

-
A warning message asks you to confirm the merge and review any fields that do not match:
- Fields that differ between the two records are shown in red.
- Fields that match are shown in white.
Review all fields carefully before merging.
-
Click the checkmark next to Selected Patient to mark it as the Primary record. Once marked, "Selected as Primary" is displayed next to its name.
-
In the Current Patient card (now the secondary record), each field displays a checkmark that can be selected to bring that field's value into the primary record. Select the checkmark next to each field you want to override on the primary record or leave a field unselected to retain the primary record's existing value.
-
The Merge Patient screen provides a Close (X) icon at the top and Cancel and Submit buttons at the bottom. Clicking Close (X) or Cancel dismisses the screen without merging the records.
-
Click Submit to merge the two patient records. The updated details appear on the Patient Info page, along with a success toast message: "[Patient A] and [Patient B] have been merged."
Note: Once submitted, the patient merge cannot be undone.
Audit Log for Link and Merge Actions
Every patient link, unlink, and merge action is recorded in the Audit Log, allowing users with the necessary permissions to review this activity and take action if needed. To view this activity, filter the Audit Log by Subtype: link or merge.
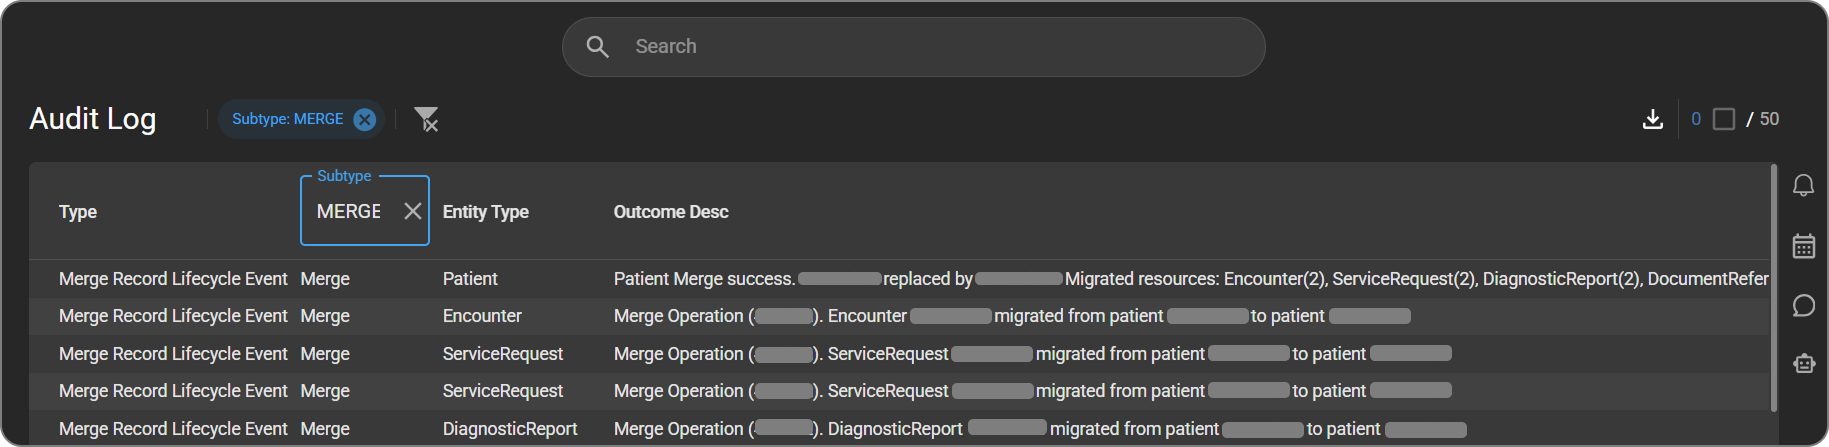
For details on accessing the Audit Log, its columns, and how to interpret outcome messages, see Logs.