Insurance Eligibility and Prior Authorization
Adding Payers to the Organization
-
Click Organization from the left navigation panel and open the required organization's details page.

-
In the Organization details page, click RIS to expand the menu and select Payers.

-
The Payers page opens, displaying the list of existing payers. From this page, users can add new payers, edit existing payers, or delete payers.
-
Click the + (Add) icon to add a new payer. The Create New Payer drawer opens.

-
Enter the Payer Name and other fields, including Payer ID, Payer Type, and Financial Type.
-
Fill in the Address and Contact Details as required.
-
Set the payer status to Active (default) or Inactive.
-
Click Create to save the payer.

- Once saved, the newly created payer appears in the Payers list.
Editing/Deleting a Payer Record
Follow the steps below to edit or delete a payer record:
-
Navigate to the Payers list page within the selected Organization.
-
Hover over the required payer record in the list to display the Edit and Delete icons.
-
Click the Edit icon to open the Edit Payer drawer.
-
Update the required payer details, including status, payer information, address, or contact details.
-
Click Update to save the changes. The updated information is reflected in the Payers list.

-
To delete a payer, hover over the payer's record and click and hold the Delete icon.

-
The payer record is removed and no longer appears in the Payers list.
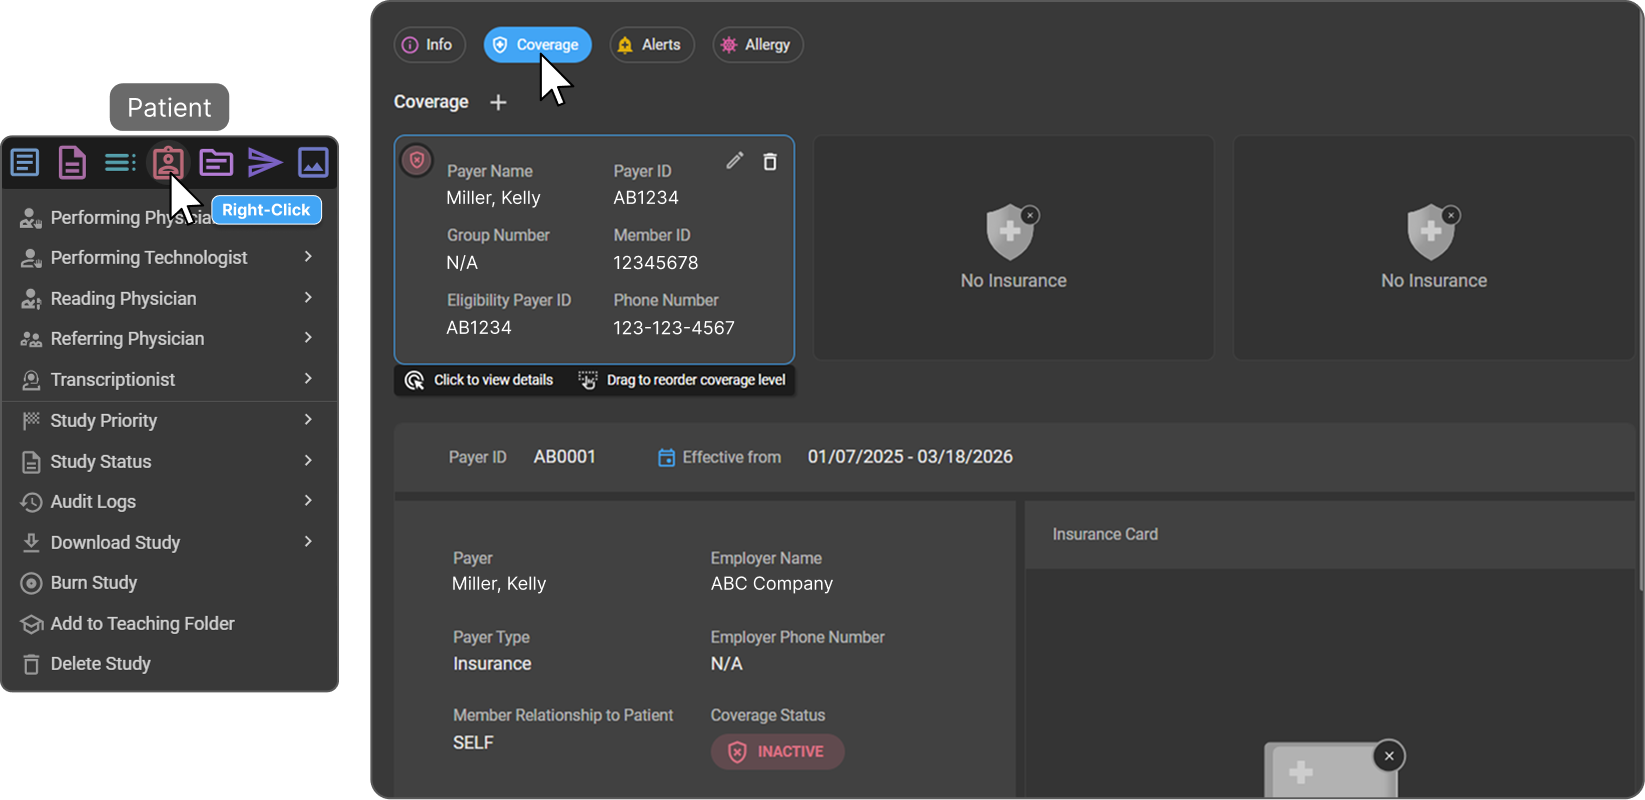
Adding Coverage for a Patient
-
Navigate to the Patient Info page and locate the Coverage section.
-
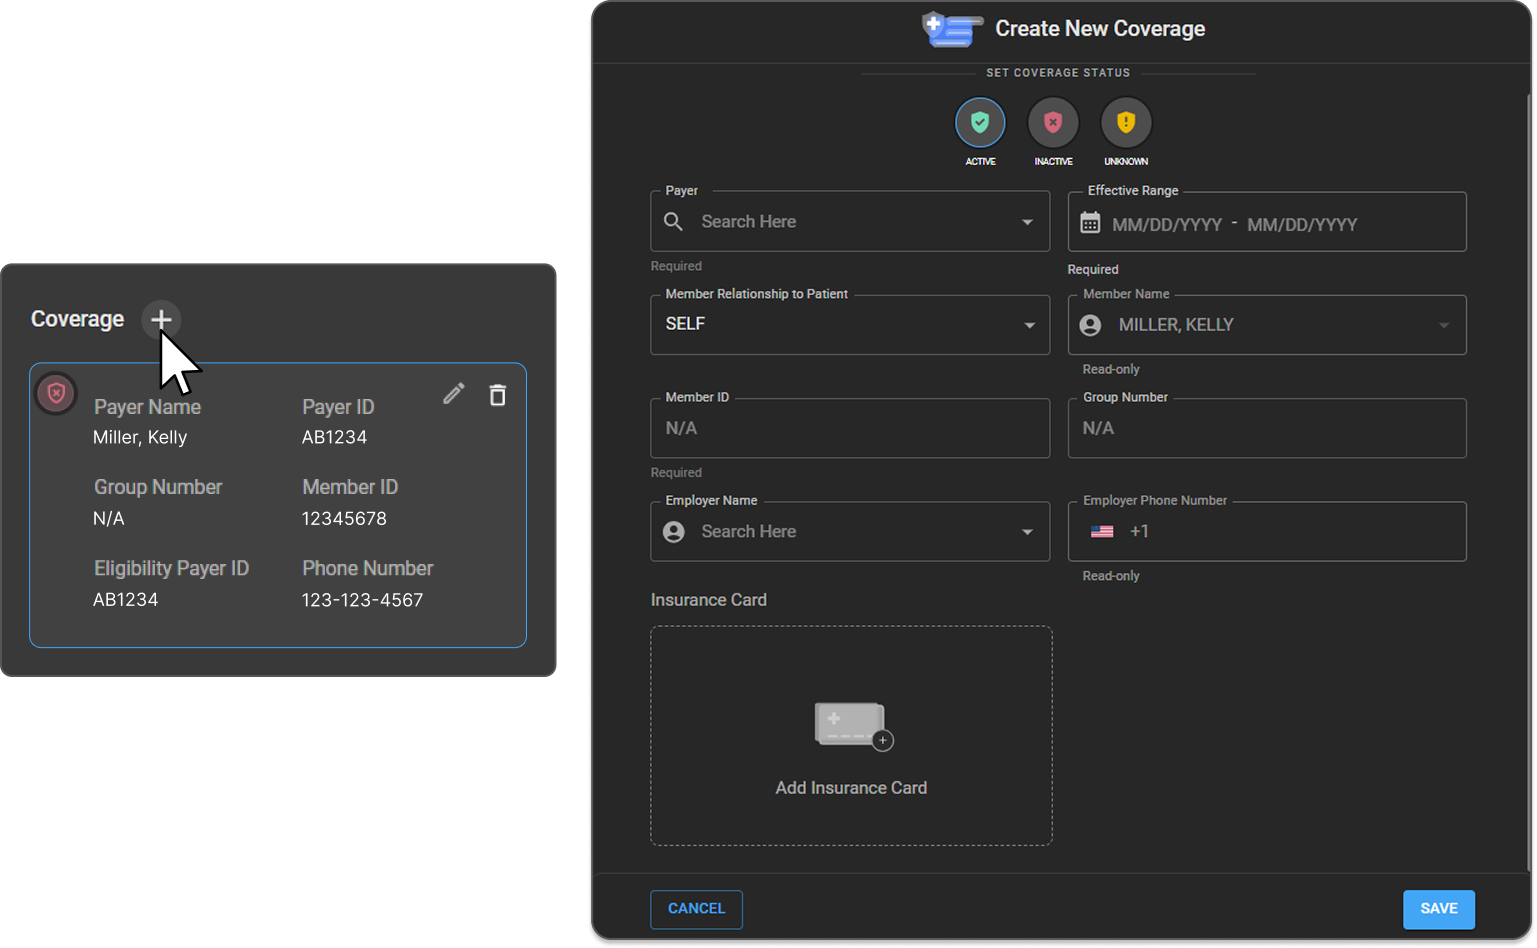
Click the + button to open the Create New Coverage drawer.
-
In the Payer Name field, search and select a payer from the list of payers added to the organization.
-
Set the Coverage Status at the top of the Create New Coverage page.
-
Enter the patient's coverage details, including the Coverage dates Effective Range.
By default, the Member Relationship is set to Self, and the Member Name is prepopulated with the patient's name.
-
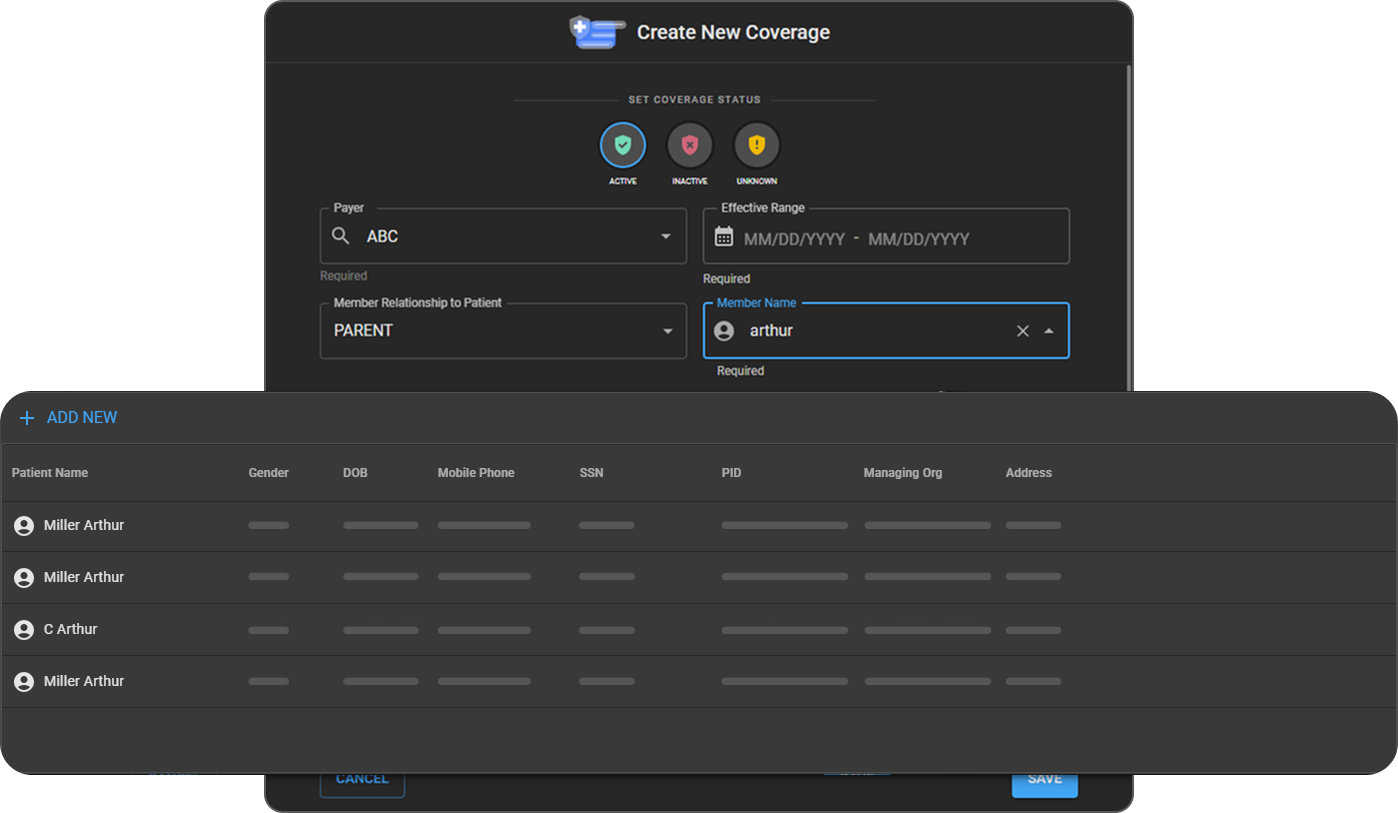
To changethe member, select a different relationship from the dropdown and search for the appropriate member.
-
If the required member does not exist in OAI, click Add New to create a new patient record for the member.

-
After creating the new member's record, select the relationship and populate the newly created member.
-
Enter the Member ID and Group Number details.
-
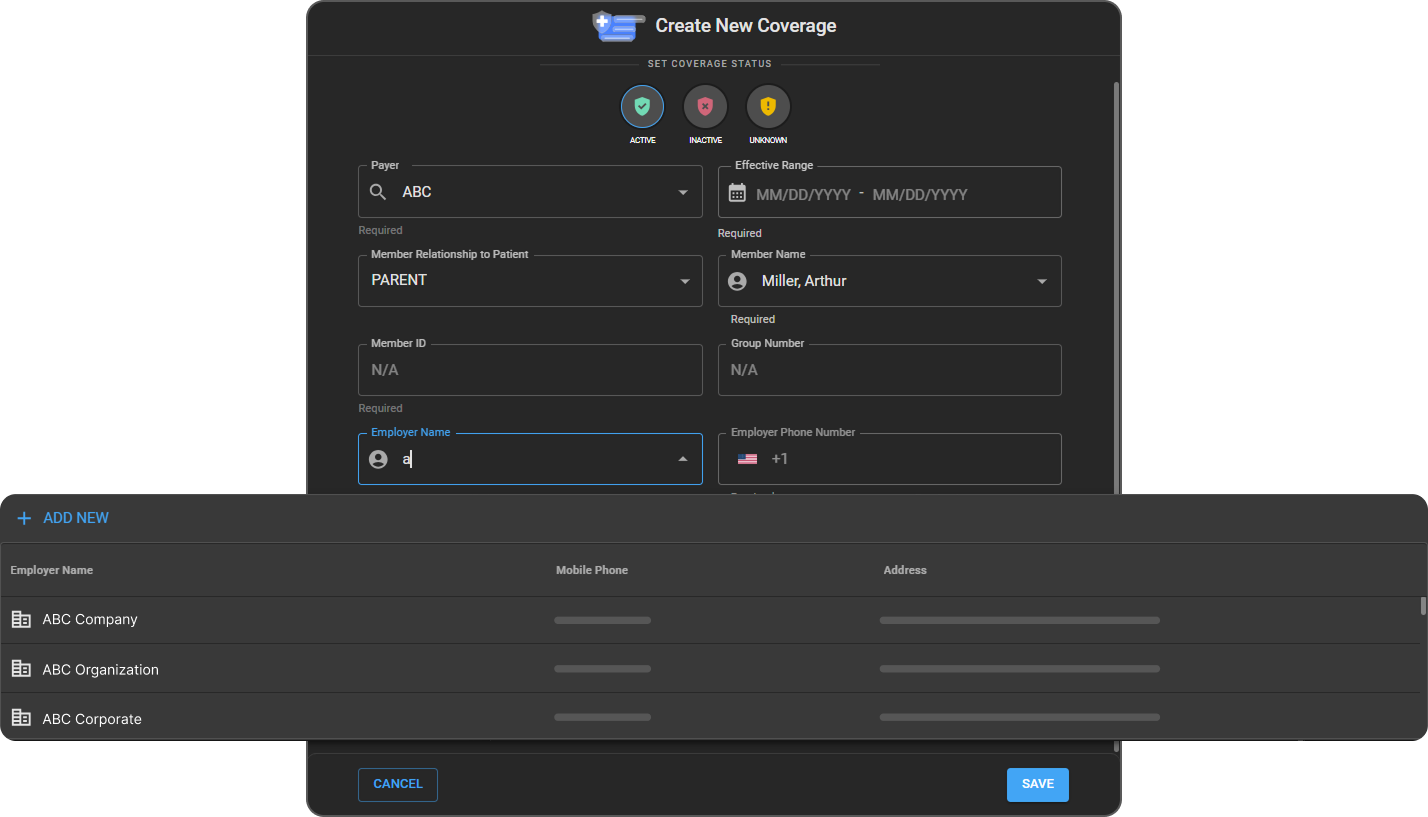
Select the Employer Name by searching from the list of employers in OAI.
-
If the employer does not exist, click Add New to create a new employer record and then select it.

-
Upload the member's Insurance Card image.
-
Click Save to store the coverage information.
Adding Prior Authorization to a Patient Study
-
Navigate to the Worklist, locate and open the required patient study.

-
From the patient study page, select Prior Authorization from the top-right corner of the screen.

-
The Prior Authorization drawer opens on the left side of the screen.

-
In the Prior Authorization panel, the patient's coverage information is displayed at the top.
-
Under Set Authorization Request, select the appropriate value that represents the current authorization status for the study:
-
Unknown
-
Not Required
-
Pending
-
Approved
-
Denied
-
-
Enter the authorization details:
-
Authorization Number
-
Authorization Start Date
-
Authorization End Date
-
Total Amount Due
-
-
Add Notes (optional) for remarks or additional context.
-
Review all entered information for accuracy.
-
Click Submit to save prior authorization.