Document Toolbar
Overview
The Document Toolbar, positioned at the top of document viewport, offers a set of tools designed to streamline the workflow for medical document management. This toolbar includes a variety of functions, from previewing documents to advanced voice dictation features, enhancing both the efficiency and flexibility of the document handling process.
Key Features and Functionalities
-
Preview Document:
- Allows users to view documents in their current state before making any further decisions or actions, ensuring accuracy and completeness. The eye icon of the toolbar offers capability for preview.
-
Proxy Sign:
- Enables a designated proxy user to sign documents on behalf of the primary user, facilitating collaborative and delegated workflows.
-
Adding Images and Text to Signature
-
Access Signature options in Document Viewer.
-
Incorporate Images: Click on the Signature box to import signature images directly from your computer.
-
Enhance with Text: click on signature box, signature text field appears. add text to proxy signatures for additional context or information.
-
Finalize Signature: Once satisfied with the signature click the Done button to complete the process.
-
-
Done Sign the Report:
- Finalizes the signing process for the current report, officially completing it. The tick mark symbol on the toolbar indicates Done.
-
Done Next Sign and Open Next Report:
- Signs the current report and automatically opens the next one, streamlining the review and approval process. The right arrow symbol indicates Done Next.
-
Augnito VR (voice to text):
-
Activates voice recognition technology for dictating content into reports, significantly speeding up data entry and reducing manual input errors. Human voice symbol indicates the Augnito VR.

-
-
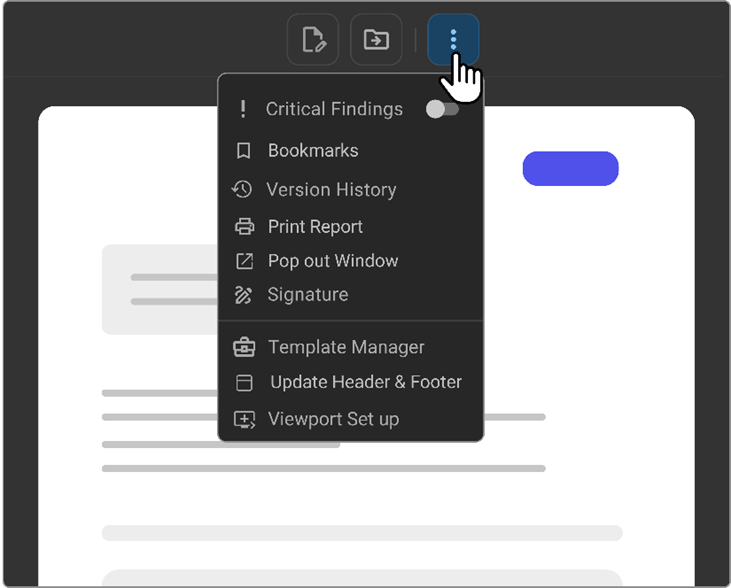
More options:
-
This menu extends additional functionalities:
-
Toggle Critical Findings: Allows users to mark reports that contain critical findings for immediate attention and follow-up.
-
Bookmarks: Provides quick access to saved bookmarks, which can include frequently used fields, picklists, and categories.
-
Version History: Keeps a log of all changes made to the report, supporting effective document management and audit trails.
-
Pop Out Window: Opens the current document in a new, separate window for enhanced focus or dual-monitor workflows. PDF documents open in a lightweight viewer with zoom, print, and download controls. Diagnostic reports open in the full Document Viewer.
-
Signature: Offers tools to add or customize digital signatures, and manage proxy signing permissions.
-
Template Manager: Aids in creating, editing, and publishing document templates to standardize report creation.
-
Viewport Setup: Customizes the settings of the document viewport to match user preferences or specific requirements for document display.
-
-
Step-by-Step Guide
Using Toolbar Features
-
Preview and Sign Documents:
-
Click on 'Preview Document' to review the document.
-
Use 'Proxy Sign' or 'Done' to sign the report. Select 'Done Next' to continue to the subsequent report without interruption.
-
-
Voice Dictation:
-
Activate 'Augnito VR' to begin voice dictation. This could be triggered by Philips SpeechMike record button, which is especially useful for lengthy documentation or when hands-free operation is needed.
Note: When using VR, you do not need to stay on the document editor page, as the system will continue to convert your voice to text and add it to the report.
-
Study/Report Sharing – Document Viewer
- Open the Document Viewer from the Worklist.
- Select the Final Report from the left panel — a Share icon will appear in the top-right corner of the page.
- Click the Share icon.

The Send panel opens on the right with two tabs: Send Reports and Send Study.

For full details on sending reports and studies, see Study/Report Share – OmegaAI in Advanced Topics.