Template Management
Overview
The Template Manager in OmegaAI allows medical professionals to create, manage, and publish structured report templates. Templates define the layout, sections, and placeholder fields that auto-fill when a report is generated — streamlining documentation and ensuring consistency across reports.
Accessing the Template Manager
To open the Template Manager in OmegaAI:
-
Open a study in the Document Viewer.
-
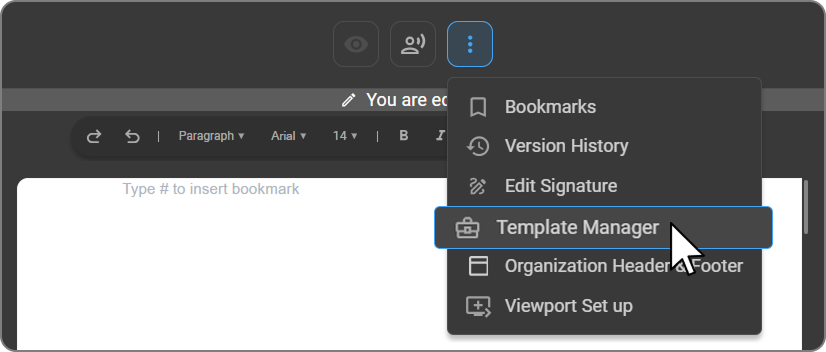
Click the three-dot menu located above the document viewport.
-
Select Template Manager from the dropdown list.
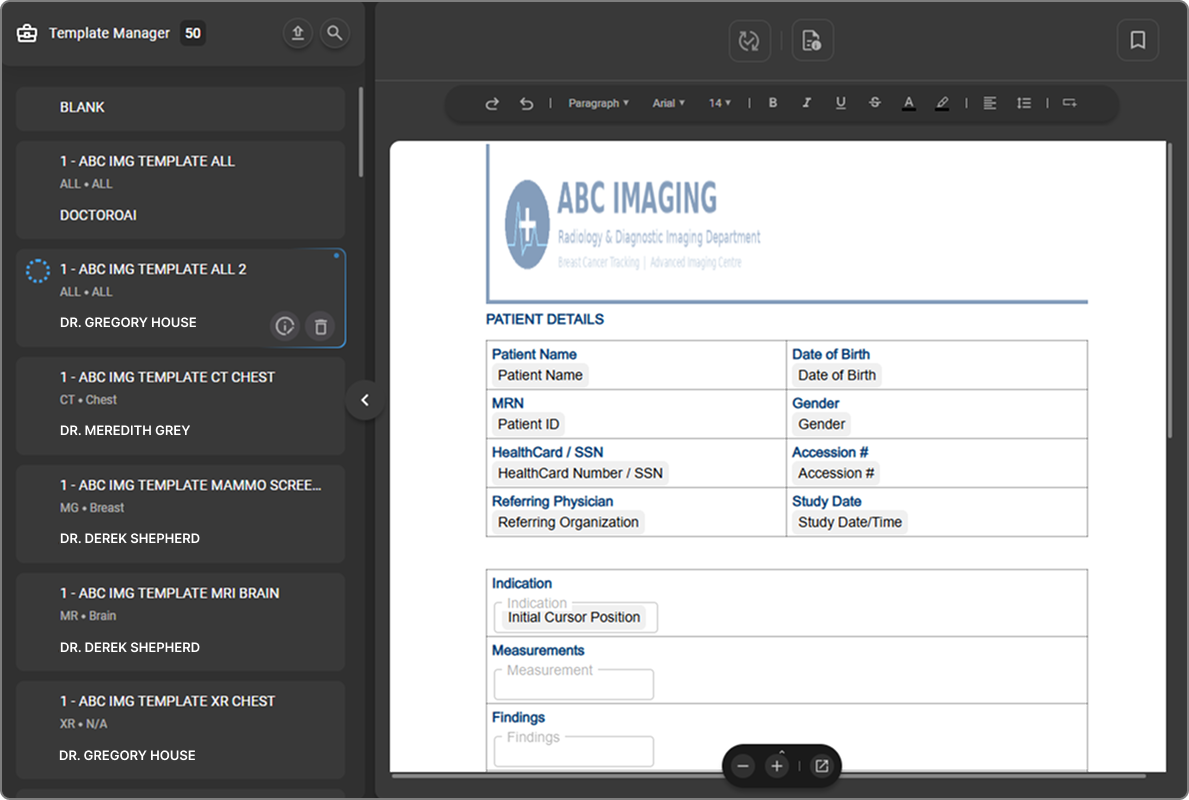
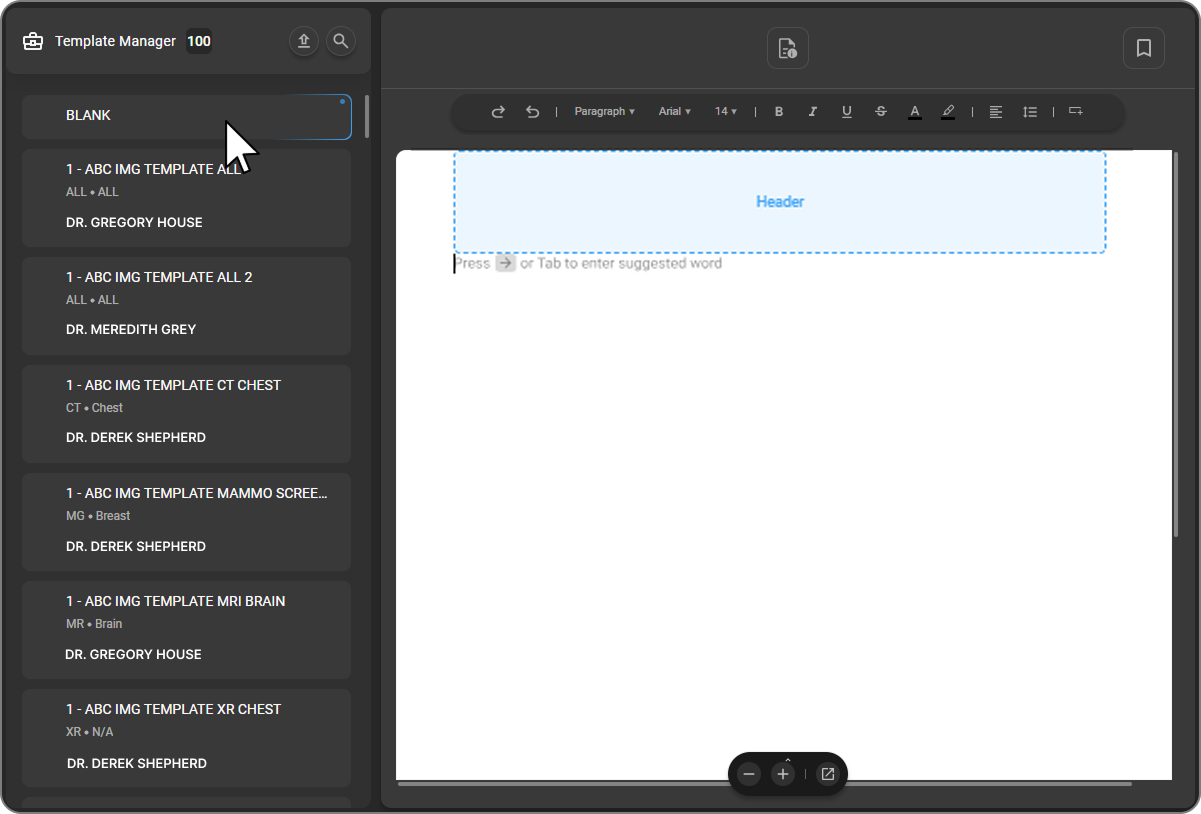
The Template Manager panel opens on the left, displaying all available templates.
Template Explorer
| The count badge next to "Template Manager" shows the total number of templates available. Each item in the list shows the template name, modality (e.g. ALL, CR, MR, CT), body part, and the owner's name below. The currently selected template is highlighted with a blue left border and opens in the editor on the right. Hovering over a template card displays a live preview of the template. | 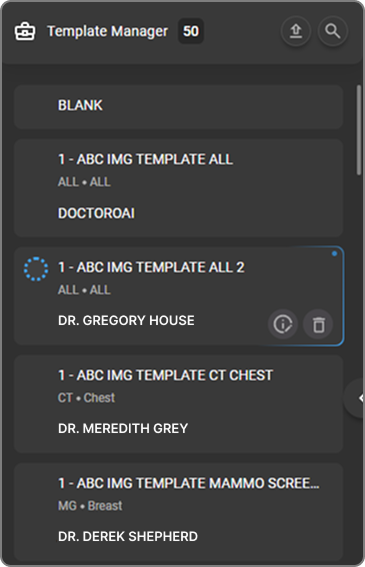 |
| Searching Templates — Click the search icon at the top of the sidebar to search for a template by name. Results update as you type. | 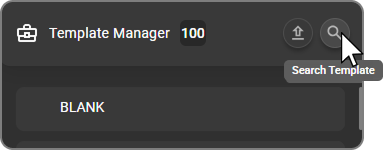 |
| Renaming a Template — Hover over a template card to reveal the action icons, then click Edit. The template name becomes an inline editable field — type the new name, then click the checkmark to confirm or ✕ to cancel. | 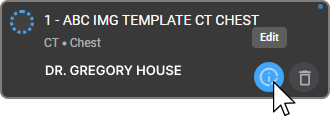 |
| Deleting a Template — There are two ways to delete a template: Single delete — hover over a template card to reveal the trash icon, then hold it to delete. Bulk delete — select multiple templates using the checkboxes, then click the trash icon in the bottom action bar. The bar shows the count of selected items (e.g. 2 Items) and a ✕ button to clear the selection. Deleting a template is permanent. It does not affect reports already generated from that template. | 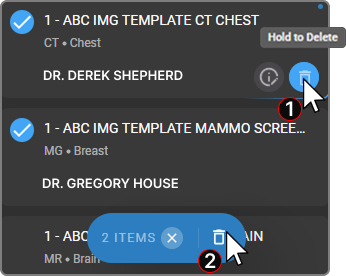 |
Creating a Template
There are two ways to create a template in OmegaAI:
Method 1: Upload a Template
Upload an existing template file in .pdf or .docx format. This is useful when you already have a structured report layout ready to import.
There are two ways to upload:
| Option A: Click the Upload button — Click the Upload Template icon at the top of the Template Manager sidebar, then select your .pdf or .docx file from your computer. | 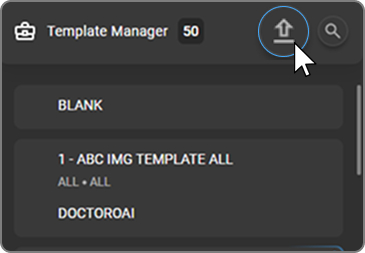 |
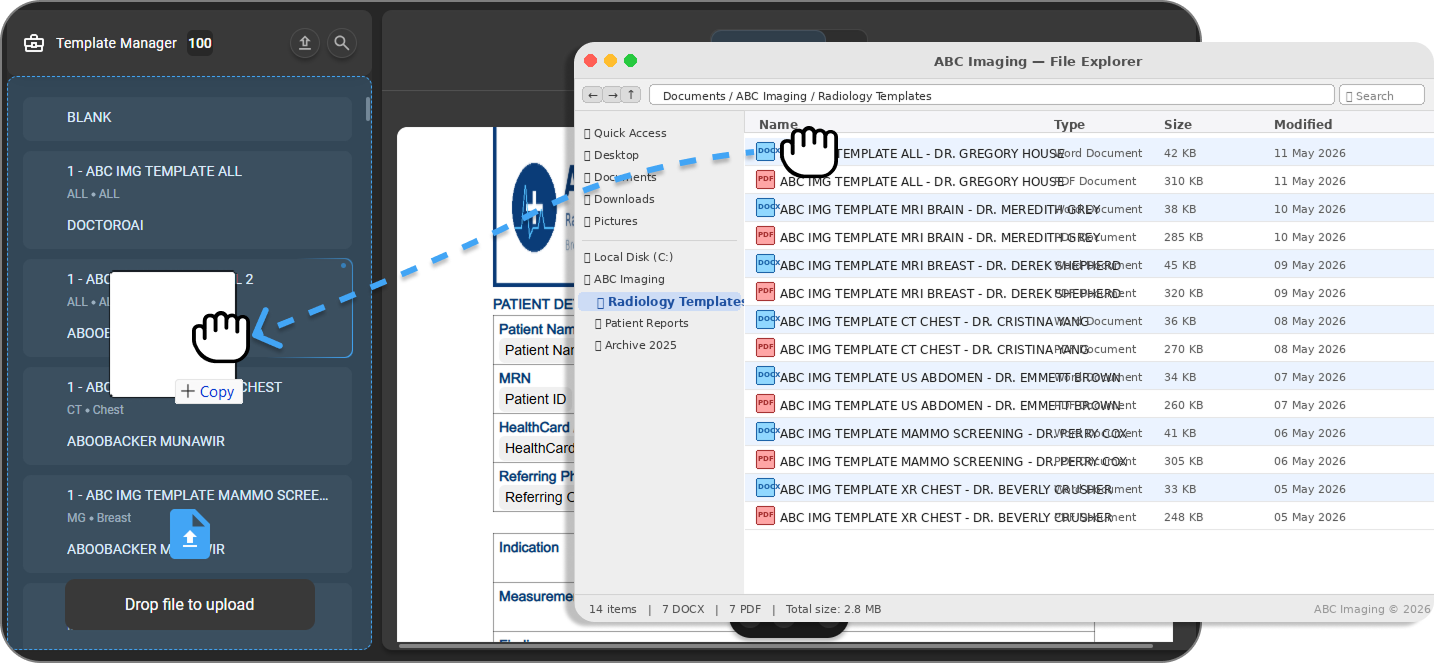
Option B: Drag and drop**.** Drag your .pdf or .docx file from your computer and drop it onto the "Drop file to upload" area at the bottom of the sidebar.
In both cases, an upload progress notification appears at the bottom of the screen. Once complete, a confirmation toast displays "Uploaded," and the template automatically opens in the editor, ready for editing.
Tip: Not sure where to start? Use an existing Word or PDF report as your upload — it gives you a ready-made structure to build on rather than starting from scratch.
Method 2: Start with a Blank Template
Select Blank from the template list as a starting point. The blank template opens with three distinct areas:
-
Header — hover over the top area to reveal and edit the header. Use this for facility name, logo, report title, or other information that should appear on every page.
-
Body — the main content area. The hint "Type # to insert bookmark" is shown here as a guide. Add your report sections, text, and bookmarks in this area.
-
Footer — hover over the bottom area to reveal and edit the footer. Use this for page numbers, disclaimers, or contact details.
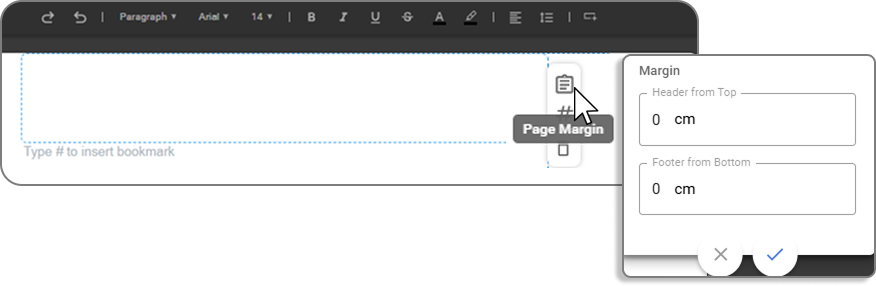
Click directly on the Header or Footer area to start editing it. A small action panel appears on the right side with three options:
-
Page Margin — opens a margin panel where you can set the Header from Top and Footer from Bottom distances in centimetres (cm).
-
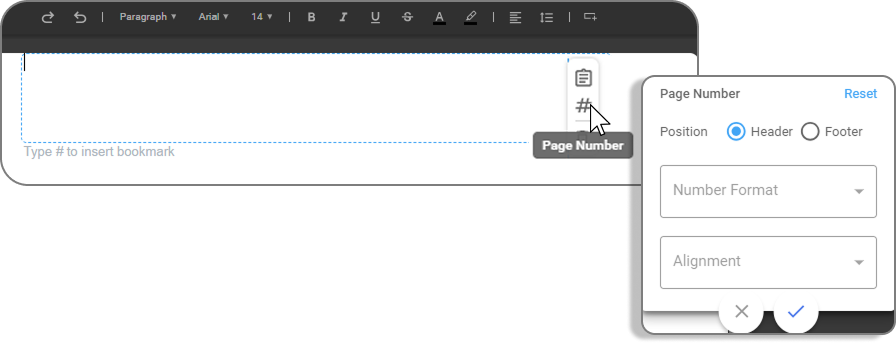
Page Number — opens a panel to configure the page number. Set the Position (Header or Footer), Number Format (e.g. 1 of 1), and Alignment (e.g. Right). A Reset option is available to restore defaults.
-
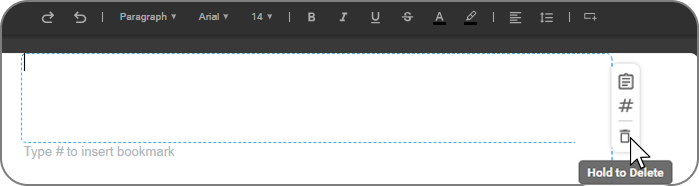
Delete — hold to delete the header or footer from the template.
Step 1: Format the Document
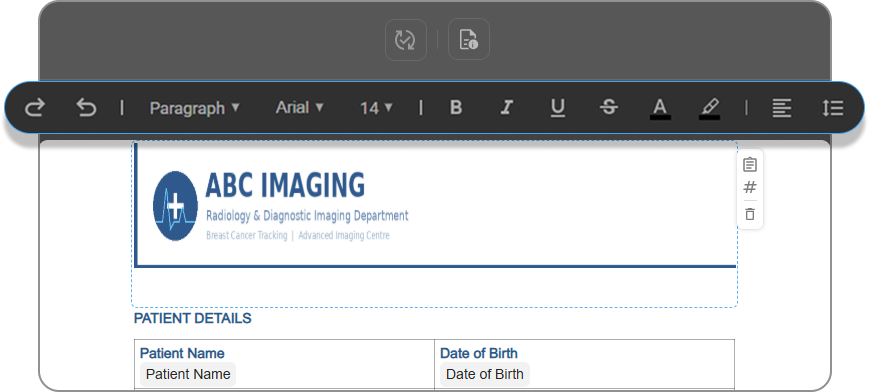
Use the document toolbar at the top of the editor to format text — adjust font style, size, and colour, or insert images and tables to structure the content. You can also right-click within the document to access the same formatting options.
Learn more about toolbar features →
Step 2: Add Bookmarks (Placeholders)
Bookmarks are placeholders that get auto-filled when a report is generated. There are two ways to add them:
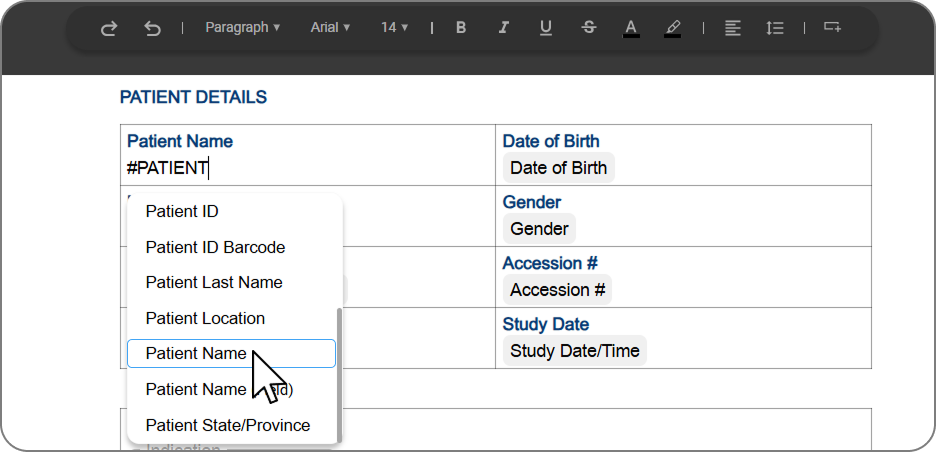
Method 1: Type # in the editor
Click anywhere in the document body and type # followed by the bookmark name (e.g. #patient). A dropdown list of matching bookmarks appears — select the one you need to insert at the cursor position.
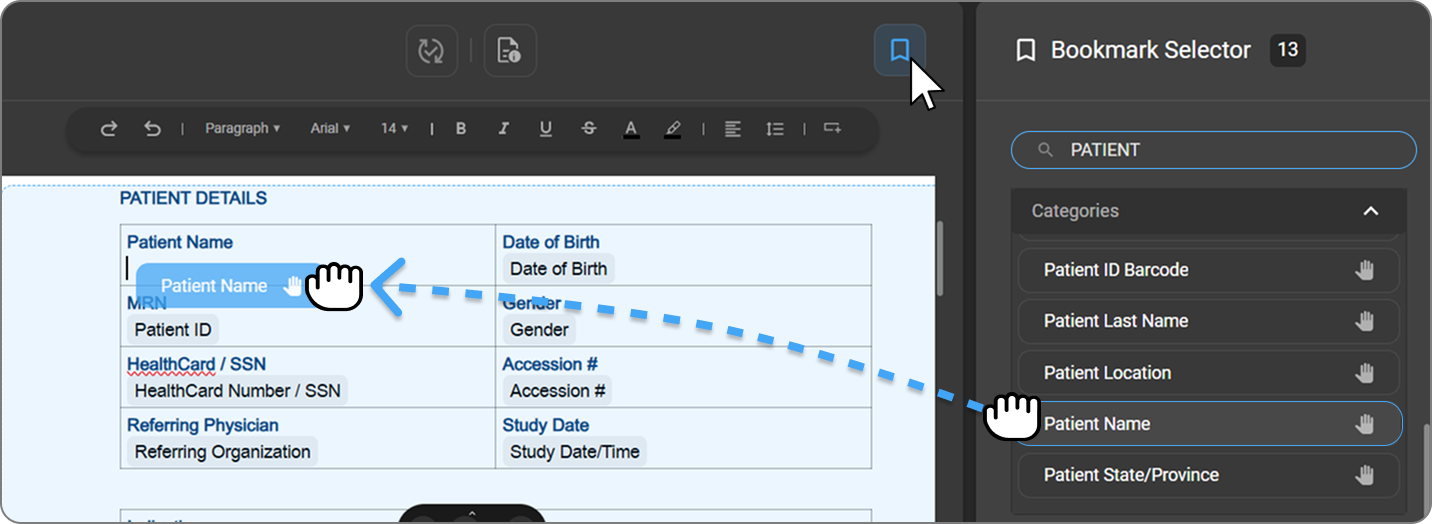
Method 2: Drag and drop from the Bookmark Selector
Click the bookmark icon in the top toolbar to open the Bookmark Selector panel on the right.
You can search for a bookmark by name and browse by category. Drag any bookmark from the panel and drop it into the desired position in the document.
Bookmark Types
| Type | Description | Examples |
|---|---|---|
| Picklists | Choose one value from a predefined list when the report is filled in | yes/no, right/left/both, normal/abnormal, none/mild/moderate/severe, positive/negative, cystic/solid/complex |
| Fields | Pre-built text blocks and report sections that insert structured content | Findings, Impression, Indication, Description, Measurement, Disclaimer |
| Categories | Auto-populated data pulled directly from the patient record and order via DICOM and FHIR | Patient Name, Date of Birth, Accession #, Study Description, Referring Physician, Date/Time Ordered |
For a full list of supported Category bookmarks and their descriptions, see Bookmarks reference.
Creating Custom Picklists and Fields
Custom Picklists
-
Click the ⚙ icon next to Picklists in the Bookmark Selector to open the Customized Picklist panel.
-
To create a new one, click the + button.
-
In the Create New Picklist form: -
-
Enter a List Name (required)
-
Click + to add options to the list.
-
Hover over an item to reveal the pin icon, then click it to set that item as the default selection.
-
Use the trash icon to remove an item.

Custom Fields
-
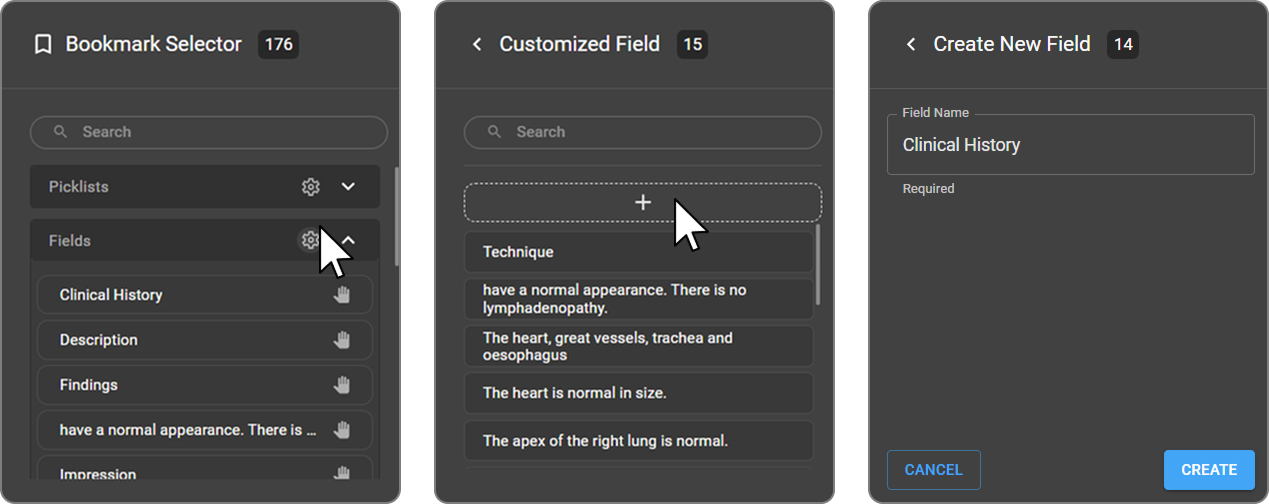
Click the ⚙ icon next to Fields in the Bookmark Selector to open the Customized Field panel.
-
To create a new one, click the + button.
-
In the Create New Field form: - Enter a Field Name (required), e.g. Clinical History, Technique, Disclaimer.
-
Click Create to save or Cancel to discard.
Managing Custom Picklists and Fields
All existing picklists and fields are listed in their respective panels and can be searched. Hover over any item to reveal two options: -
| - Edit (pencil icon) — update the name. - Delete (trash icon) — permanently remove the item. | 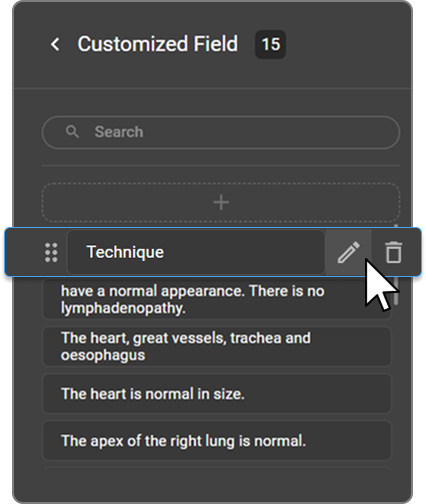 |
Once created, your custom Picklists and Fields appear in the Bookmark Selector and can be inserted into any template or report.
Initial Cursor Position
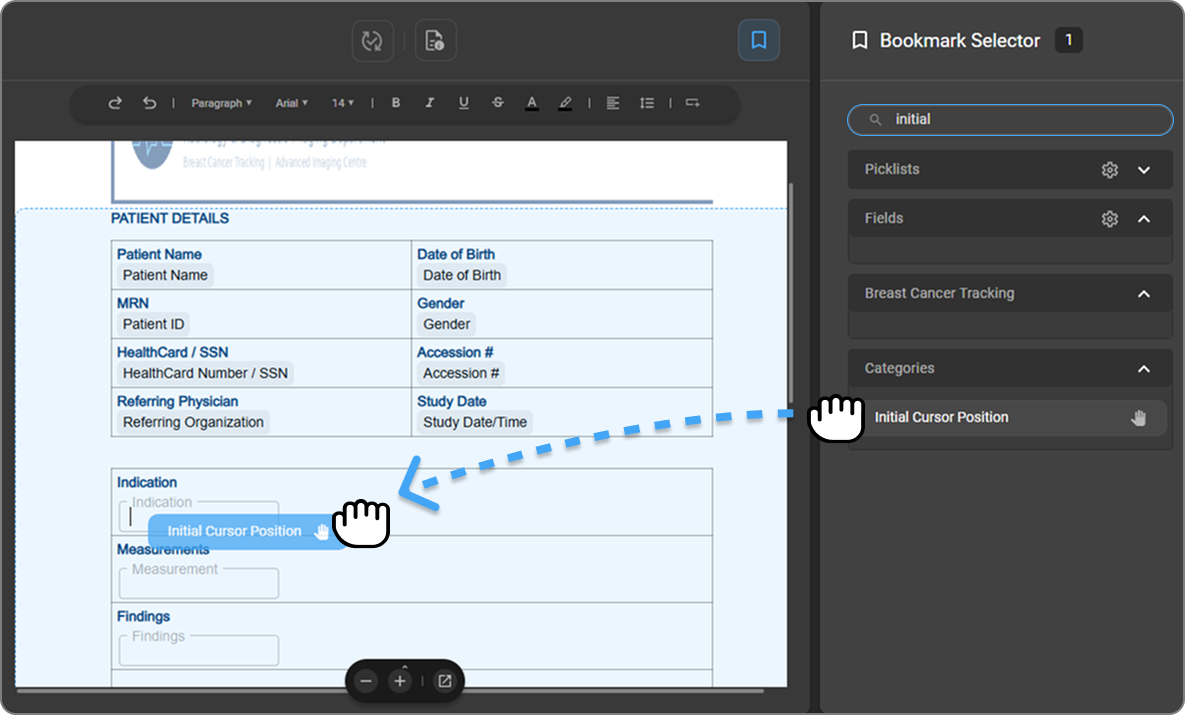
The Initial Cursor Position is a special bookmark found under Categories in the Bookmark Selector. It defines where the cursor lands the moment a report is opened for editing — guiding the radiologist straight to the first field that needs input.
If this bookmark is not placed in the template, a warning appears when publishing: "No Initial cursor position bookmark found!"
To add it, type # in the document body and start typing Initial Cursor Position, then select it from the dropdown, or search for it in the Bookmark Selector under Categories and drag it into the desired starting location.
HealthCard Number / SSN Bookmark
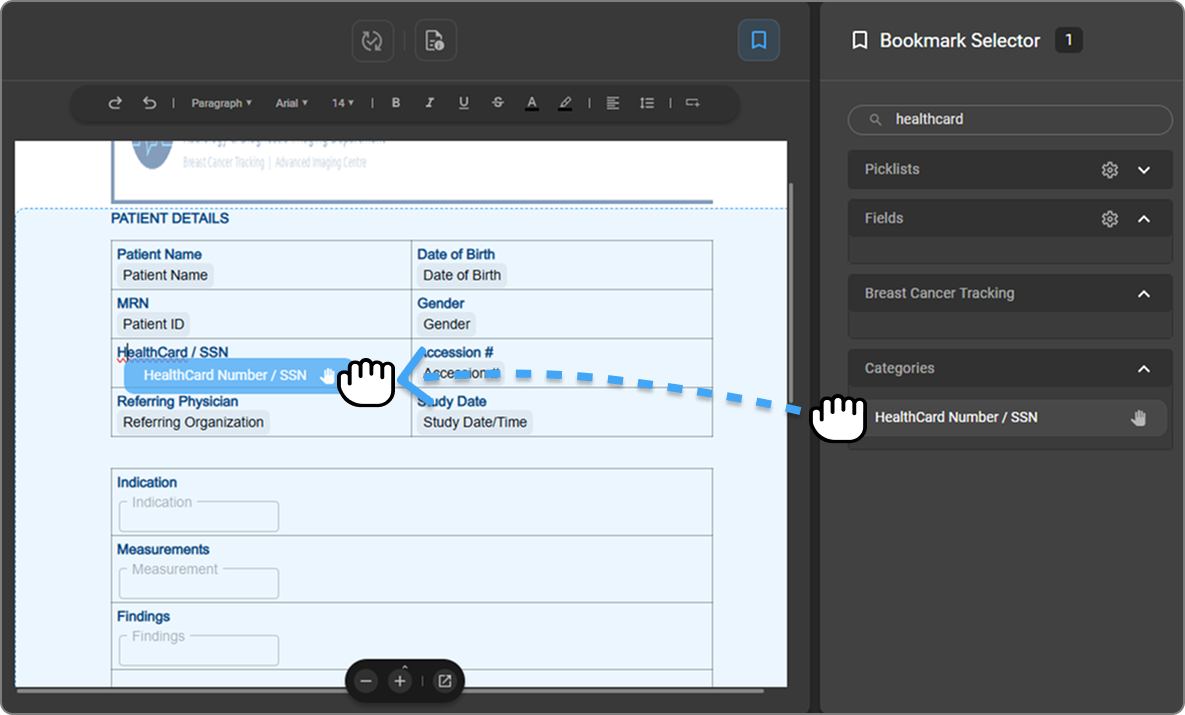
The HealthCard Number / SSN bookmark is available under Categories in the Bookmark Selector. It auto-populates the patient's government-issued health identifier — resolving to either the HealthCard Number (Canadian provincial health insurance ID) or SSN (US Social Security Number), depending on the entity type and region.
To add it, type #HealthCard Number/SSN in the document body and select HealthCard Number / SSN from the dropdown, or search for it in the Bookmark Selector and drag it into the desired position.
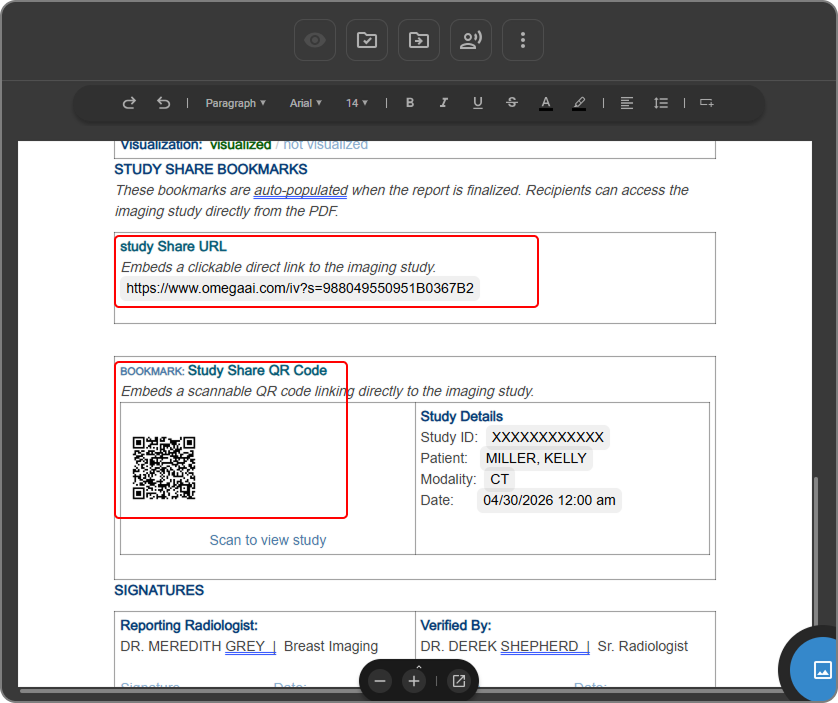
Study Share URL and Study Share QR Code
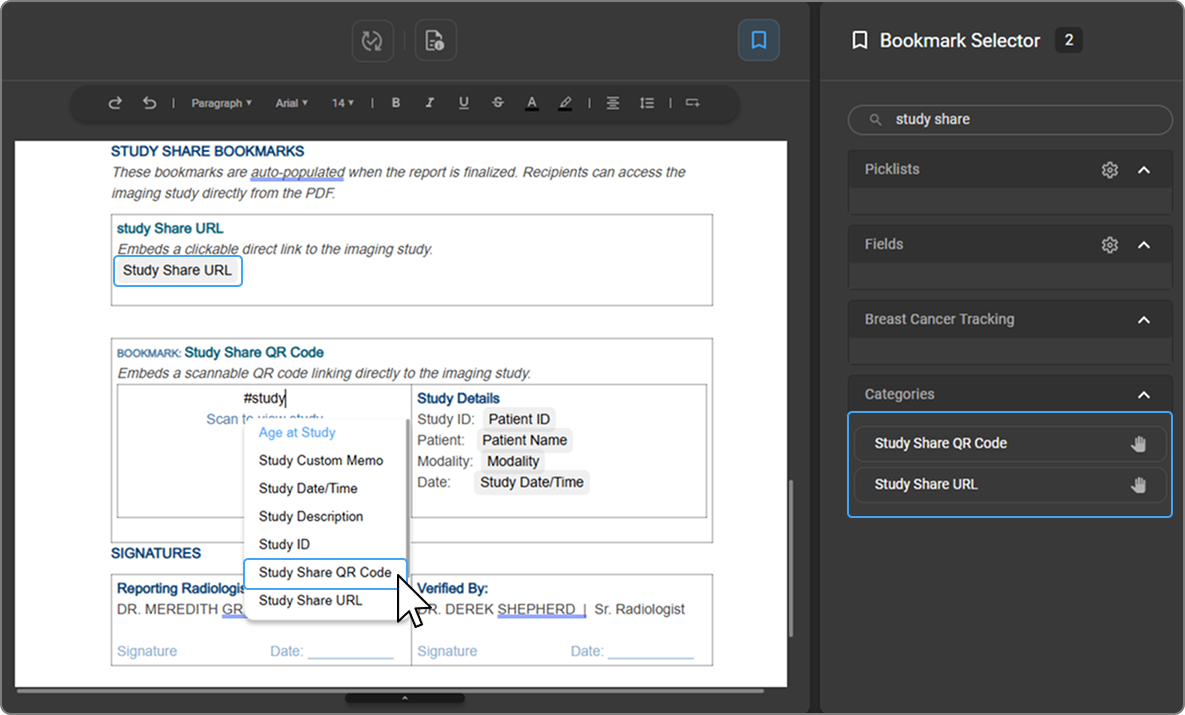
The Study Share URL and Study Share QR Code bookmarks allow you to embed a direct link to the imaging study within the report. When the report is finalized, recipients can access the study directly from the PDF.
To add them, type #Study Share in the document body and select Study Share URL or Study Share QR Code from the dropdown, or search for them in the Bookmark Selector and drag them into the desired position.
How It Works
-
The Study Share URL appears as a clickable link in the report. Clicking it opens the study in a new tab.
-
The Study Share QR Code is scannable once the report is finalized and saved as a PDF.
-
Both the URL and QR code open the study link in a new browser tab.
-
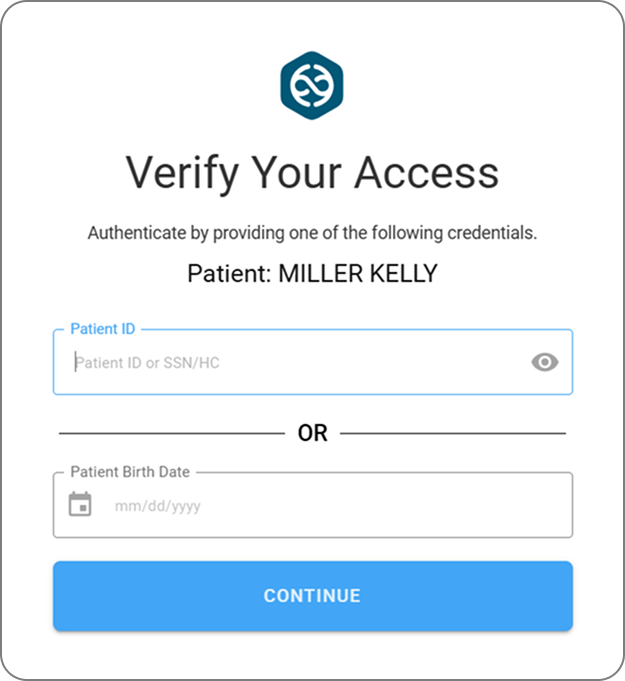
When accessed, the user must verify their identity by entering either the Patient ID or the Patient Date of Birth.
-
Once verified, the Image Viewer opens, displaying the study.
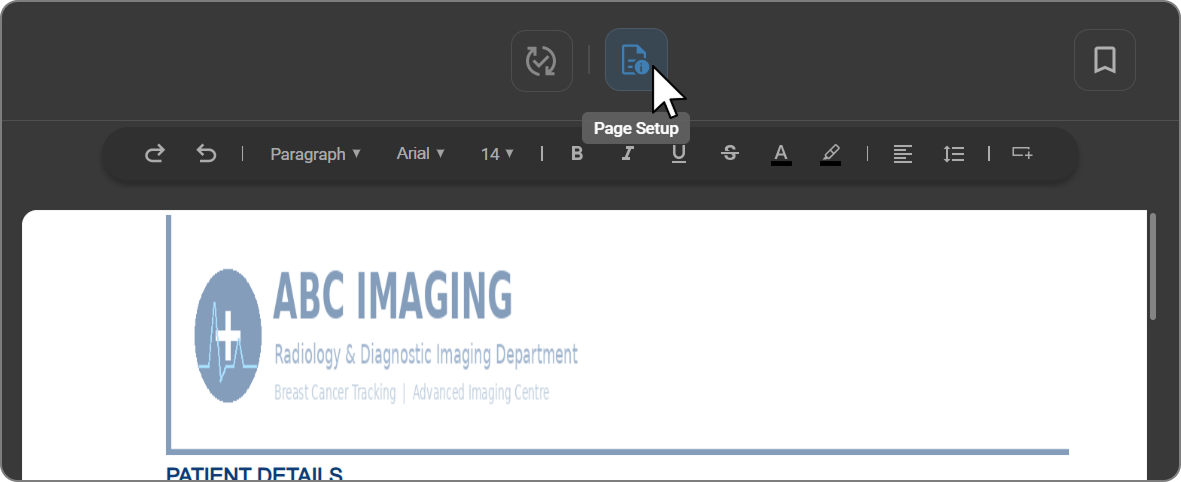
Step 3: Page Setup
Click the Page Setup icon above the toolbar to configure how the document is printed or displayed. A panel opens on the right with the following options:
Paper Size & Orientation
Orientation — toggle between portrait and landscape.
Paper Size — select the paper size (e.g. A4 — 21cm × 29.7cm).
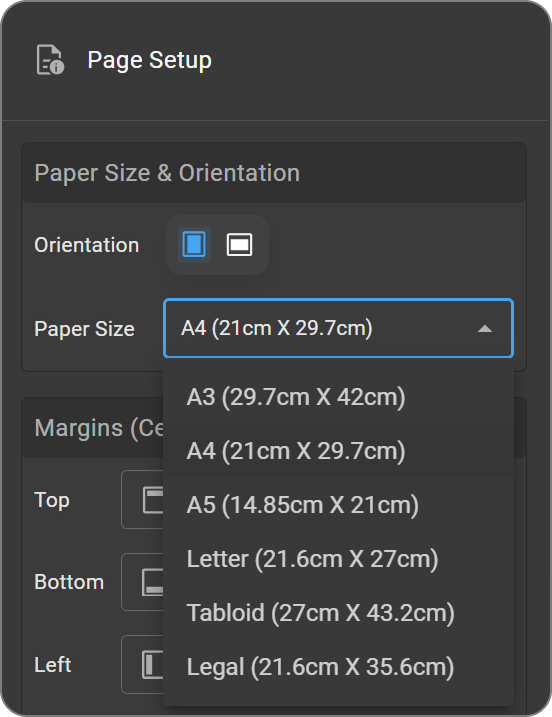
Margins (Centimetre) Set the margin distance for the Top, Bottom, Left, and Right sides of the page.
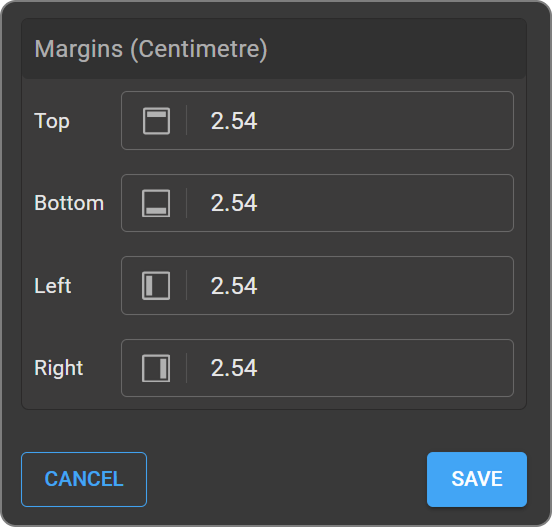
Click Save to apply the changes or Cancel to discard.
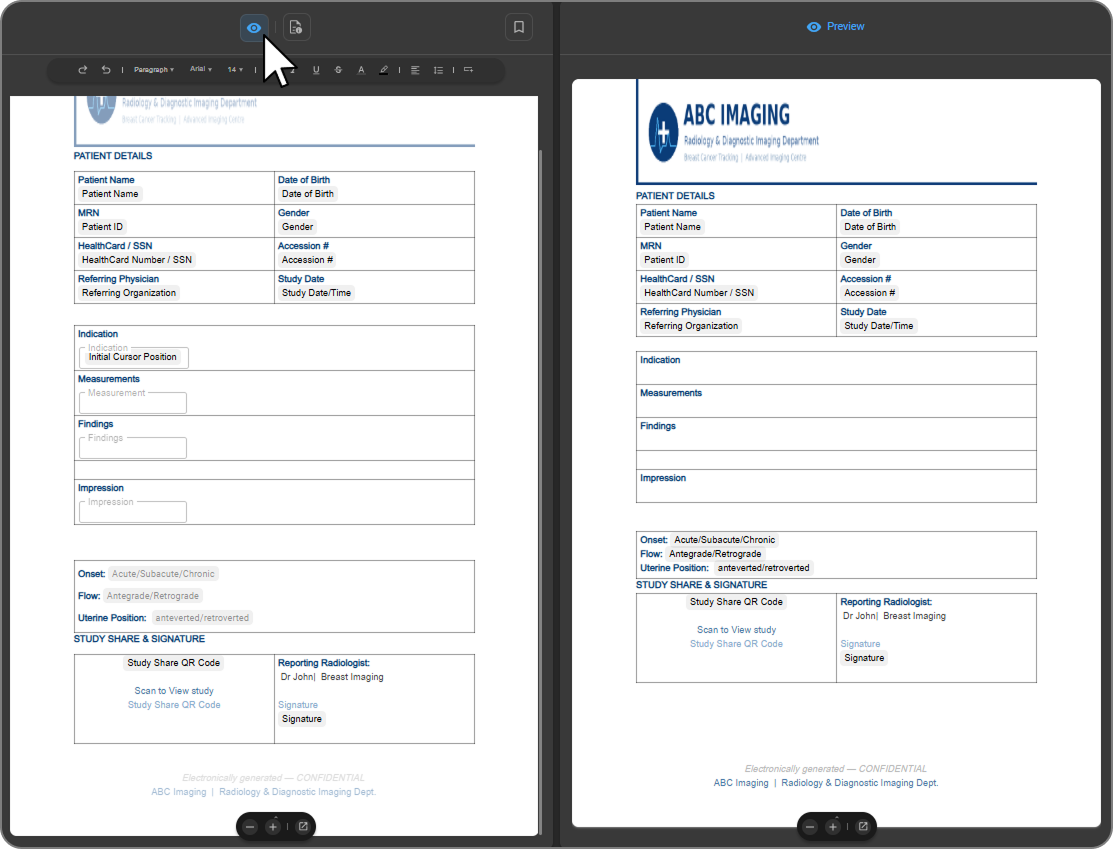
Step 4: Preview
Click Preview to see how the template looks with all content, bookmarks, and page settings applied before publishing. This is the recommended final check before making the template available.
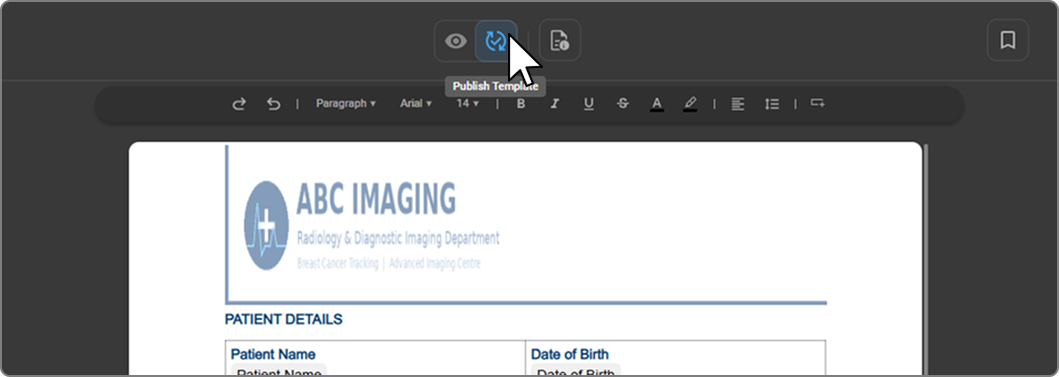
Step 5: Publish the Template
Once the template is ready, click the Publish Template button above the toolbar
A drawer opens on the right with the following fields:
| Field | Description | 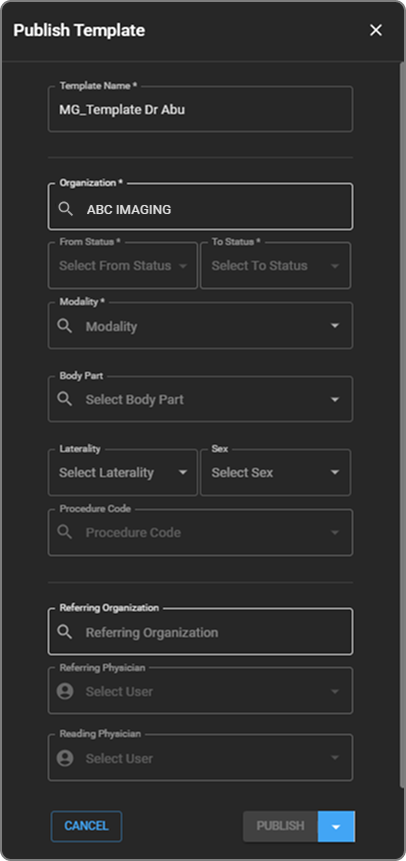 |
| Template Name (required) | A unique name for the template | |
| Organization (required) | The organization this template belongs to | |
| From Status (required) | The order status this template applies from | |
| To Status (required) | The order status this template applies to | |
| Modality (required) | The imaging modality (e.g. MR, CT, US) | |
| Body Part | The anatomical body part this template targets | |
| Laterality | Left, Right, or Bilateral | |
| Sex | Filter by patient sex if applicable | |
| Procedure Code | Associate a specific procedure code | |
| Referring Organization | The referring facility or organization | |
| Referring Physician | The referring physician | |
| Reading Physician | The radiologist reading the study |
Once all required fields are filled, click Publish to make the template available. Click Cancel to discard.
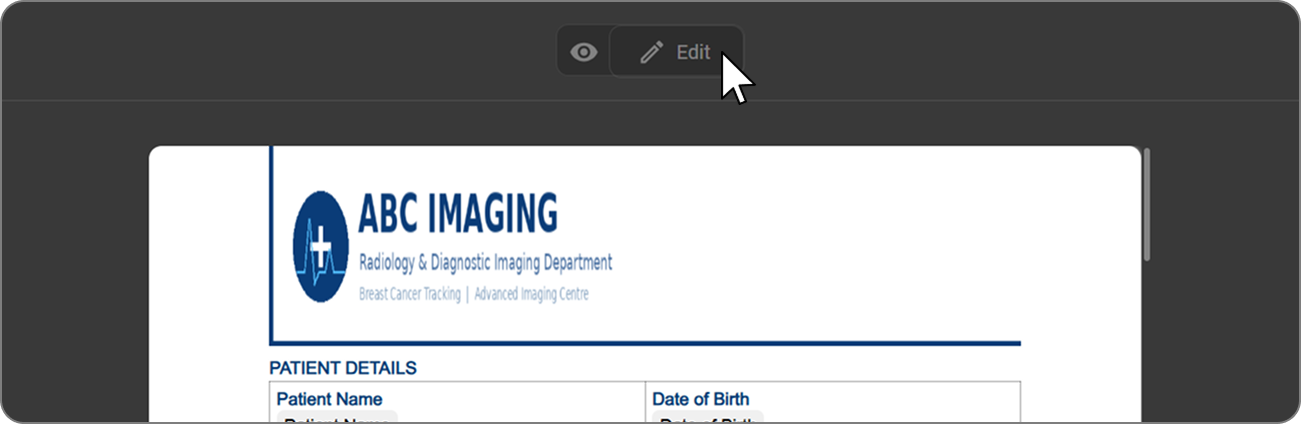
Editing a Template
To edit a published template:
-
Click on the template you want to edit from the Template Manager.
-
Click the pencil icon at the top right to open it in the editor.
Once open, you can modify the content directly.
Custom Fields from Square Brackets
OmegaAI automatically detects square brackets [ ] in pasted content and converts them into editable custom fields.
How it works:
-
Copy content containing square brackets from your source document or text editor.
-
Paste it into the OmegaAI Document Viewer editor.
-
OmegaAI automatically recognizes each section enclosed in square brackets and converts it into a custom field.
-
These fields are editable and can be customized further as needed.
Example
Clinical: [] Comparison: [] Technique: []
Findings:[]
Impression: []
Recommendation: []
Each bracketed section becomes an independent editable field in the report.
Bookmark Reference
The following Category bookmarks are available in the Bookmark Selector. They auto-populate with data from the patient record and imaging order via DICOM and FHIR — no manual entry required.
| Bookmark | Description |
|---|---|
| # of Images | Total number of images in the study |
| Accession # | Unique accession number assigned to the imaging study |
| Account # | Patient's billing account number |
| Account Status | Current billing or account status of the patient |
| Age at Study | Patient's age at the time the study was performed |
| Allergies | Patient's recorded allergies |
| Amendment Signature | Name of the physician who amended the report, along with the date and time of amendment |
| Anatomic Focus | Anatomical focus of the study |
| Assigning Authority | The institution that issued the patient identifier |
| Authorization # | Authorization reference number |
| Authorization Period | Period for which the authorization is valid |
| Availability | Availability status of the study or result |
| Birth Sex | Patient's sex as recorded at birth |
| Blume Registration Page QR Code | QR code linking to the Blume patient registration page |
| Body Part | Anatomical body part examined in the study |
| Cancellation Reason | Reason recorded if the order or study was cancelled |
| CDS ID | Clinical Decision Support identifier |
| Clinical Notes | Clinical notes associated with the order |
| Communication Status Name | Current communication or notification status |
| Conditions | Patient's recorded medical conditions |
| Confidentiality | Confidentiality classification of the report or record |
| Consulting Physician | Name of the consulting physician |
| Date of Birth | Patient's date of birth |
| Date/Time Addendum | Date and time the addendum was added to the report |
| Date/Time Last Updated | Date and time the report was last updated |
| Date/Time Read | Date and time the study was read |
| Date/Time Received | Date and time the study was received |
| Date/Time Signed | Date and time the report was signed |
| Date/Time Transcribed | Date and time the report was transcribed |
| Date/Time Verified | Date and time the report was verified |
| Department | Department that conducted the study |
| Diagnosis Code | Diagnosis code associated with the order |
| Eligibility | Patient's insurance or program eligibility status |
| Ethnicity | Patient's recorded ethnicity |
| Exam Duration | Duration of the imaging examination |
| Exam Room | Room in which the examination was performed |
| Filler Order # | Filler order reference number |
| Financial Class | Patient's financial classification |
| Gender | Patient's recorded gender |
| HealthCard Number / SSN | Patient's HealthCard Number (Canada) or Social Security Number (US) |
| Healthcare Service | Room or service line where the study was performed |
| History | Patient's relevant clinical history |
| Home Phone | Patient's home phone number |
| Imaging Organization | The facility at which the study was performed |
| Insurance Copay | Co-pay amount of the patient's primary insurance coverage |
| Insurance Expiry | Expiry date of the patient's insurance |
| Insurance Payer | Primary insurance company's name |
| Insurance Status | Current insurance status |
| Key Images | Key images associated with the study |
| Languages | Patient's preferred language(s) |
| Laterality | Side of the body examined (Left, Right, Bilateral) |
| Managing Organization | Organization managing the patient's care |
| Modality | Imaging modality used (e.g. MR, CT, US, CR) |
| Modality Modifier Array | Array of modifiers applied to the modality |
| Order Custom Memo | Custom memo associated with the order |
| Order Date/Time | Date and time the order was placed |
| Order ID | Unique identifier for the order |
| Order Notes | Notes associated with the order |
| Order Of Appropriateness | Appropriateness rating of the order |
| Order Status | Status of the order |
| Patient Address | Patient's registered address |
| Patient Age | Patient's age |
| Patient Balance | Outstanding balance on the patient's account |
| Patient Contact Method | Patient's preferred contact method |
| Patient Email | Patient's email address |
| Patient First Name | Patient's first name |
| Patient ID | Patient's medical record number (MRN) |
| Patient ID Barcode | Barcode representation of the patient ID |
| Patient Last Name | Patient's last name |
| Patient Location | Patient's current or registered location |
| Patient Name | Patient's full name |
| Patient State/Province | Patient's state or province |
| Performing Physician | Name of the physician who performed the study |
| Performing Physician NPI | NPI identifier of the performing physician |
| Performing Technologist | Name of the technologist who performed the study |
| Pharmaceutical | Pharmaceutical details associated with the study |
| Phone Number | Patient's primary phone number |
| Placer Order # | Placer order reference number |
| Priority | Priority level assigned to the order |
| Procedure Code | Procedure code associated with the study |
| Race | Patient's recorded race |
| Reading Organization | Name of the facility responsible for reading the study |
| Reading Physician | Name of the physician reading and reporting the study |
| Reading Physician NPI | NPI identifier of the reading physician |
| Reason For Exam | Reason the examination was ordered |
| Referring Organization | Name of the referring facility |
| Referring Physician | Name of the referring physician |
| Referring Physician Fax Number | Fax number of the referring physician |
| Referring Physician NPI | NPI identifier of the referring physician |
| Reporting Detail | Reporting details associated with the study |
| Requested Appointment Date/Time | Date and time of the requested appointment |
| Requested Procedure ID | Procedure ID of the requested study |
| Scheduled Resource | Resources scheduled for the study |
| Series UID | Unique identifier for the image series |
| Signature | Name of the physician who signed the report, with date and time |
| Smoking Status | Patient's recorded smoking status |
| SOP Instance UID | SOP instance unique identifier |
| Source Device AE Title | AE title of the source device |
| Special Arrangement | Any special arrangements noted for the patient or study |
| Study Custom Memo | Custom memo associated with the study |
| Study Date/Time | Date and time the study was performed |
| Study Description | Description of the imaging study |
| Study ID | Study ID or reference number |
| Study Share QR Code | QR code linking to the study, scannable once the report is finalized as a PDF |
| Study Share URL | Clickable link that opens the study in a new browser tab |
| Study Status | Status of the study |
| Study UID | Unique identifier for the study |
| Subject | Subject or topic associated with the report |
| Technique Object | Imaging technique parameters used in the study |
| Time At Status | The duration the study or order has been in its status |
| Time Zone | Time zone associated with the study or order |
| Transcriptionist | Name of the transcriptionist assigned to the study |
| Transcriptionist Organization | Organization responsible for transcription |
| Transport | Transport details associated with the patient or study |
| View | View associated with the study |
| Visit # | Visit number associated with the patient encounter |
| Visit Class | Classification of the patient visit (e.g. inpatient, outpatient) |