Sending Reports and Studies
This article covers sending finalized reports and imaging studies out of OmegaAI — to referring physicians, imaging organizations, or external users. Sending is distinct from exporting: sending transmits to another system or person, while exporting downloads a copy for yourself — see Exporting Worklist Data and Study Files for the latter.
Before you begin
- You need an open worklist with at least one study selected. See Select studies in Using the Worklist Screen.
Open the Send panel
- Select a study and right-click to open the right-click menu.
- Click the Send icon (the arrow) in the row of quick-access icons at the top.
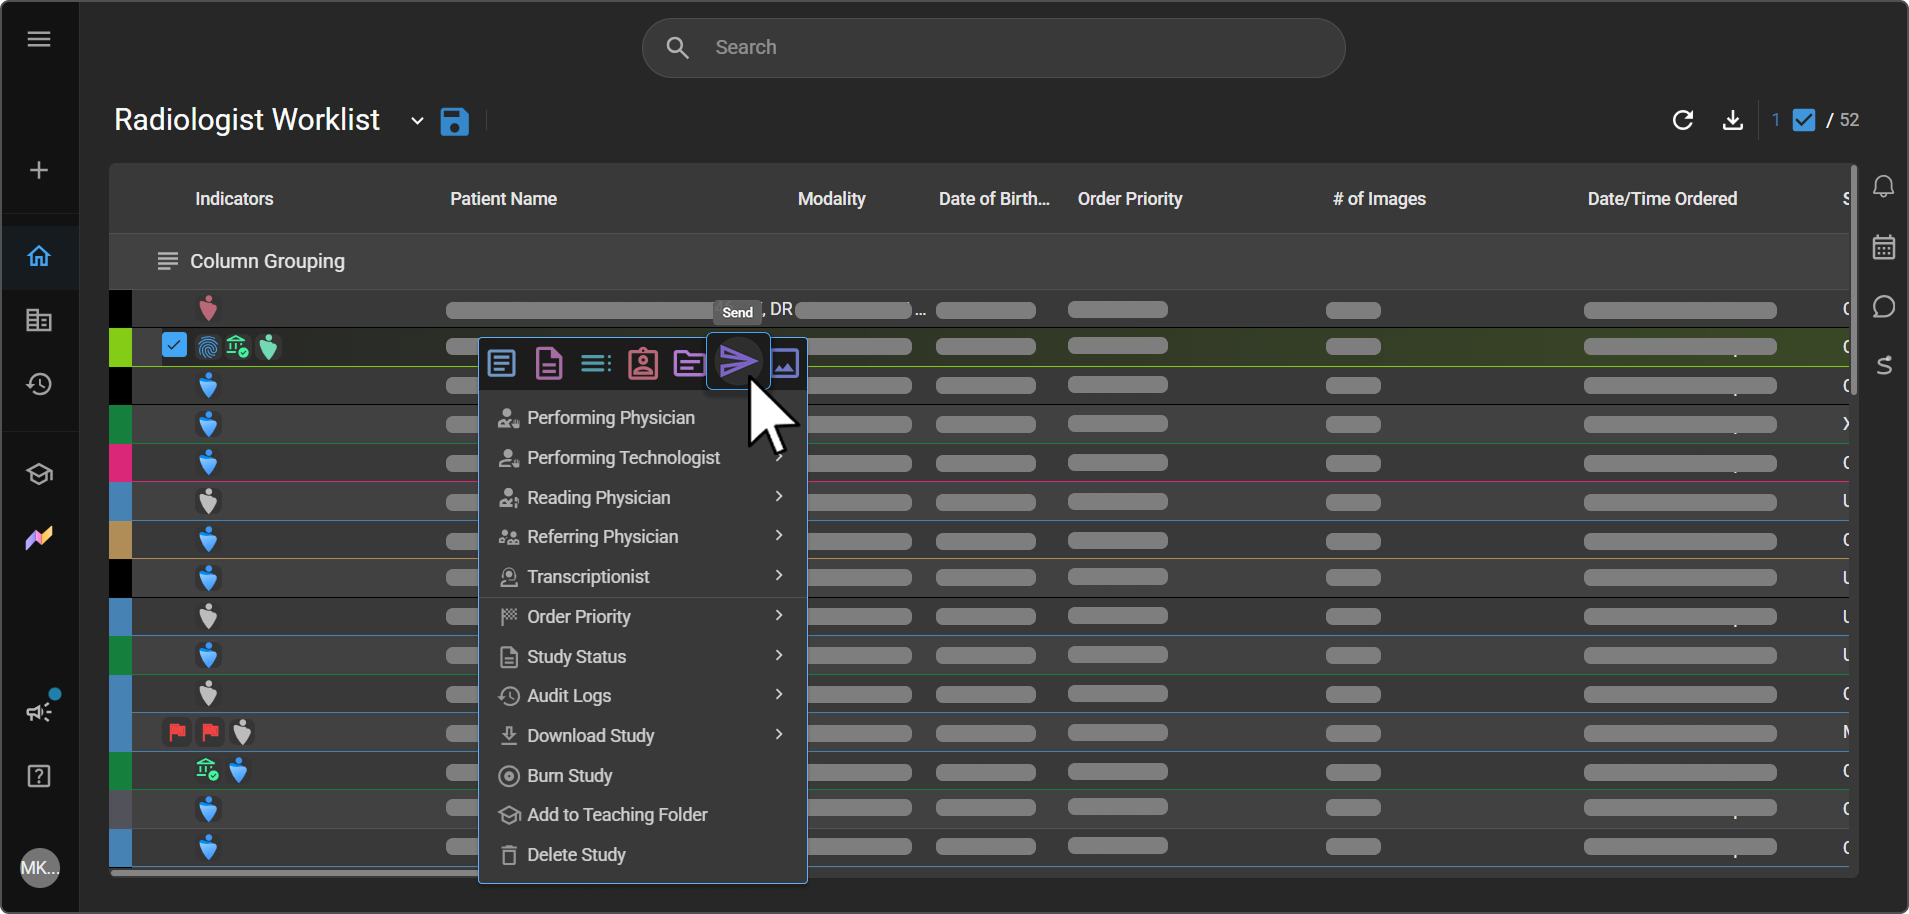
Expected result: The Send panel opens on the right side of the screen, with two tabs: Send Reports and Send Study.
Send a report
Use the Send Reports tab to send the study's finalized report.
Send to Blume is a one-click shortcut button at the top of the tab, separate from the Send Method dropdown below it — it sends the report straight to the patient's Blume Patient Portal without any further fields. |
|
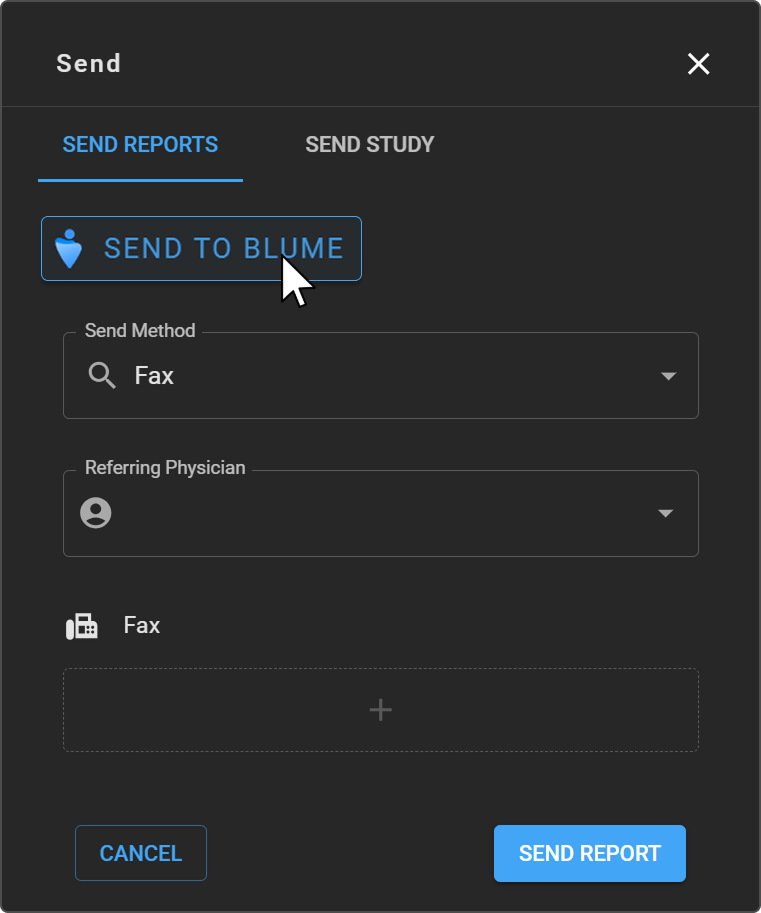
For any other destination, use the Send Method dropdown:
|
|
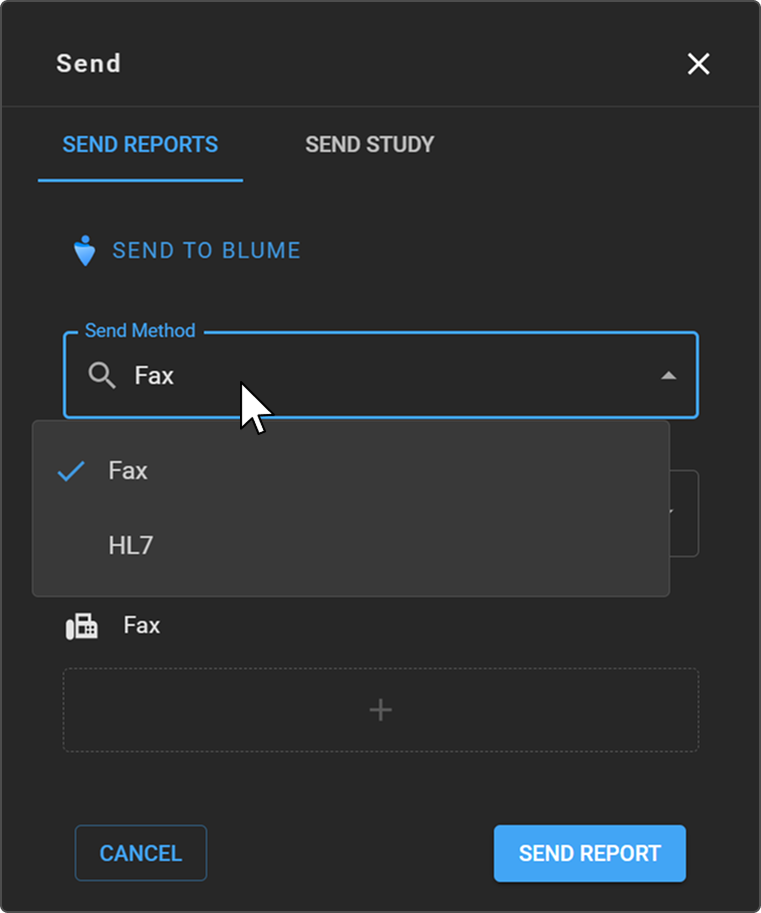
Send by fax
- Select Fax as the Send Method.
- In the Referring Physician field, search for and select the intended recipient. If a fax number is on file for that physician, it auto-populates in the Fax field.
- If no number auto-populates, click the + button to enter one manually.
- Click Send Report.
Note: If the selected Referring Physician doesn't have a fax number on file, an error message appears. Enter the number manually using + to proceed.
Expected result: The report is faxed to the number(s) provided.
Send by HL7
- Select HL7 as the Send Method.
- Click Send Report.
No additional fields are required — HL7 transmission uses the study's existing integration configuration rather than a manually entered destination.
Expected result: The report is transmitted to the integrated system via HL7.
Send a study
The Send Study tab is available from the Worklist, Document Viewer, and Image Viewer. It supports two recipient types: an Imaging Organization (via DICOM) or an External User (via a secure email link).
Open the Send Study tab
Click the Send Study tab at the top of the Send panel.
Select a recipient type
Click the Send to dropdown and choose one of the following:
- Imaging Organization — send the study via DICOM to another imaging facility or device.
- External User — share the study via a secure email link with a user outside your organization.
Send to an Imaging Organization
Use this option to transmit the study to another imaging organization via DICOM Send.
|
|
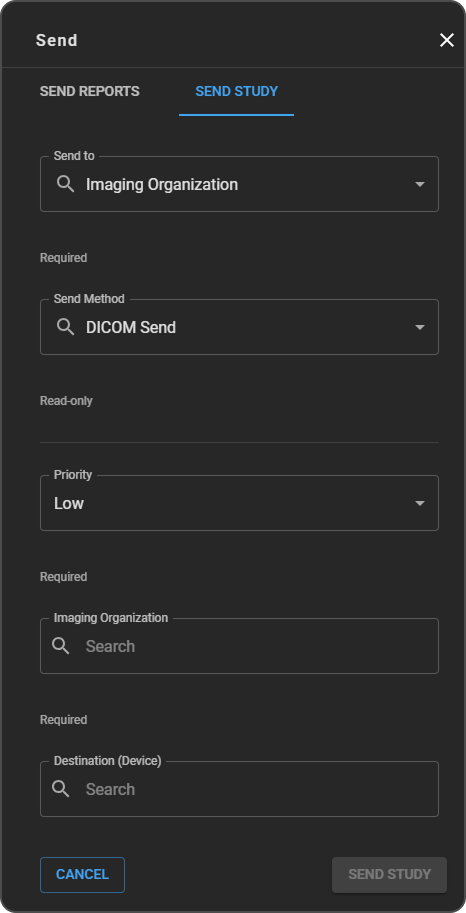
Expected result: The study is transmitted to the selected device.
Note: When a study is sent via DICOM, the sent data includes the study's final report (as a DICOM-encapsulated PDF). If the study has key images, a Key Object Selection (KO) DICOM object is generated when the study is sent to mark those images for the receiving system.
Note: If the destination DICOM station has Send New Objects Only enabled, a manual send transmits only the objects that destination does not already hold, instead of the whole study. See Send New Objects Only.
Send to an External User
Use this option to share the study with a user outside your OmegaAI organization via a secure email link.
|
|
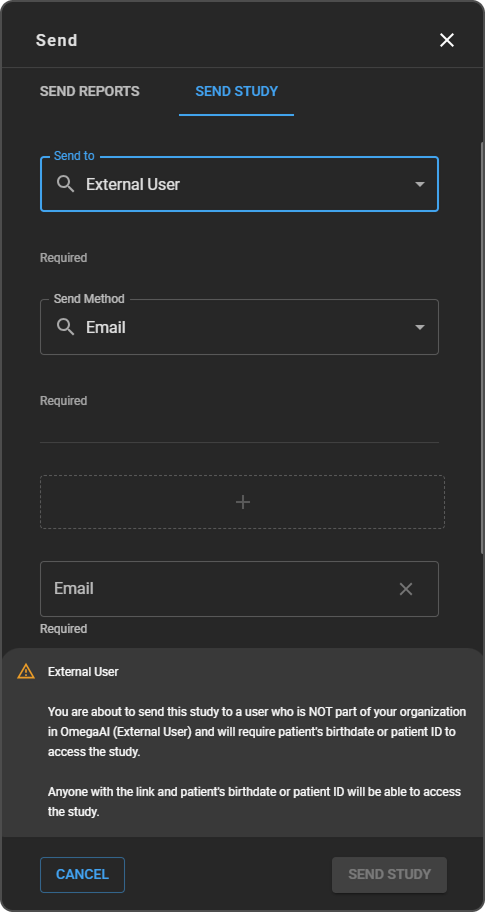
External User — You are about to send this study to a user who is NOT part of your organization in OmegaAI (External User) and will require the patient's birthdate or patient ID to access the study. Anyone with the link and the patient's birthdate or patient ID will be able to access the study.
- Click Send Study to proceed, or Cancel to exit without sending.
Expected result: The recipient(s) receive an email with a secure link to the study. Opening it requires entering the patient's birthdate or patient ID.
Related articles
- Using the Worklist Screen — the right-click menu and its other options
- Exporting Worklist Data and Study Files — downloading and de-identified exports, as opposed to sending
- Study/Report Share — additional detail on sharing studies and reports outside OmegaAI
- Send New Objects Only — configuring a DICOM destination to receive only new objects on each send