Use Premium Reports
Premium reports are ready-made reports that OmegaAI curates for you. You don't need to build anything. Just open one, adjust its filters, and review your data.
This article lists the Premium reports, explains how to open and filter them, and shows you how to export your data from the Data Export report.
Before you begin
-
Root access: Your role must include access to Root. For details, see Get Started with Root Analytics.
-
Permission: Your role must include the View Premium Reports permission. If you don't see any Premium reports on the Root homepage, ask your administrator. See User access control and roles.
-
Read-only reports: Premium reports are read-only by design. You can't edit, copy, delete, or share a Premium report. To share or change similar data, build your own report. See Create a Report.
Find a Premium report
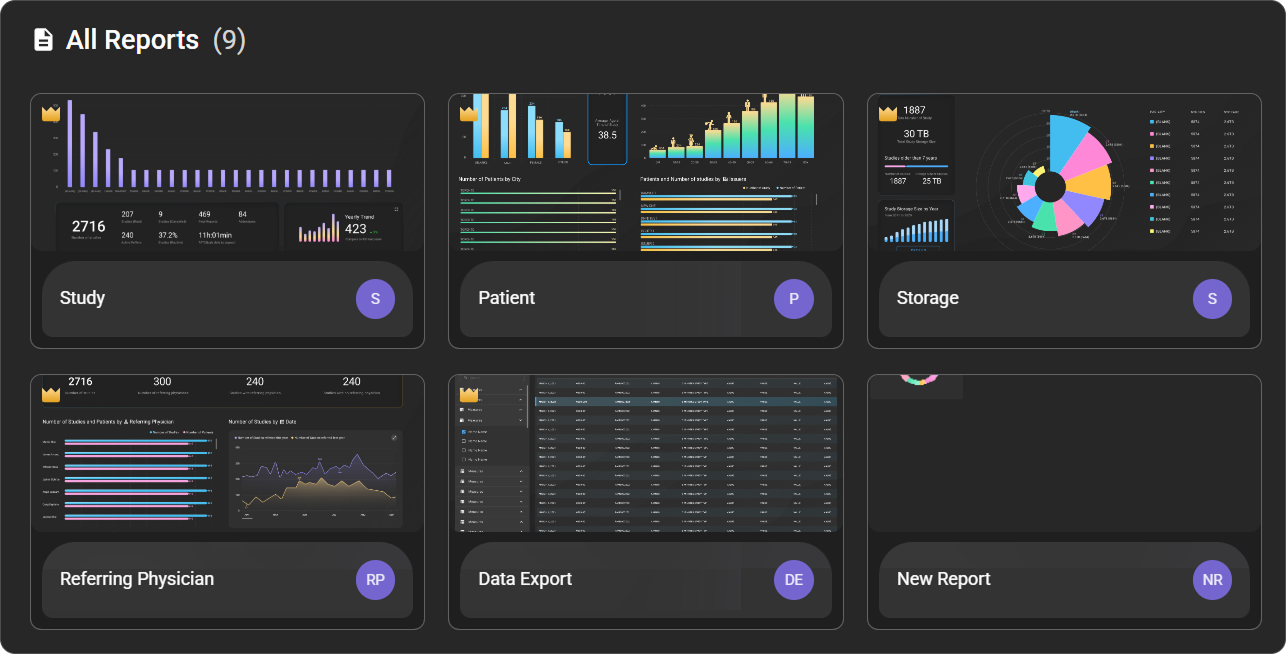
On the Root homepage, Premium reports appear under All Reports. Each one is marked with a gold crown icon at the top left of the card.
What each Premium report shows
| Report | What it shows |
|---|---|
| Study | Study volume across your organization. A chart shows the number of studies by Facility, Issuer, Status, or Priority. Summary cards show the total number of studies, Studies (Read), Studies (Cancelled), Final Reports, and Addendums. A Yearly Trend card compares the current year, last year, and two years ago. |
| Patient | Information about your patients, such as patient age. |
| Storage | How much storage your studies use. |
| Referring Physician | Study activity broken down by referring physician. |
| Data Export | A row-by-row list of your study data for a date range. You can preview the rows or download them as a CSV file. |
Open and filter a Premium report
-
On the Root homepage, click the Premium report's card.
-
Review the charts and tables on the report.
-
To narrow the data, use the filters at the top of the report. Each filter shows its current setting, such as Study Date: All or Organization Name: All. Click a filter, and choose the dates or values you want.
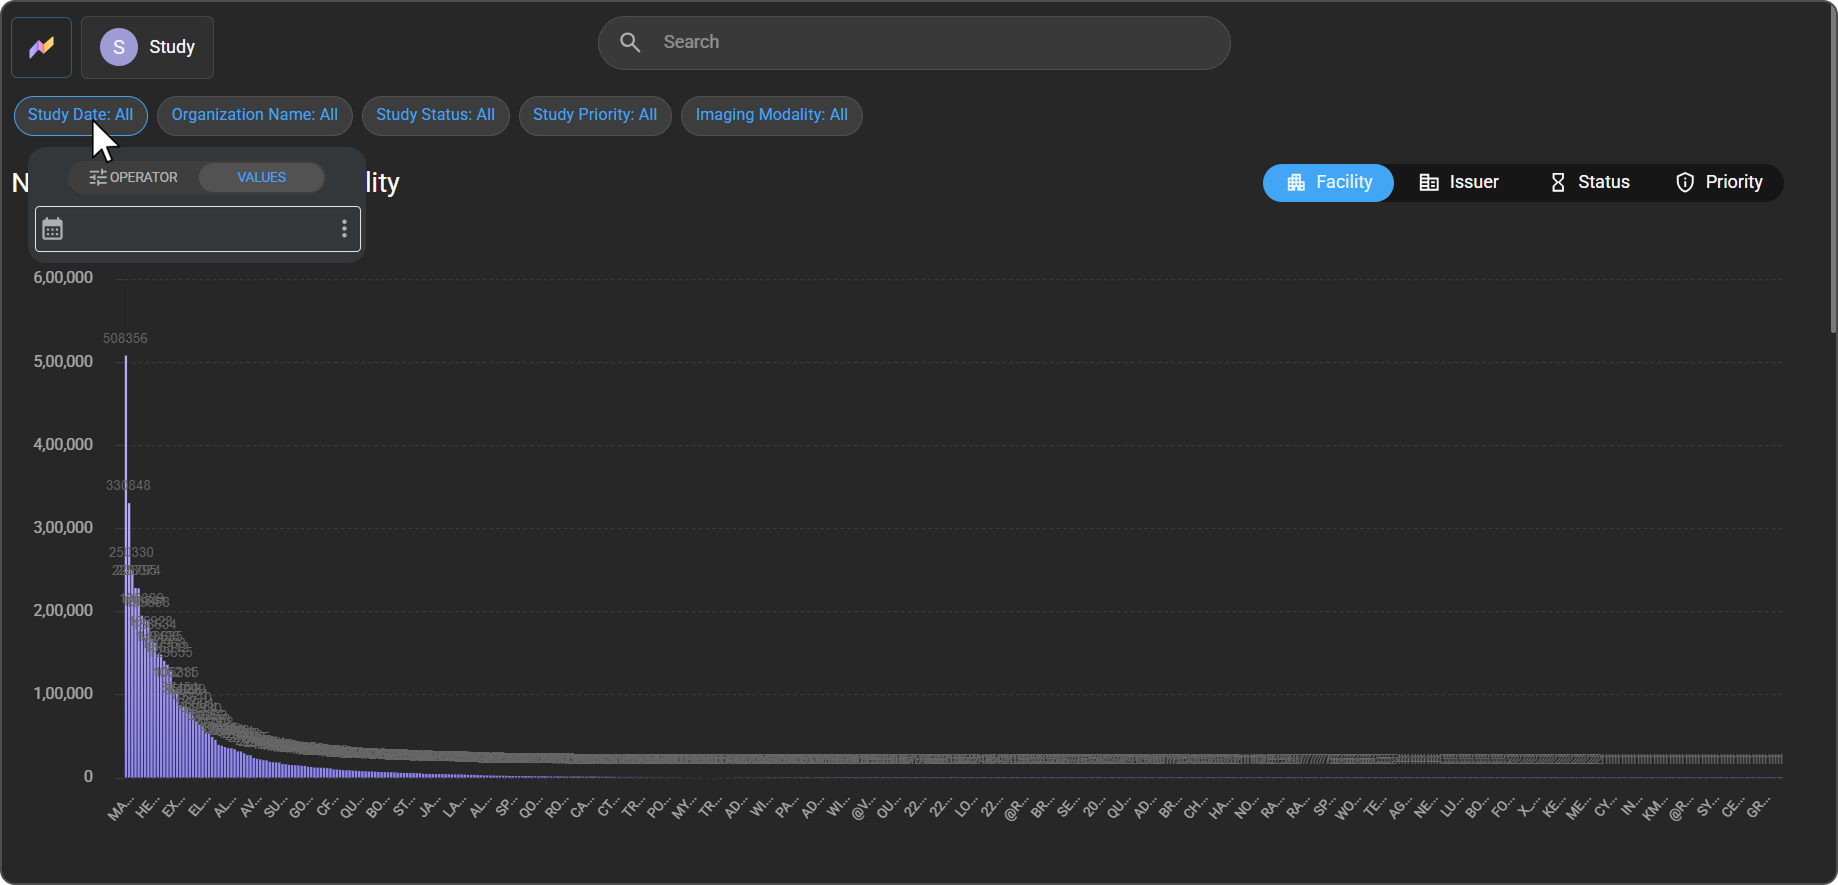
Expected result: The report updates to show only the data that matches your filters.
Example: the Study report
The Study report has these filters: Study Date, Organization Name, Study Status, Study Priority, and Imaging Modality. All of them start at All.
- Change the chart's grouping: Next to Number of Studies by, click Facility, Issuer, Status, or Priority.
- Enlarge a card: On the Yearly Trend card, click the expand icon at the top right.
Export your data with the Data Export report
Use the Data Export report when you need your raw study data in a spreadsheet.
-
On the Root homepage, click the Data Export card.
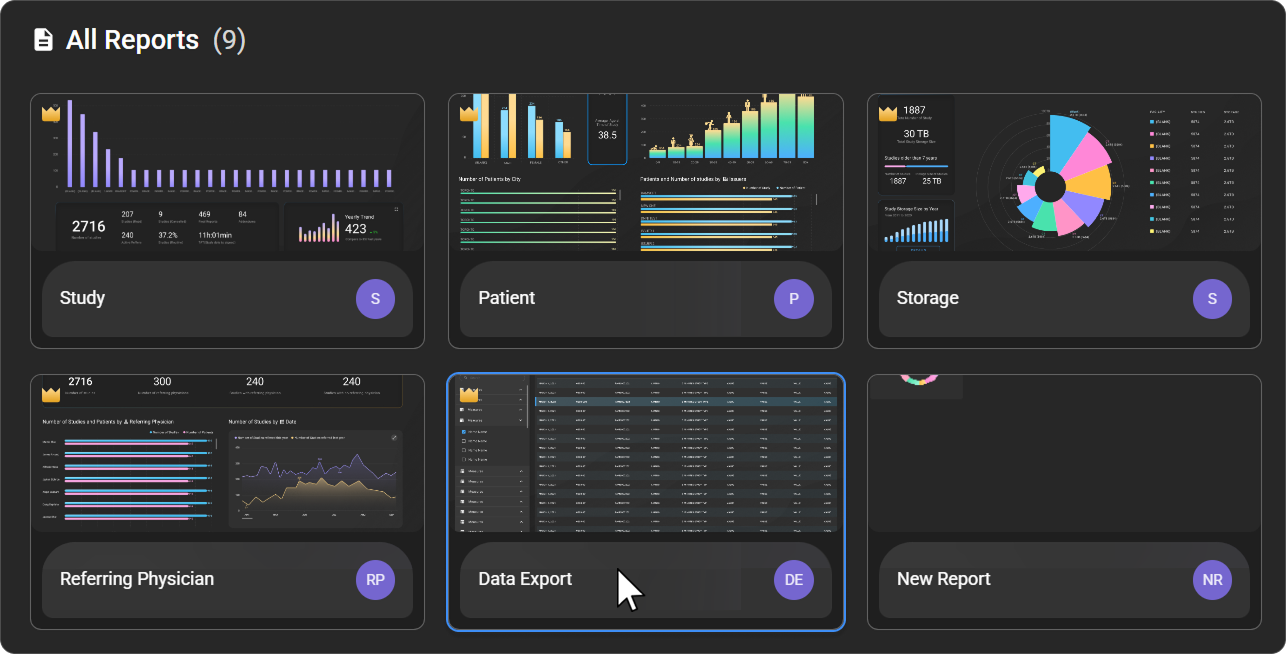
The report opens with the Study Date: Today filter, and a table of the matching studies.
-
Choose the study dates to export:
-
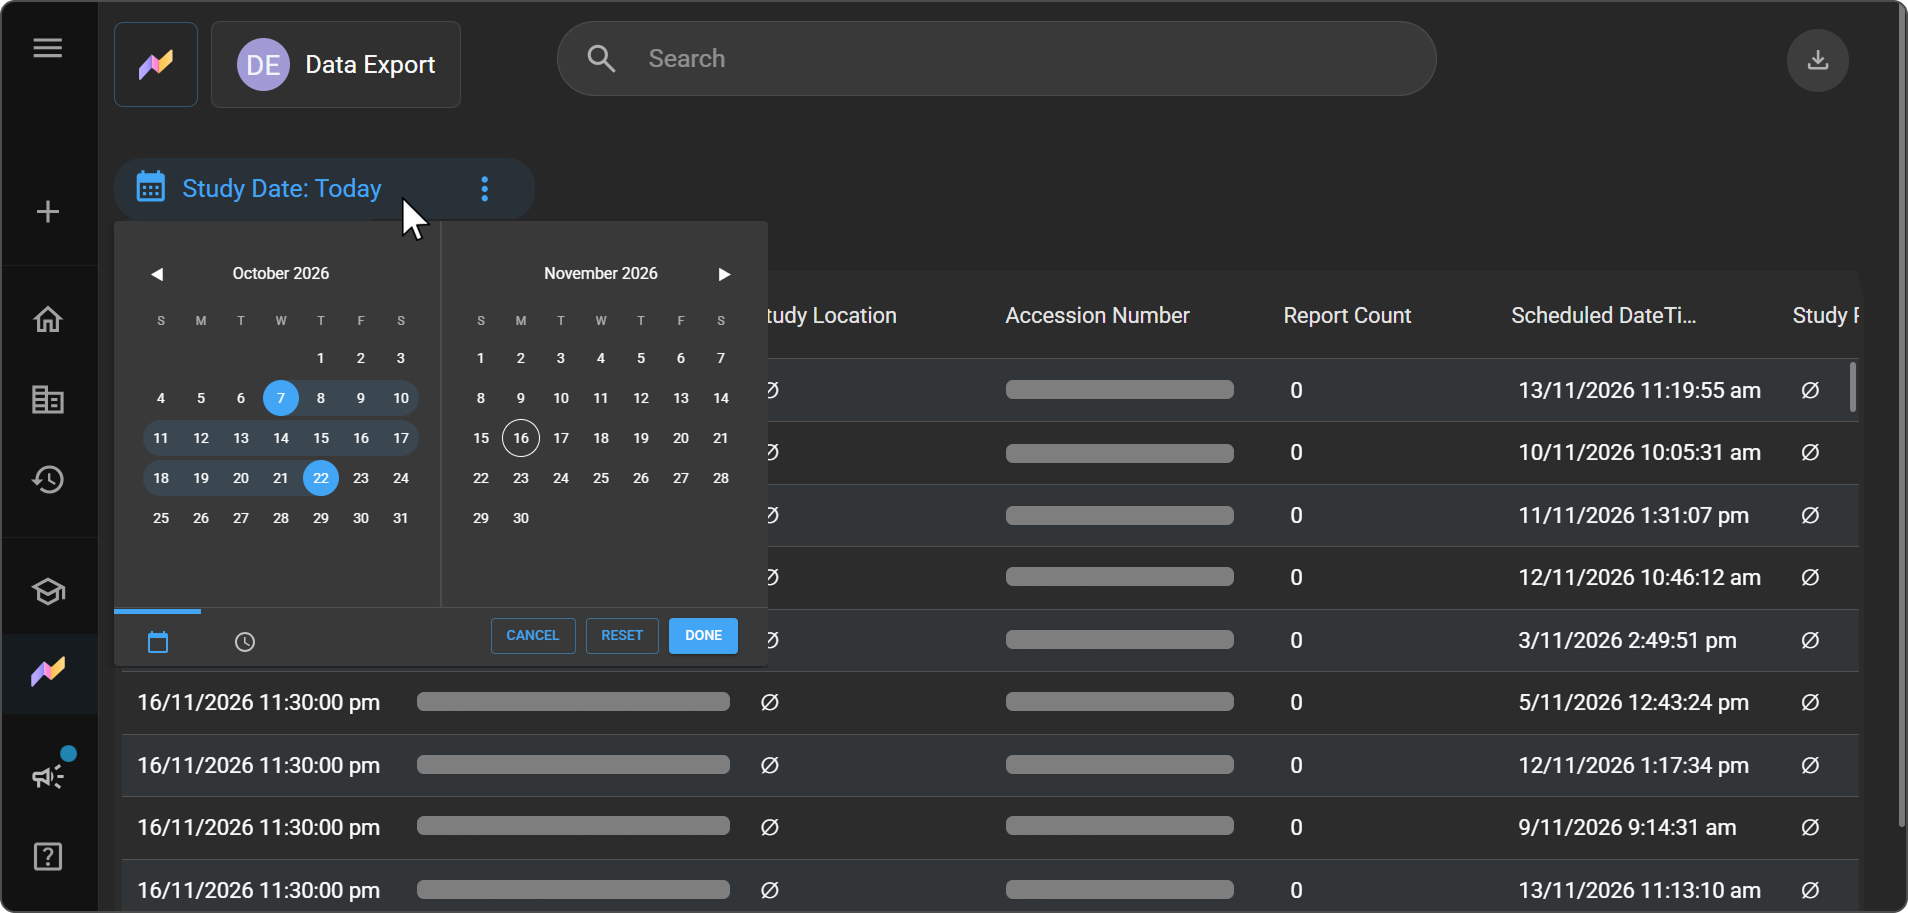
Use a preset: Click the Presets icon (three dots) on the Study Date filter, and select a range: All time, Today, Tomorrow, This week, This month, This quarter, This year, Last 7 days, or Last 30 days.
-
Choose your own dates: Click the Study Date filter. In the calendar, click the first date and then the last date of your range, and click DONE. To set times as well, click the clock icon at the bottom of the calendar.
-
-
Review the table. It shows one row per study, with columns such as Study Date, Imaging Facility Name, Accession Number, and Report Count.
-
Click the download icon at the top right of the report.
Expected result: A CSV file of the studies in your date range downloads to your computer. You can open it in a spreadsheet app, such as Microsoft Excel.
Tip: In the calendar, click RESET to clear your dates, or CANCEL to close the calendar without changes.
Note: An empty value appears as
∅in the table.
Tip: For a smaller, faster download, choose the shortest date range you need.
To export a page of a Custom report as a PDF instead, see Export a report page as a PDF.
Troubleshooting
- I don't see any Premium reports: Your role doesn't include the View Premium Reports permission. Ask your administrator.
- Recent studies are missing from the Data Export report: Root data is refreshed on a schedule, so studies from the last few hours might not appear yet. If studies from earlier days are missing, contact RamSoft Support.
- A report returns zero rows for a specific date range, but works for "All Time": See this troubleshooting entry.
- Exported fields show blank, null, or unexpected values: See this troubleshooting entry.
- I need a report that a Premium report doesn't cover: Build your own. See Create a Report.
Related articles
- Get Started with Root Analytics: Learn the Root homepage and report types.
- Create a Report: Build a Custom report when a Premium report doesn't cover what you need.
- Filter and Customize Report Data: Filter and group data in your own reports.
- Open, Edit, and Organize Your Reports: Favorite, sort, and export reports.
- User access control and roles: Give a role the View Premium Reports permission.