Ir al contenido principal

3 publicaciones etiquetados con «image-viewer»

Ver todas las etiquetas

Product Update: Image Viewer Enhancements & Blume Mobile Image Viewer

· 5 minutos de lectura

Overview

This release introduces the Blume Mobile Image Viewer, a new M-Mode measurement tool for ultrasound, and enhancements to the OmegaAI Image Viewer.


What's New

1. Blume Mobile Image Viewer

What changed:

The Blume Mobile Image Viewer is now available in the Blume Patient Portal app on iOS and Android. Patients can view DICOM studies on any touchscreen device with support for stack scroll, Cine playback, window leveling, measurements, Drag Probe, image orientation controls, landscape mode, and JPEG sharing via the native share sheet.

Benefit:

Patients can securely review their imaging studies from a mobile device with tools consistent with the desktop Image Viewer experience.

Mobile IV


2. M-Mode Measurement Tools for Ultrasound

What changed:

Three measurement tools are now available when an M-Mode ultrasound series is active — auto-detected on load. Slope (cm/s), Horizontal (s), and Vertical (cm/s) measurements are placed by click and drag, calibrated to DICOM metadata, and saved as annotations for structured reporting.

Benefit:

Precise in-viewer cardiac quantification on M-Mode ultrasound without switching tools or workflows.

Mobile IV


3. New Cine Tool on Viewport

What changed:

The Cine playback toolbar has been redesigned with a full-width progress bar at the bottom of the viewport. Left-side controls include play/pause, first frame, last frame, previous frame, and next frame. Right-side controls include an FPS display, playback speed, and playback method.

Benefit:

Full frame-level control over cine playback directly within the viewport.

Mobile IV


4. Hotkey Customization

What changed:

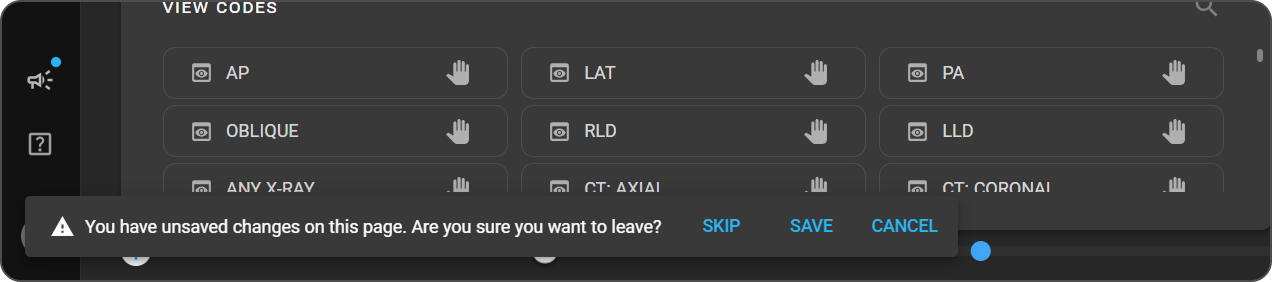
All configurable Image Viewer key bindings are now surfaced in a dedicated Hotkey Customization panel within the User Settings page. The panel is also accessible directly from the Image Viewer via Settings → Customize Hotkeys, with a Back to IV button to return without losing context.

Benefit:

Radiologists can tailor keyboard shortcuts to match their reading preferences, with changes persisted to their profile and applied consistently across all organizations they have access to.


5. Browser-Locale Date & Time Format in Overlay Annotations

What changed:

Date and time values in Image Viewer overlay annotations — including study, series, acquisition, and content date/time, and date of birth — now automatically follow the user's browser locale (navigator.language).

Benefit:

Date and time stamps display in the format most familiar to each user with no manual configuration required.


6. Annotations Included in Export (Download, Print, Copy to Clipboard)

What changed:

Visible annotations and measurements are now included when downloading, printing, or copying an image to clipboard — the export captures the viewport exactly as displayed.

Benefit:

Toggle annotation visibility before exporting to control what is included — no extra steps required.


7. CAD Toggle for Mammography Studies

What changed:

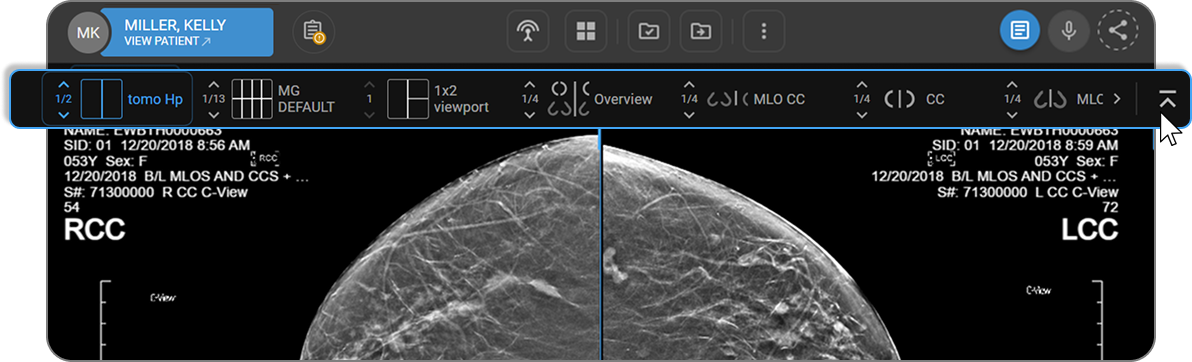
A Toggle CAD button now appears in the toolbar when a mammography study with CAD SR objects is loaded, globally showing or hiding all CAD markers across every viewport in one click. When active, the viewport overlay displays the iCAD case score and, for Tomo series, clickable slice hyperlinks that navigate directly to flagged frames.

Benefit:

Instantly compare images with and without CAD overlays and jump to flagged slices without disrupting the reading workflow.

Mobile IV


Important Notes

  • Blume Mobile Image Viewer: For non-diagnostic patient review only.
  • M-Mode Tools: Only available when an M-Mode ultrasound series is active in the viewport.
  • Cine Controls: Progress bar is only visible when Cine mode is active. FPS is adjusted by hovering over the FPS display and swiping left or right.
  • Hotkey Customization: Mouse buttons and scroll wheel are not valid inputs. System-reserved keys cannot be reassigned. The Back button is hidden during Edit Mode.
  • Time Format: Automatic — no configuration required.
  • Export with Annotations: Only currently visible annotations are captured; hidden annotations are excluded.
  • CAD Toggle: Only appears on mammography studies with CADSR objects. Does not affect user-drawn annotations. Default state is off unless a preference is saved.

Where to Find It

  • Blume Mobile Image Viewer: Blume app → Completed → View Results → View Images
  • M-Mode Tools: Image Viewer → Customize Toolbar → M-Mode → load an M-Mode ultrasound series
  • Cine Controls: Image Viewer → activate Cine mode → progress bar appears at viewport bottom
  • Hotkey Customization: User Profile → User Settings → keyboard icon; or Image Viewer → More options (⋮) → Customize Hotkeys
  • Time Format: Automatic — no action required
  • Export with Annotations: Image Viewer → toggle annotation visibility → Download / Print / Copy to Clipboard
  • CAD Toggle: Image Viewer → Tools menu → CAD icon (leftmost); mammography studies with CAD objects only

Updated Help Articles

Hanging Protocols — Configuration Screen & Quick Access Strip

· 3 minutos de lectura

Overview

This release introduces updates to Hanging Protocols in OmegaAI, focused on improving usability, efficiency, and control across the HP Configuration screen and the Quick Access Strip in the Image Viewer.

What's New

1. Redesigned HP Configuration Screen

What changed:

The HP Configuration screen now includes a persistent top toolbar, a three-tab layout (All Protocols / HP Rules / Matching Rules), and a protocol search field. The toolbar displays the active protocol name, a Default badge for system protocols, and dedicated Clone Current and Save Protocol buttons.

Benefit:

Makes it easier to navigate, find, and manage hanging protocols without losing context — especially when working across multiple protocols or configurations.

hp

2. Unsaved Changes Navigation Guard

What changed:

Navigating away from an unsaved protocol now triggers a prompt with Save, Skip, and Cancel options. The guard applies when switching protocols, cloning, using side-nav, or closing the browser.

Benefit:

Prevents accidental loss of work during protocol configuration, giving users full control over whether to save or discard changes before leaving.

hp

3. HP Quick Access Strip — Hide Button

What changed:

A new chevron-up button on the Quick Access Strip lets you collapse the strip with one click. The hide is in-memory only — the strip reappears when you open a new study, switch modality, or refresh the page.

Benefit:

Gives users more screen space in the Image Viewer when the strip is not needed, without affecting any persistent settings.

hp

4. Persistent "Hanging Protocols Bar" Toggle by Modality

What changed:

A new toggle in the Layout Selector lets you show or hide the Quick Access Strip per modality (e.g. CT, MR). The preference saves in your browser and syncs across open tabs.

Benefit:

Users who work across multiple modalities can customise strip visibility per modality, with the preference persisting across sessions in the same browser.

hp

Important Notes

  • The strip hide (chevron-up) is in-memory only — it resets on study change, modality change, or page refresh.

  • The modality toggle is saved per browser, not per user account. Clearing browser data or logging in on a different machine will reset the preference.

  • On multi-monitor setups, strip visibility is independent per monitor.

Where to Find It

Navigation path in the application: Image Viewer → Hanging Protocol Settings

Updated Help Articles

Product Update: Hotkey Customization

· 3 minutos de lectura

Overview

This release introduces updates to User Profile – Hotkey Customization in OmegaAI, focused on improving usability, efficiency, and system reliability. The Hotkey Customization feature allows each user to personalize the keyboard shortcuts in the Image Viewer. All configurable Image Viewer functions are surfaced in a single panel, enabling users to remap any key binding to their preferred combination. Customizations are saved to the individual user’s profile and apply across all organizations the user has access to.

What’s New

1. Centralized Hotkey Customization Panel

What changed:

A dedicated Hotkey Customization panel has been added to the User Settings page, listing all 44 configurable Image Viewer functions alongside their currently assigned hotkeys in a two-column table. Functions without an assigned key are shown with a dash (—).

Benefit:

Users can view and manage all keyboard shortcuts from a single location, eliminating the need to search across menus.

2. Dual Entry Points for Quick Access

What changed:

The Hotkey Customization panel can be accessed from two locations: the User Profile navigation bar (User Settings → keyboard icon) and directly from the Image Viewer (Settings → Customize Hotkeys). When accessed from the Image Viewer, a Back button appears at the top-left of the page header, enabling a seamless return to the Image Viewer.

Benefit:

Radiologists and technicians can access and adjust hotkeys without leaving their workflow, reducing context switching during diagnostic sessions.

3. Live Conflict Detection & Resolution

What changed:

When a user assigns a key combination already in use, the conflicting row is immediately highlighted in red with a yellow warning icon (⚠). Saving is blocked until the conflict is resolved by reassigning or clearing one of the duplicate bindings.

Benefit:

Prevents accidental overrides and ensures every function has a unique, valid key binding, reducing errors during diagnostic workflows.

4. Instant Effect & Reset to Defaults

What changed:

Saved hotkey changes take effect immediately across all open Image Viewer sessions without a page refresh. A Reset to Defaults button, located next to the Edit button at the top-right of the panel, restores all bindings to system defaults after a confirmation prompt.

Benefit:

Users experience real-time feedback on their changes and can quickly recover from unintended configurations without disrupting their session.

Important Notes

  • User-specific scope: Hotkey customizations apply per user, not per organization. Changes made by one user do not affect other users in the same organization.
  • Restricted keys: Certain system-reserved keys cannot be reassigned. An inline error is displayed: “This key is reserved and cannot be reassigned.”
  • Mouse inputs not accepted: Standard mouse buttons (left, right, middle) and the scroll wheel are not valid inputs in the hotkey capture field.
  • Back button behavior: The Back button is hidden while the panel is in Edit Mode and reappears once changes are saved or cancelled.
  • Clearing bindings: To clear a single hotkey, press Escape while the cell is focused. To reset all bindings at once, use Reset to Defaults (confirmation required).

Where to Find It

Navigation path in the application: User Profile → User Settings → Keyboard Icon

Or from the Image Viewer: Image Viewer → Settings (three-dot menu) → Customize Hotkeys

Updated Help Articles

HotKeyCustomization