Getting Started with Image viewer Customization in OmegaAI
OmegaAI's Image Viewer provides flexible customization features designed to optimize your imaging workflow. Users can personalize the toolbar, configure overlay annotations, set up Hanging Protocols, and manage multi-monitor displays according to their reading preferences.
This guide offers a quick-start overview of each feature, with links provided in every section for accessing detailed configuration instructions.
Accessing the Image Viewer in OmegaAI
Access Methods
You can access the Image Viewer from the OmegaAI Worklist using the following methods:
1. Double-Click Method
-
Navigate to the Worklist on the OmegaAI dashboard.
-
Double-click on the desired study to open it in the Image Viewer.
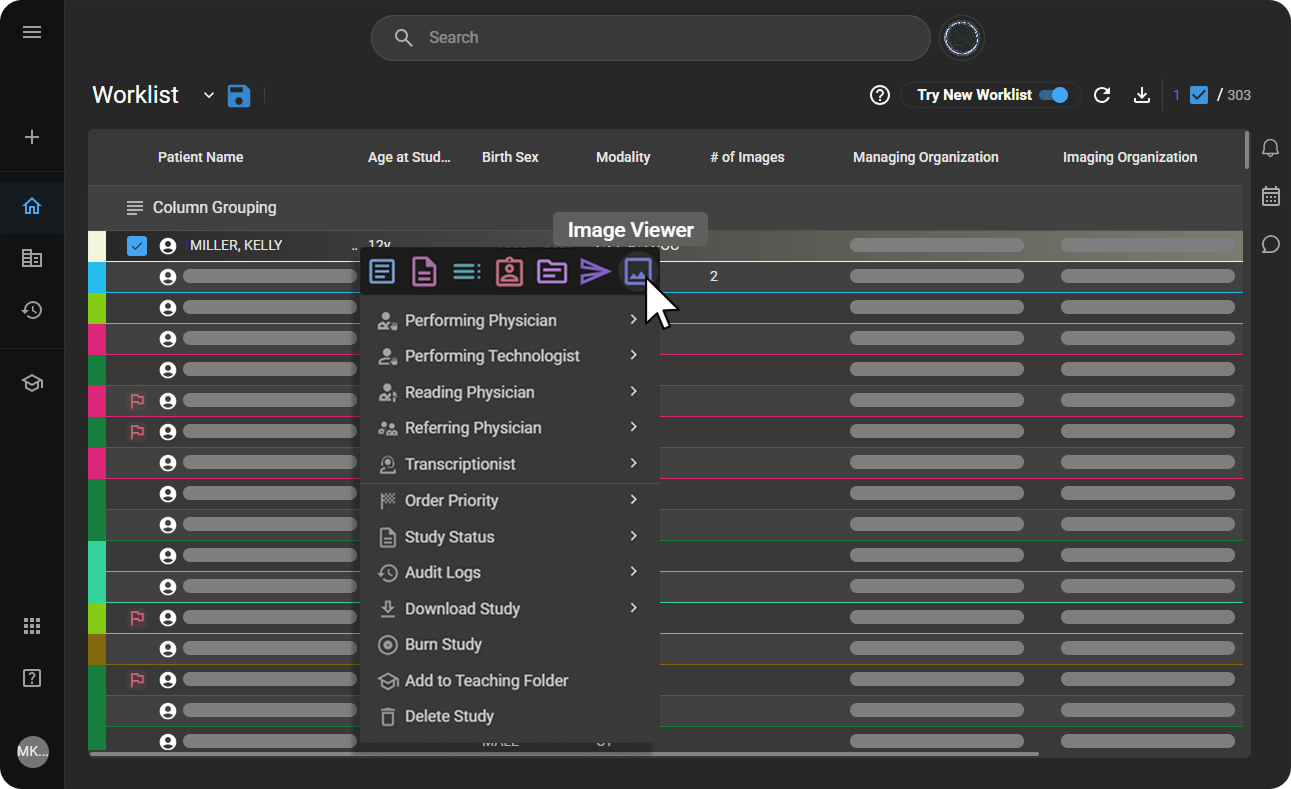
2. Right-Click Menu Method
-
Single Right-click on the study you wish to view from the worklist.
-
From the context menu that appears, select Image Viewer.
Customizing the Toolbar in OmegaAI
OmegaAI allows you to personalize the Image Viewer toolbar to match your workflow. You can add, remove, rearrange, or reset tools based on your preferences.
How to Access
|
|

Customizing Your Toolbar
-
Add Tools: Click or drag tools from the customization panel to the toolbar.
-
Remove Tools: Hover over a tool and click the × icon.
-
Rearrange Tools: Drag tools to change their position.
-
Undo / Reset: Use the Reset icon to undo changes or restore default settings.
-
Save Changes: Close the panel to apply updates instantly.

Customizing the Image Control Wheel in OmegaAI
OmegaAI allows you to personalize the Image Control Wheel to match your workflow. You can choose the wheel layout, assign tools, and configure hotkeys for faster image navigation and annotation.
How to Access
|
|

Wheel Configuration
-
Choose a wheel layout with 4, 6, or 8 tool slots.
-
Select tools from:
-
Adjustment Tools -- image navigation and display controls.
-
Markup Tools -- annotation and measurement tools.
-
-
Drag tools to reorder them. Only tools above Currently Not Assigned appear in the wheel.
Assign Hotkeys: Select a tool and assign a custom keyboard shortcut.

Customizing Overlay Annotations in OmegaAI
OmegaAI allows you to personalize overlay annotations displayed on images, helping you control what DICOM information appears in each viewport.
How to Access
|
|

Customizing Viewport Areas
You can configure annotations on any of the eight viewport positions:
-
Top Left / Top / Top Right
-
Left / Right
-
Bottom Left / Bottom / Bottom Right
Click any region to:
-
Add free text
-
Insert predefined annotations
-
Remove existing annotations
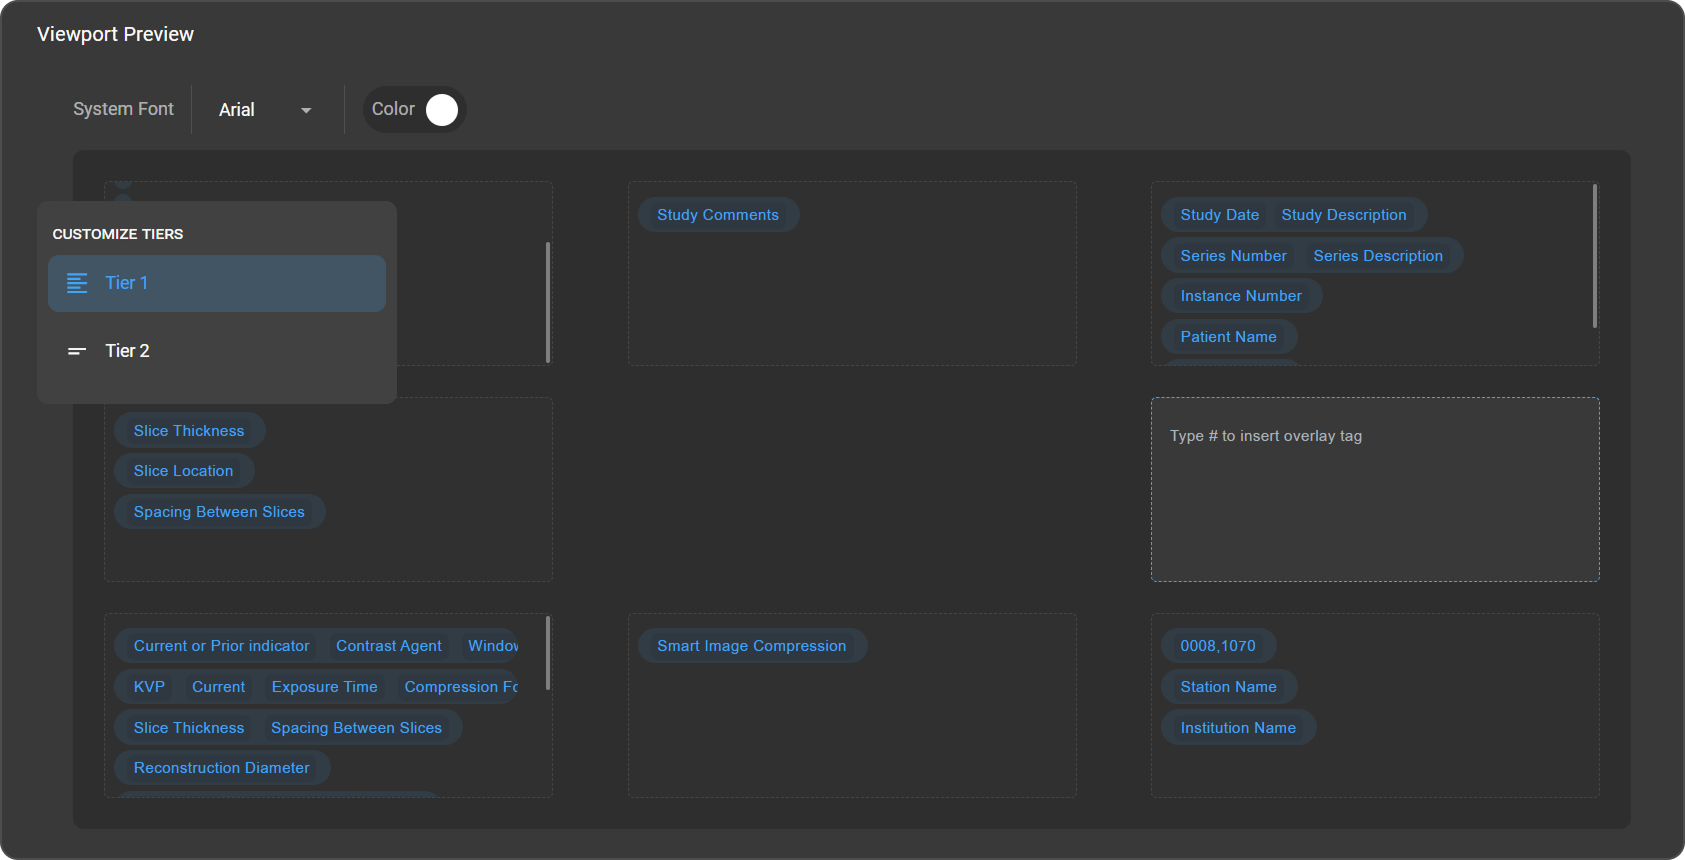
Overlay Modes
-
Tier 1 -- Detailed: Displays full DICOM information for large viewports (>500 px).
-
Tier 2 -- Minimal: Shows essential DICOM details for smaller viewports (
<500 px).
The system switches automatically based on viewport size.
Font & Color
-
Font: Select Arial or Roboto (applies to all overlays).
-
Color: Choose a global annotation color.
Adding DICOM Tags
Click inside a viewport region and type # to search and insert DICOM tags into the overlay.
Hanging Protocol Configuration in OmegaAI
Hanging Protocols standardize how images are arranged and displayed in the Image Viewer. They define layout, image sequence, matching rules, and viewing behavior based on modality and study attributes.
How to Access
-
Quick Access: Click the Change Layout (Grid icon) in the Image Viewer toolbar and expand the panel to view, create, or edit protocols.

-
Via Settings: Go to More Options (⋮) > Settings > Hanging Protocols.

Default & Saved Protocols
-
Pre-configured Default Protocols are available per modality.
-
You can duplicate, edit, or create custom protocols.
-
The list is automatically filtered by the active modality.
-
Protocols are grouped under Default and Saved sections.
Matching Criteria
Protocols are automatically applied based on:
-
Modality
-
Body Part
Creating a Hanging Protocol
-
Select a Layout (e.g., 1×1, 2×2).
-
Drag and drop View Codes (AXIAL, CORONAL, AP, LAT, etc.) into viewports.
-
Configure Rules (Window Level, Scaling, Orientation, Conditions).
-
Set Prior Matching Model (Current, 1st Prior, 2nd Prior, etc.).
-
Add Stages if using multiple monitors.
-
Click Save, name the protocol, and optionally set it as default.
For detailed configuration steps, refer to the full Hanging Protocols Guide
Multimonitor Setup
OmegaAI's Multimonitor setup expands your workspace across multiple screens, allowing you to efficiently access the Image Viewer, Document Viewer, Worklist, and Scheduler.
Access Display Settings
-
Click on your Profile icon (bottom-left corner).
-
Select Display Settings.

Configure Monitors
-
Click the pencil icon (top-right) to enter Edit Mode.
-
Hover over the monitor window icon.
-
Select an application from the dropdown:
-
Image Viewer
-
Document Viewer
-
Worklist
-
Scheduler
-
-
Click Save to apply changes.
Modify or Reset
-
Click Reset Selection to change an assigned application.
-
Click Cancel or Back to discard changes.
Activate /Deactivate Displays
-
Display settings are active by default.
-
Use the Active toggle (top-right) to enable or disable multi-monitor mode.
For complete configuration details, refer to the full Multimonitor Setup Guide