OmegaAI-Referring Physician Guide
Introduction
Welcome to OmegaAI, a powerful and intuitive platform designed for referring physicians to manage patient studies seamlessly. This guide covers account setups, navigating the worklist, searching for studies, using emergency access, and working with imaging tools.
A. Account Setup
I. Sign-Up Process
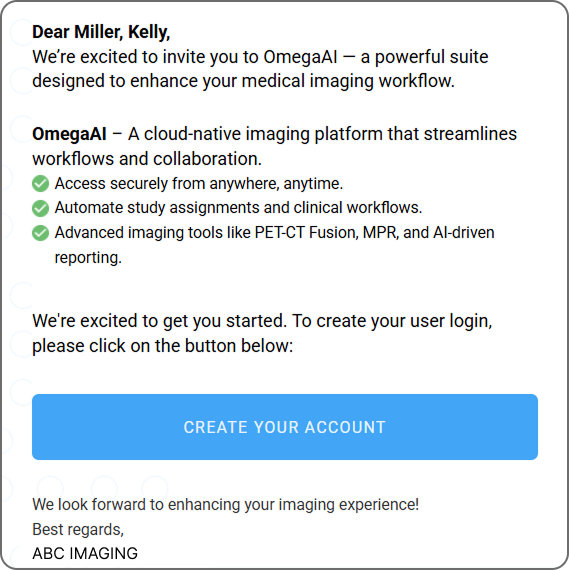
Once an organization grants you access to OmegaAI, you will receive an invitation email.
1. Open the Invitation Email
-
Open the invitation email sent by your organization.
-
Click Create Your Account.
2. Choose a Sign-Up Method
On the Registration page, you will see multiple sign-up options.
You can create your account using one of the following methods:
-
Continue with Apple
-
Continue with Google
-
Continue with Microsoft
-
Continue with Facebook
-
Register with Email
Alternatively, expand Register with Email to create an account using your email address.
Below the sign-up options, the following message appears:
"Sign up securely and effortlessly."

Note: When signing up with Google, Microsoft, Apple, Facebook, or Email, always use the same email address that received the invitation. This ensures that your account is correctly linked to your organization.
II. Register with Email
Follow these steps to create your OmegaAI account using your email address.
If you choose Register with Email, complete the required fields:
-
Email or Phone Number---The email address from your invitation link will be pre-filled and cannot be changed.
-
First Name---Enter your first name.
-
Last Name---Enter your last name.
-
Password---Create a secure password.
Complete the Sign-Up
-
You cannot proceed until the password meets all requirements, and both password fields match.
-
Once all fields are completed correctly, click Continue to complete the registration.

Note:
Existing users can continue logging in to their Blume or OAI
accounts using their current 6-digit PIN. However, upgrading to
the new password-based login is strongly recommended for improved
security.
For detailed instructions, refer to: New Sign-Up / Sign-In section.
III. Sign Up with Google, Microsoft, Apple, or Facebook
OmegaAI allows users to create an account using a supported third-party authentication provider. This method enables quick and secure registration without creating a separate password.
Steps to Sign Up
1. Open the Registration Page
After clicking Create Your Account in the invitation email, the Registration page will open.
2. Select a Sign-Up Option
Choose one of the following authentication providers:
-
Continue with Apple
-
Continue with Google
-
Continue with Microsoft
-
Continue with Facebook
3. Authenticate with the Selected Provider
You will be redirected to the selected provider's sign-in page.
-
Enter your credentials.
-
Approve the authentication request.
4. Complete the Registration
Once authentication is successful, your OmegaAI account will be created and linked to the selected provider.
Important: Always use the same email address that received the invitation email when signing in with Google, Microsoft, Apple, or Facebook. Using a different email address may prevent the system from linking your account to the organization.
B. Logging In
- Enter your registered email address and password.

-
When prompted, complete the email verification process by entering the code sent to your email (two-factor authentication).
-
Click Verify to proceed.
Tip: If you do not receive the verification email, check your Spam/Junk folder or contact your organization administrator for assistance.
C. Navigating the OmegaAI Worklist
I. Accessing the Worklist
After logging in to OmegaAI, you will be directed to the default Worklist, where you can view your assigned patient studies.

Note: For the best experience, it is recommended to use Google Chrome or Microsoft Edge.
II. Adjusting Display Settings
If the text appears too large or too small, adjust your browser's zoom settings to improve readability.
Zoom Shortcuts (Recommended Browsers)
Google Chrome / Microsoft Edge:
-
Zoom In: Ctrl + +
-
Zoom Out: Ctrl + -
-
Reset Zoom: Ctrl + 0
Alternatively, you can adjust zoom from the browser menu:
-
Click the three-dot menu (top-right corner)
-
Use the Zoom controls to increase or decrease the view
III. Understanding Worklist Assignments
The studies displayed in your Worklist include only those assigned to you as:
-
Referring Physician
-
Consulting Physician
-
A member of the same referring organization
IV. Filtering the Worklist
To quickly locate a specific study or patient:
1. Select a Column
Click on the column header corresponding to the data you want to filter (for example, Patient Name or Modality).
2. Enter Search Criteria
Type the relevant value in the search field (for example, enter the patient's name).
The Worklist will automatically update to display records that match or closely resemble the entered criteria.

V. Viewing More Columns
If not all columns are visible within the Worklist view, you can access additional information by scrolling horizontally.
- Scroll left or right using the horizontal scrollbar at the bottom of the Worklist

VI. Clearing Filters
You can remove applied filters to restore the full Worklist view:
-
Click the (X) icon next to a filter to remove a specific filter
-
Click Clear All to remove all applied filters and reset the Worklist view

VII. Downloading or Burning Studies
-
Locate the desired study in the Worklist
-
Right-click on the selected study to open the action menu
-
Choose an option:
-
Download Study -- Downloads the selected study to your system
-
Burn Study -- Exports the study (typically to external media such as CD/DVD or a designated format)
-

For more information on the Worklist, including how to create custom Worklists, refer to the Worklist user guide.
D. Searching for Patient Studies
I. Accessing Global Search
The Global Search feature allows you to quickly locate patient studies using various identifiers.
Steps to Search for a Study
-
Open Global Search
Click the Global Search bar located at the top of the homepage. -
Enter Search Criteria
Enter relevant details such as-
Patient name
-
Study ID
-
User or organization
-
DICOM-related information
-
-
View Search Results
Matching studies will appear dynamically in the search panel, including:-
Recently viewed studies
-
Recently searched terms
-
-
Open a Study
Double-click on the desired study to open it. -
View More Results (Optional)
Click View More to expand and display additional search results.

Learn more about Using Global Search
E. Emergency Access
I. What is Emergency Access?
The Emergency Access feature in OmegaAI enables authorized users to retrieve patient studies and records in urgent or time-sensitive situations.
-
Provides rapid access to patient data required for clinical decision-making.
-
Temporarily overrides organizational restrictions to ensure continuity of care.
Compliance Notice:
All Emergency Access activities are securely logged, monitored, and
subject to audit in accordance with applicable data protection and
regulatory standards.
II. How to Use Emergency Access
Steps to Access a Patient's Study
-
Open the Search Bar
Click the Search bar located at the top of the screen. -
Select Emergency Access
Choose Emergency Access from the dropdown menu.

-
Enter Patient Details
To retrieve a patient's studies, reports, and images, enter:-
First Name and Last Name (mandatory)
-
At least one of the following identifiers:
-
Date of Birth
-
Phone Number
-
Email Address
-
-
-
Once all required fields are completed, the Continue button becomes active (highlighted in blue), allowing you to proceed.

-
After successful verification, you will be redirected to the Patient History page.

Accessing Study Management Options (Right-Click Menu)
-
You can right-click on the desired study to open the menu, which provides multiple study management tools.
-
The available menu options are as follows:
-
Study
-
Document Viewer
-
Order
-
Patient
-
Study History
-
Image Viewer
-
Send

-
F. Using the Image Viewer
I. Accessing the Image Viewer
Access Methods
You can access the Image Viewer from the OmegaAI Worklist using the following methods:
1. Double-Click Method
-
Navigate to the Worklist on the OmegaAI dashboard.
-
Double-click on the desired study to open it in the Image Viewer.
2. Right-Click Menu Method
-
Right-click on the study you wish to view from the Worklist.
-
From the context menu that appears, select Image Viewer.

II. Key Features of the Image Viewer
1. Study Explorer (Left Panel)
The Study Explorer is located on the left side of the Image Viewer and is collapsed by default. Click the Study Explorer (file) icon in the top-left corner to expand it.
Key Features:
|
|

2. Toolbar
Located below the Search Bar, providing quick access to key tools:
-
View patient details
-
Adjust layouts and apply hanging protocols
-
Access additional options
-
Review documents alongside images
-
Add study notes or voice notes
-
Share studies

3. Measurement Panel (Right Panel)
Used to review and manage measurements and annotations for the current study.
Learn more about Measurement Panel4. Viewports (Main Display Area)
The central area where images are displayed. It supports multiple layouts, image overlays, and side-by-side document viewing for reporting.
5. Embedded Document Viewer (EDV)
The Embedded Document Viewer (EDV) enables viewing images and reports together within the Image Viewer for a streamlined workflow.
How to Use:
-
Click the Document Viewer icon in the top toolbar
-
The document panel opens alongside the images, allowing simultaneous review of reports and DICOM images


6. Layout Selector
The Layout Selector allows you to adjust how images are displayed in the Image Viewer.
How to Access:
-
Open a study in the Image Viewer
-
Click the Layout (grid) icon in the top toolbar
-
Select the desired layout from the grid
-
Apply changes to the active view

Downloading Studies & Images
The Download option allows you to export imaging data from the Image Viewer.
How to Access:
-
Click the More Options (⋮) icon in the top toolbar
-
Select Download from the menu
Available Options:
-
Download Image -- Exports the currently displayed image with annotations
-
Download Study -- Exports the complete study in DICOM format, including all series and images

Once a study is downloaded in OmegaAI, it begins streaming in the background and will appear only after the download is complete.
I. Track Download Progress
-
Click the Downloads button in the right panel
-
Monitor the download progress
-
The study will be available after completion (location depends on browser/OS)
II. Accessing Studies on Windows
-
Locate the downloaded ZIP file
-
Click Extract All and choose a destination
-
Open the extracted folder
To View Study:
- Run VIEWER.EXE (Windows only)
To Access DICOM Files:
- Open the numbered folders inside the extracted directory
III. Accessing Studies on macOS
-
VIEWER.EXE is not supported
-
Use a third-party DICOM viewer
Recommended options:
Note: These are third-party tools; use at your discretion.
The Image Viewer offers a wide range of features, including tools, hanging protocols, and customization options.
For more detailed information about the Image Viewer, refer to the OmegaAI Image Viewer User Guide.
G. Using Document Viewer
The Document Viewer in OmegaAI allows referring physicians to view, download, and print patient reports efficiently.
Accessing the Document Viewer
The Document Viewer can be accessed in two ways:
From the Worklist
-
Navigate to the Worklist.
-
Select the desired study.
-
Click the Document Viewer icon from the action toolbar.
-
The Document Viewer opens with all associated documents.

From the Image Viewer (Embedded Document Viewer)
-
Open a study in the Image Viewer.
-
Click the Document Viewer icon in the top toolbar.
-
The Document Viewer opens alongside the images, displaying related documents.

How to Download & Print Reports
Download Report
-
Open the Document Viewer.
-
Click the Download icon from the bottom toolbar.
-
The report will be downloaded as a PDF file to your device.

Print Report
-
Open the Document Viewer.
-
Click the Print icon from the bottom toolbar.
-
This will open the print dialog in your web browser, allowing you to select printer settings.

III. Troubleshooting
If you are unable to find a report, try the following:
- Verify the correct study -- Ensure you have opened the correct study for the patient.
- Check report status -- Unsigned reports may not yet be available.
- Check the Worklist -- Confirm that the study status is SIGNED.
- Contact the imaging center -- If the report is still unavailable, reach out for assistance.
For more detailed information about the Document Viewer, refer to the OmegaAI Document Viewer User Guide.
I. Final Notes
-
Ensure your Worklist is regularly refreshed for the latest updates.
-
Use appropriate access levels to maintain security.
-
Explore additional features in the OmegaAI user guide for advanced functions.
For further assistance, visit help.omegaai.com or contact support.