More Options Menu in OmegaAI Image Viewer
Overview
The More Options menu (⋯) in the OmegaAI Image Viewer toolbar provides access to a range of tools and settings for downloading studies, managing view settings, linking series, configuring display preferences, and customizing the viewer environment.
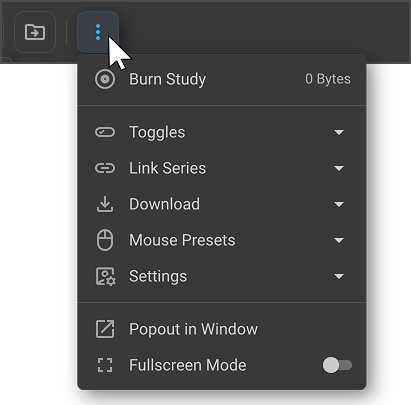
Accessing the More Options Menu��
|
|
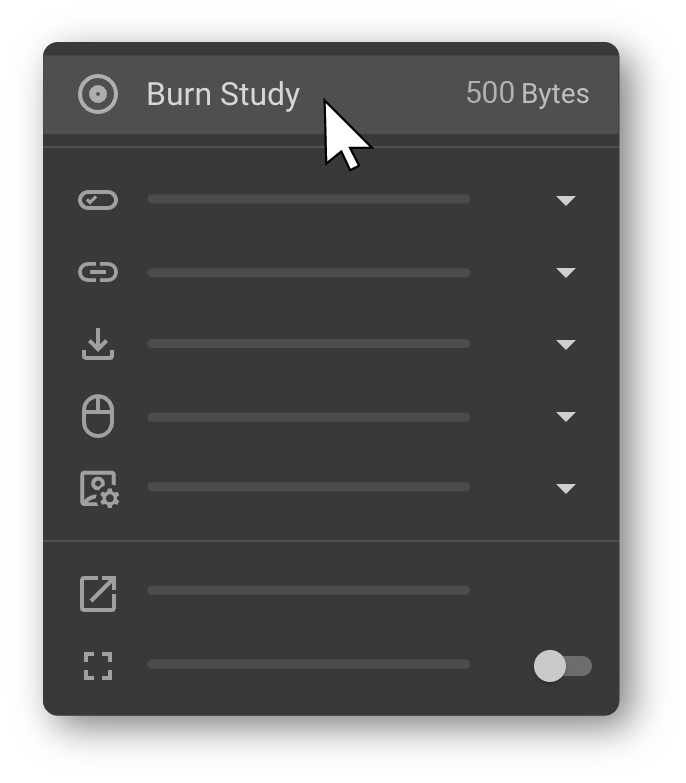
1. Burn Study
The Burn Study feature allows you to write the current study onto a CD or DVD. When selected, it displays the size of the study to be written to the disc — helping you confirm the contents will fit on the selected media. If there are no documents or images in the study, the size will be shown as 0 MB. |
|
Burn Process
If the selected study contains valid images, the following sequence occurs automatically:
- A small executable file — RamSoft.DiscImageBurner.exe — is downloaded to your machine. This file is required to facilitate the disc image burning process.
- Once the executable launches, a command prompt window opens and the system begins preparing the burn. The window displays real-time progress including percentage complete, data transferred, and elapsed time.
- The Windows Disc Image Burner dialog opens. Select the appropriate disc burner from the dropdown, then click Burn to begin writing the study to the disc.
The Burn Study feature also enables users to burn one or more studies directly from the Worklist. Learn more about Burn Study in the Worklist.
Learn more about how to access DICOM files exported from OmegaAI.
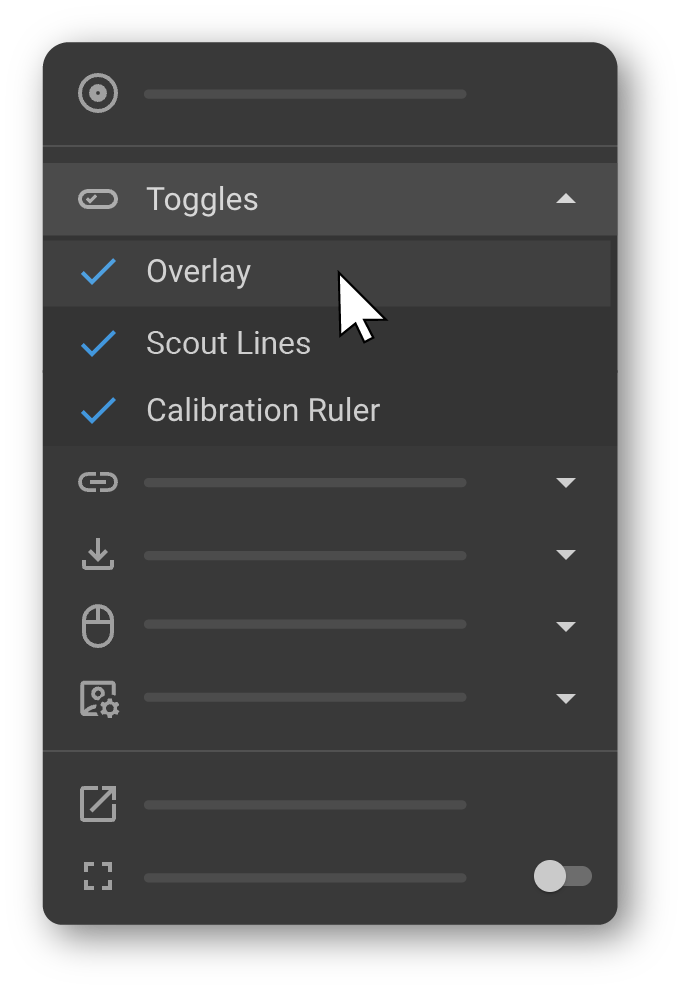
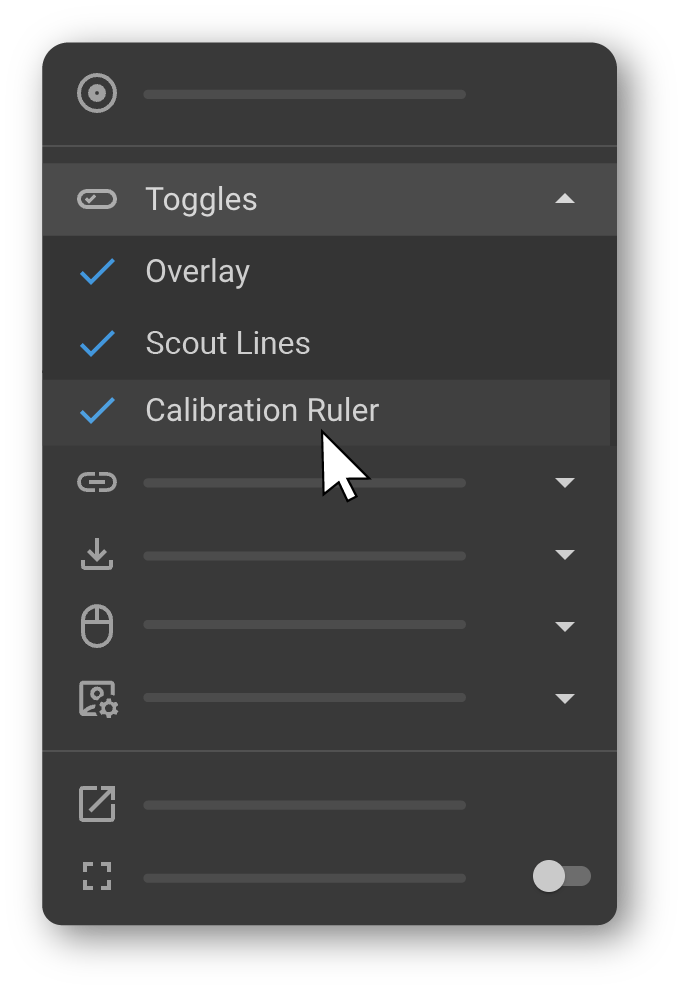
2. Toggles
The Toggles submenu provides quick on/off controls for commonly used display elements. Click any toggle to enable or disable it. A blue checkmark (✓) indicates the option is active. |
|
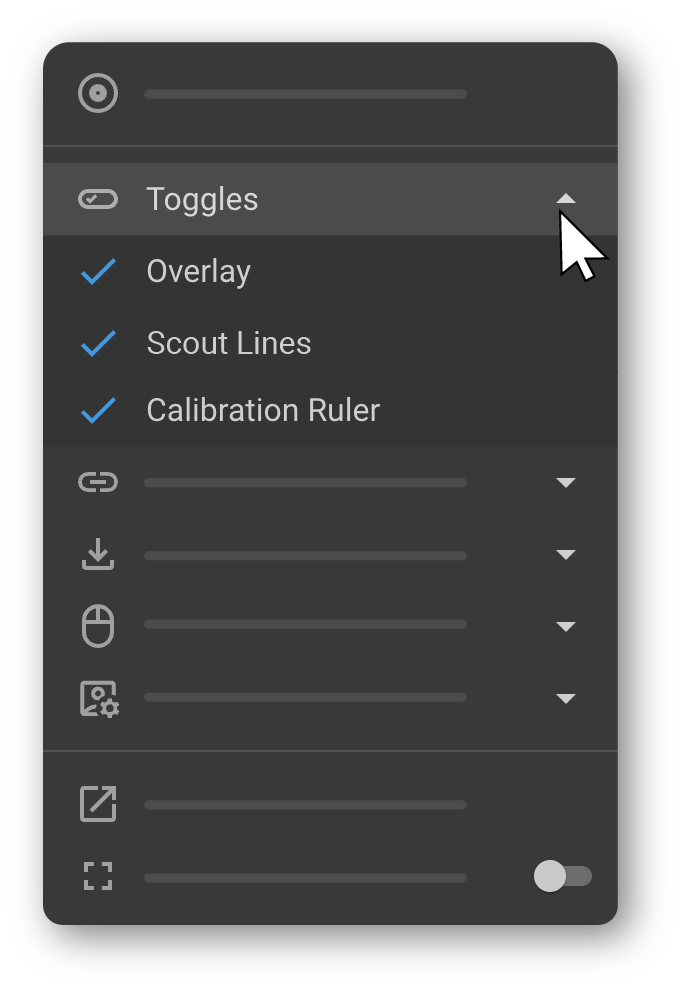
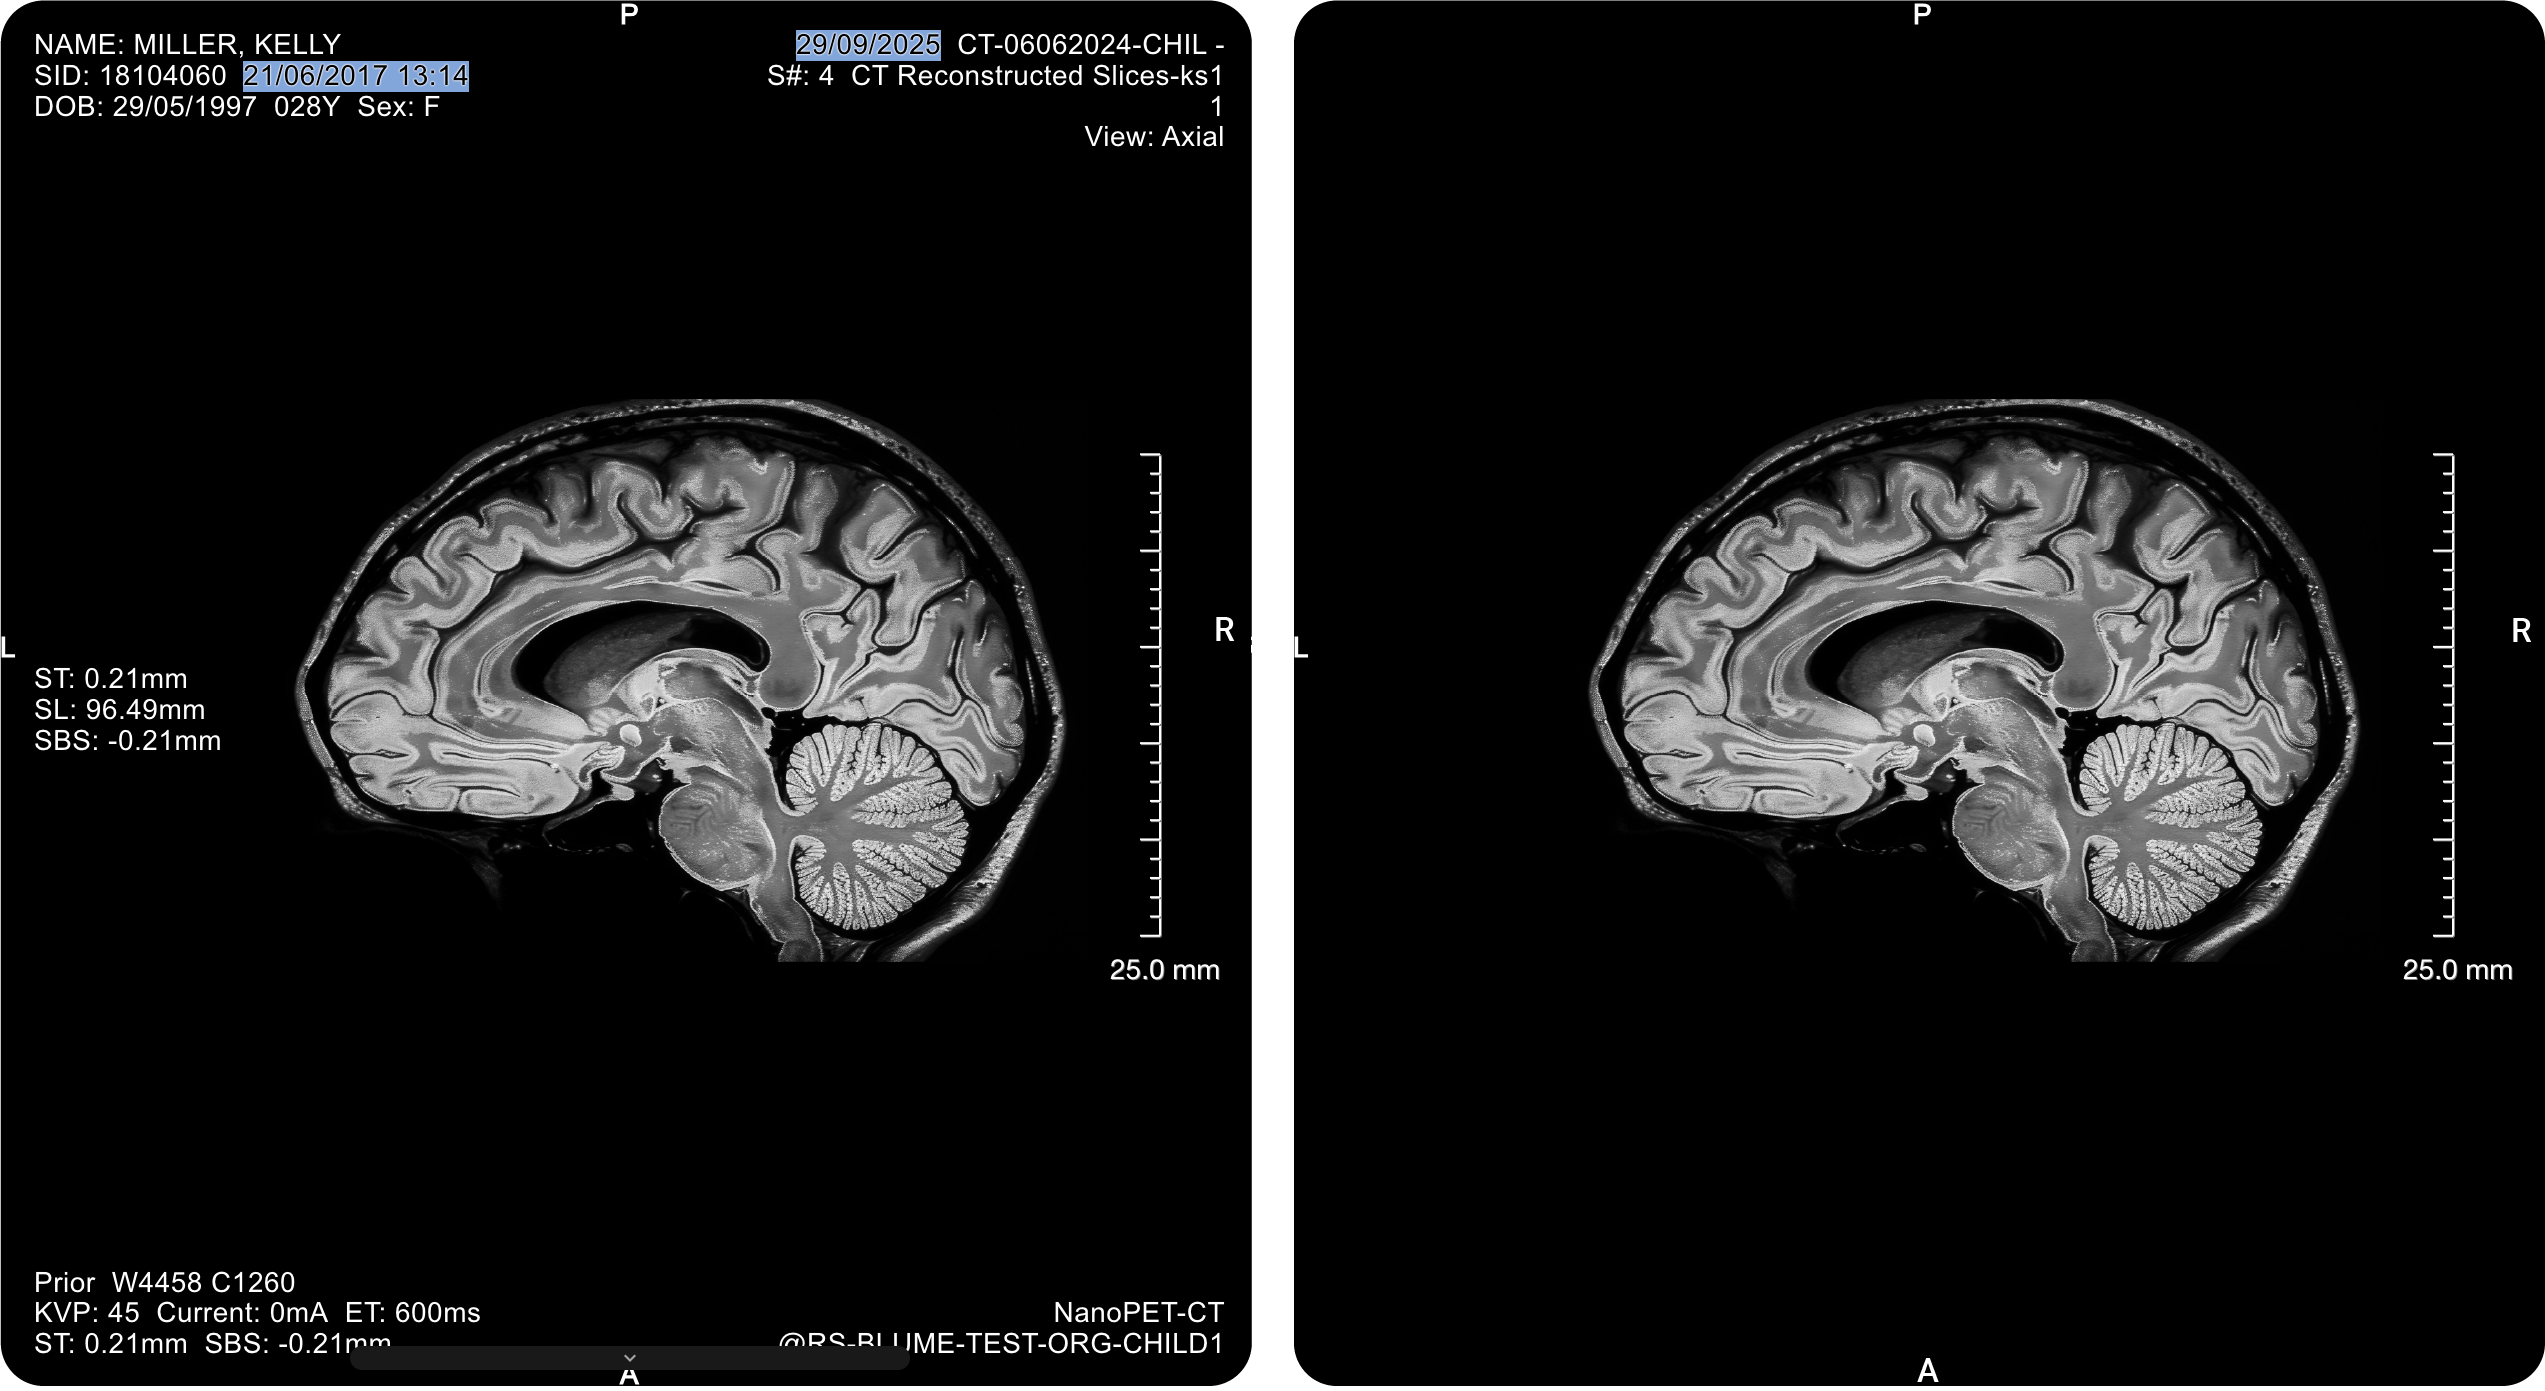
2.1 Overlay
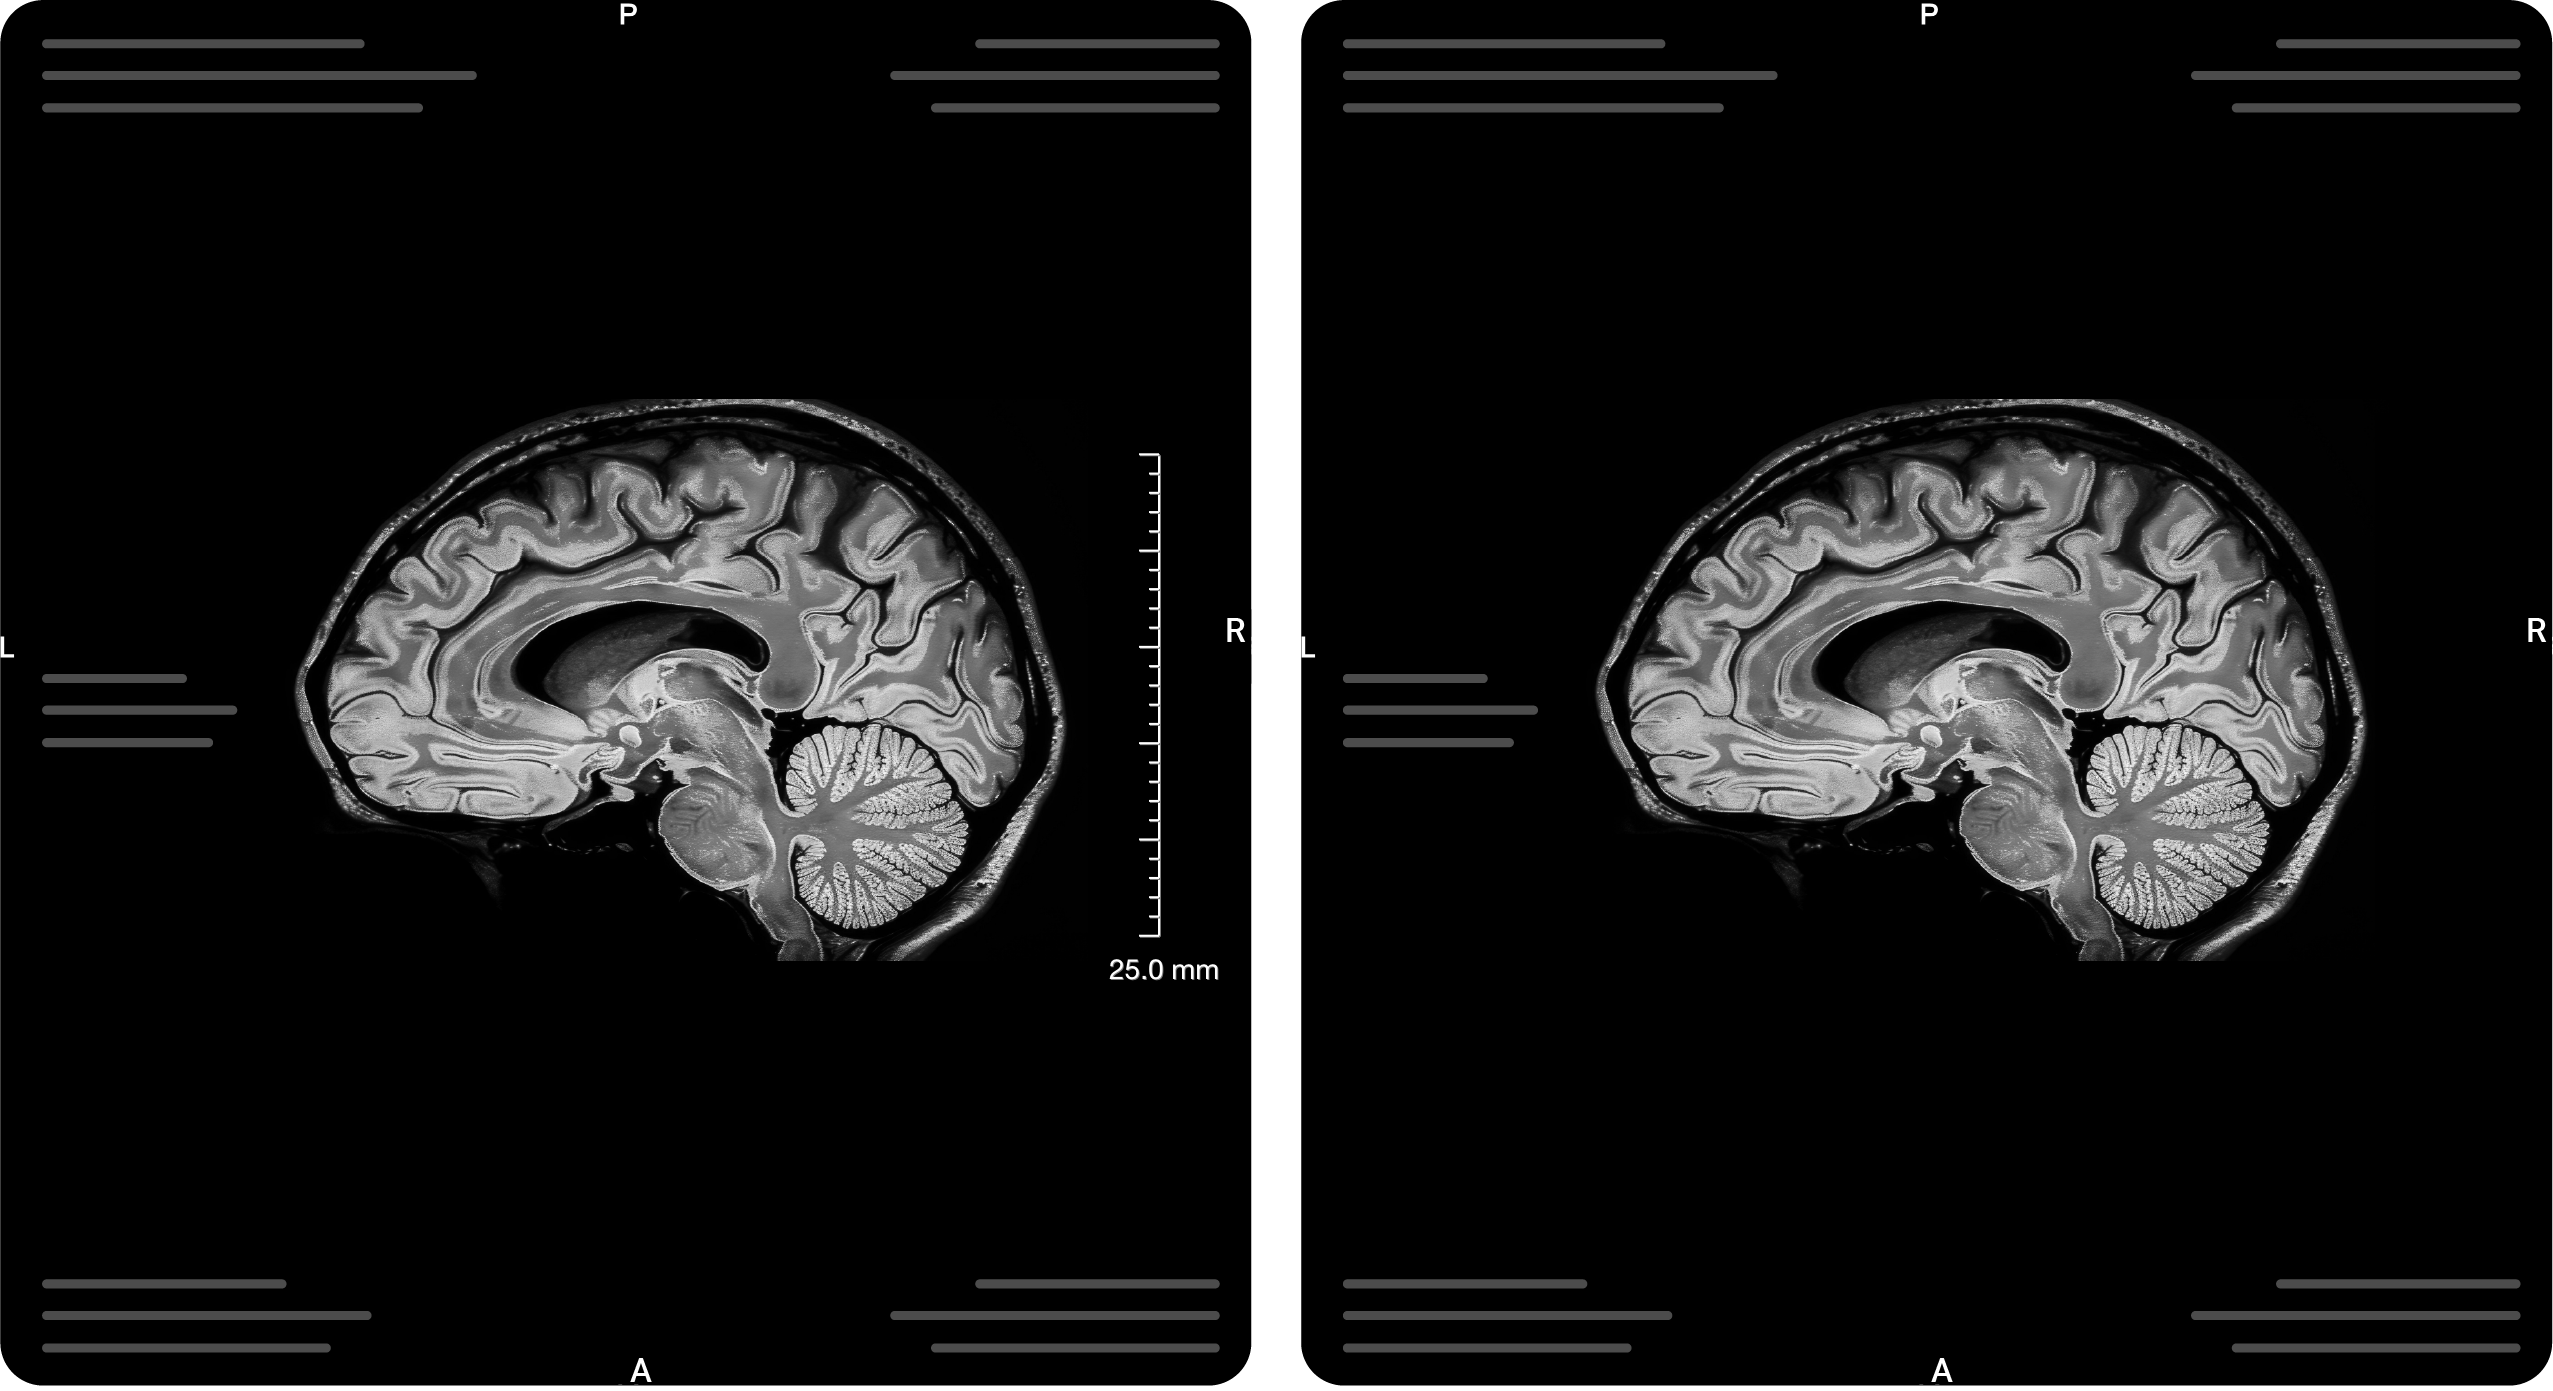
Shows or hides the informational overlay displayed on images, including patient details, study metadata, image orientation, slice number, zoom level, and other contextual information.
|
|
To learn more, see Customize Overlay Annotations.
2.2 Scout Lines
The Scout Line feature visually links the scout (localizer) image with corresponding cross-sectional images (CT, PT, or MR slices). When enabled, a horizontal or vertical reference line appears on the scout image, indicating the exact anatomical position of the currently displayed slice. The line updates dynamically as you scroll, providing real-time spatial feedback. Useful for:
|
|


2.3 Calibration Ruler
Shows or hides an on-screen calibration ruler representing real-world measurement units (cm or mm). The ruler provides a visual reference scale adjacent to the image for interpreting anatomical size and proportion.
|
|
To set a custom measurement scale, see Calibration Tool under Settings.
3. Link Series
The Link tool synchronizes multiple images or series across viewports. When linking is enabled, interactions such as scrolling, zooming, and panning are mirrored across all linked viewports — useful for comparing images from different time points, modalities, or anatomical regions. |
|
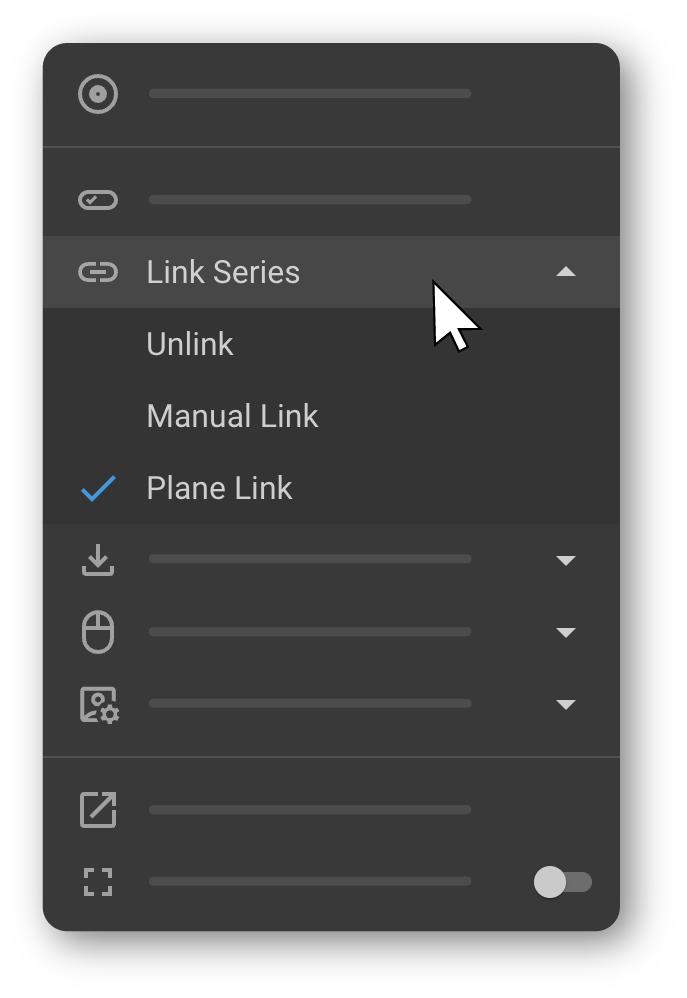
| Mode | Description |
|---|---|
| Unlink | Disables synchronization between viewports. |
| Manual Link | Manually link selected viewports for synchronized viewing. |
| Plane Link | Links viewports based on anatomical planes (axial, sagittal, coronal) for coordinated multi-plane navigation. |
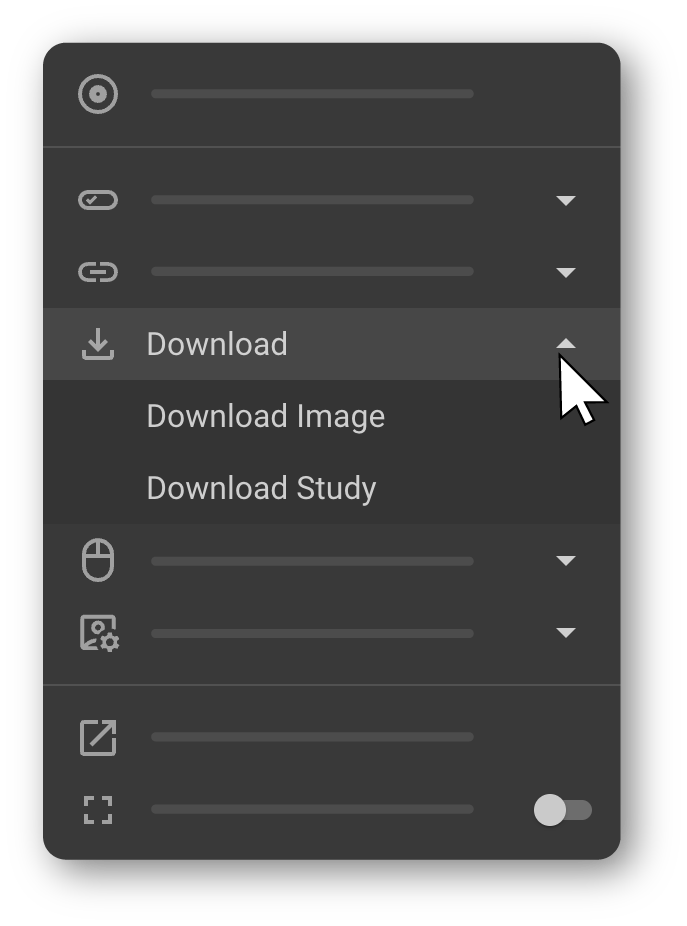
4. Download
The Download tool allows you to export imaging content directly from the Image Viewer for sharing, reporting, or offline reference. Clicking Download expands into two options: Download Image Exports only the image currently displayed in the active viewport, along with its annotations. When selected, the Download Image dialog appears with options to set the file name, image width (px), and image height (px). A preview of the selected image is shown before downloading. Download Study Downloads the entire study — including all series and images — in DICOM format. Useful for sharing the full dataset or creating offline archives. |
|
Learn more about how to access DICOM files exported from OmegaAI.
5. Mouse Presets
Mouse Presets define how mouse buttons and the scroll wheel behave in the Image Viewer. Presets are modeled after commonly used radiology PACS vendors, allowing you to work with familiar controls for window/level adjustment, panning, zooming, measurements, and scrolling. The selected preset is applied immediately and remains active until changed. |
|
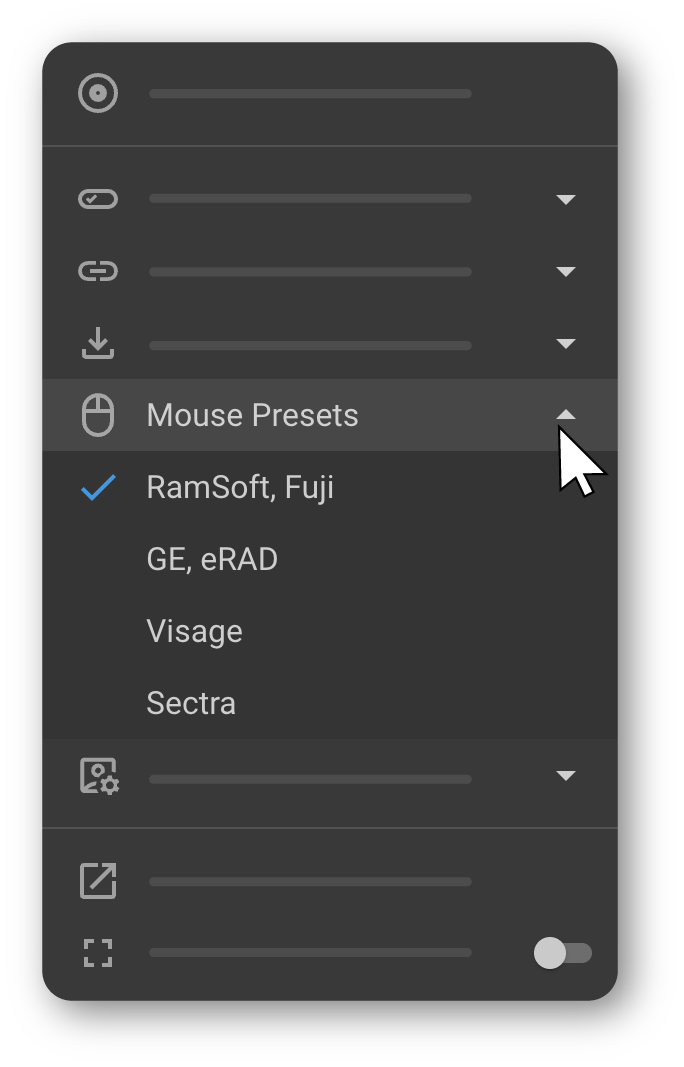
Preset Reference
| Vendor | Left Click | Right Click | Middle Click | L+R Hold & Drag | Scroll Wheel |
|---|---|---|---|---|---|
| RamSoft, Fuji | Scroll (or selected tool) | Window/Level | Zoom | Pan | Image scroll, Series scroll |
| GE, eRAD | Pan (or selected tool) | Window/Level | — | Zoom | Image scroll, Series scroll |
| Visage | Scroll (or selected tool) | Pan | Zoom | Window/Level | Image scroll, Series scroll |
| Sectra | Pan (or selected tool) | Window/Level | Zoom | Scroll | Image scroll, Series scroll |
6. Display & Viewing Options

| Option | How to Access | Description |
|---|---|---|
| Popout in Window | More Options (⋯) → Popout in Window | Opens the current image in a separate window. |
| Fullscreen Mode | More Options (⋯) → Fullscreen Mode | Toggles full-screen display for a distraction-free viewing experience. Click again to exit and return to the standard viewer layout. |
To learn more, see Accessing the Image Viewer.
7. Settings
The Settings submenu provides access to configuration and customization options for the Image Viewer, including display behavior, overlay and toolbar personalization, calibration, DICOM metadata, and workflow preferences. |
|
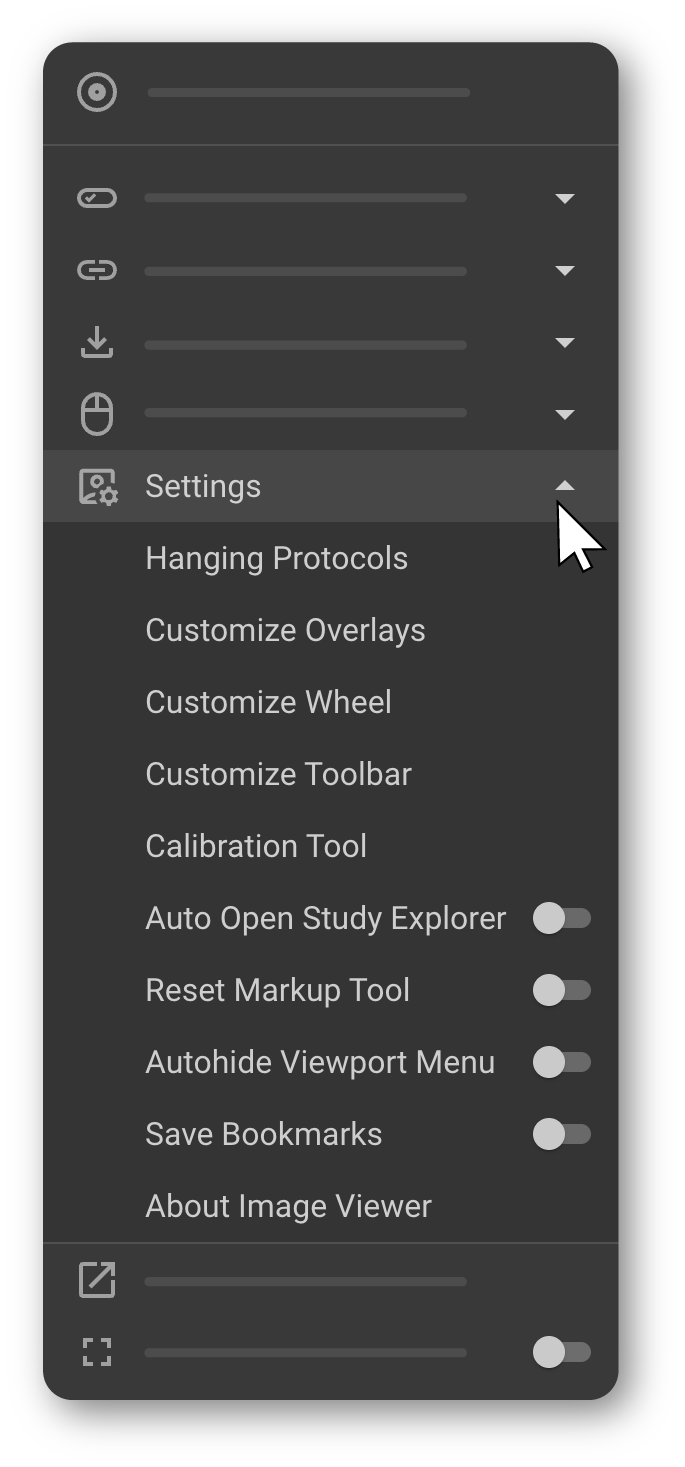
7.1 Hanging Protocols
How to access: More Options (⋯) → Settings → Hanging Protocols
Customize existing hanging protocols or create new ones. Adjust the layout, sequence, and display preferences based on study details to streamline review for specific modalities or study types.
To learn more, see Hanging Protocols.
7.2 Customize Overlays
How to access: More Options (⋯) → Settings → Customize Overlays
Choose which patient data, study information, and annotations appear directly on image viewports — such as patient name, study date, and acquisition time — to keep the display focused on relevant data.
To learn more, see Customize Overlay Annotations.
7.3 Customize Wheel
How to access: More Options (⋯) → Settings → Customize Wheel
Organize and update tools within the Image Control Wheel for quicker access, placing the most frequently used tools at the forefront.
To learn more, see Image Control Wheel.
7.4 Customize Hotkeys
How to access: More Options (⋯) → Settings → Customize Hotkeys
Assign or modify keyboard shortcuts for tools and actions in the Image Viewer. Custom hotkeys allow faster access to frequently used tools without navigating menus.
To learn more, see Adjustment & Markup Tools.
7.5 Customize Toolbar
How to access: More Options (⋯) → Settings → Customize Toolbar
Add, remove, or rearrange tools in the toolbar to match your workflow, including tools like Zoom, Measure, Annotate, and Window Level presets.
To learn more, see Image Viewer Toolbar.
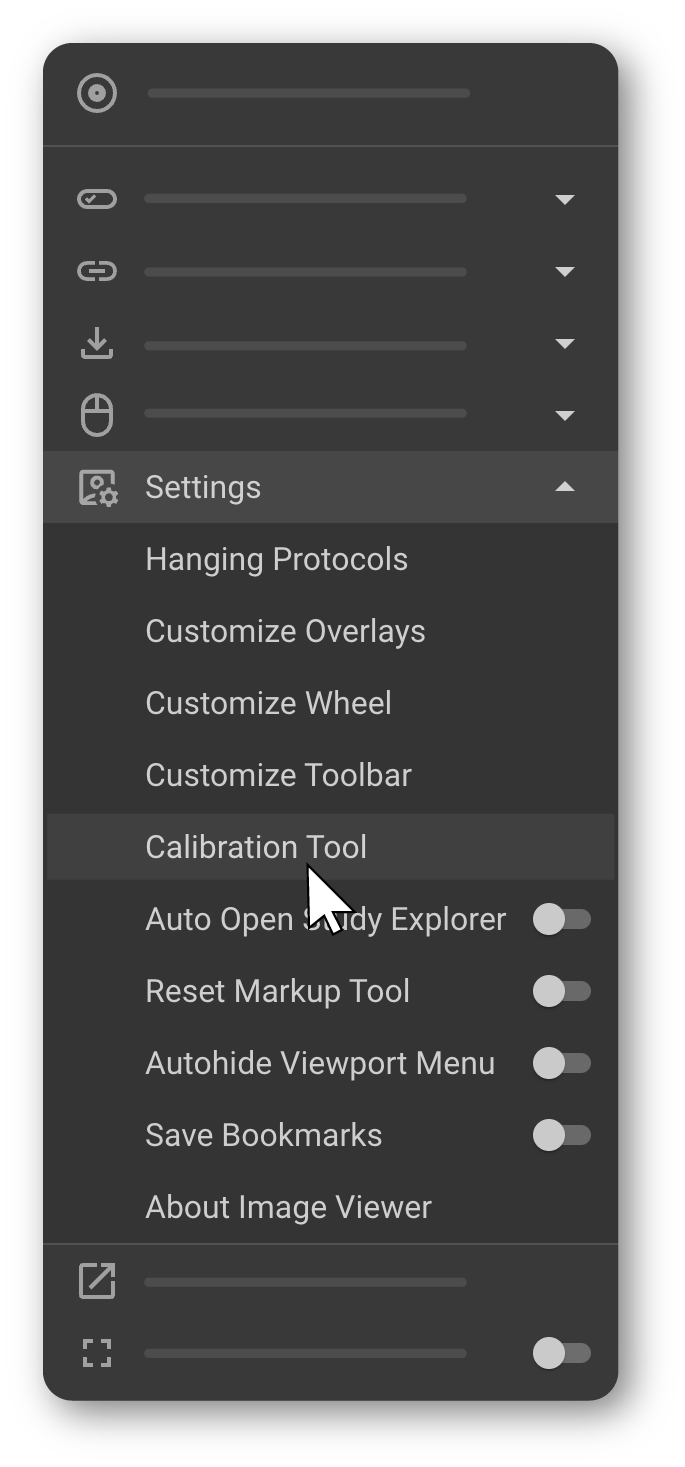
7.6 Calibration Tool
The Calibration Tool allows you to define a custom measurement scale for the active viewport. |
|
-
The cursor changes to a line icon, indicating calibration mode is active.
-
Draw a straight reference line on the image within the active viewport to define the measurement scale.

-
The Calibrate Ruler dialog appears automatically.
-
Enter the real-world measurement corresponding to the drawn line.
-
Select the unit: mm, cm, or inches.
-
Click Save to apply the calibration.

Once calibration is complete, all subsequent measurements in the viewport use the calibrated scale.
7.7 DICOM Header Tags
How to access: More Options (⋯) → Settings → DICOM Header Tags
Displays DICOM header metadata for the active image — essential for clinical image interpretation and validation.
To learn more, see DICOM Tag Browser.
7.8 Auto Open Study Explorer
How to access: More Options (⋯) → Settings → Auto Open Study Explorer
Controls whether the Study Explorer opens automatically when the Image Viewer launches. Toggle on to always start with the Study Explorer expanded, or off to start directly in the main viewer.
To learn more, see Study Explorer & Image QC.
7.9 Reset Markup Tool
How to access: More Options (⋯) → Settings → Reset Markup Tool
When enabled, markup tools automatically reset back to the pointer tool after each use, allowing you to return to a neutral state without additional clicks.
To learn more, see Adjustment & Markup Tools.
7.10 Autohide Viewport Menu
How to access: More Options (⋯) → Settings → Autohide Viewport Menu
When enabled, the viewport menu remains hidden until you actively interact with it, providing a cleaner workspace.
To learn more, see Orientation of the Image Viewer.
7.11 Save Bookmarks
How to access: More Options (⋯) → Settings → Save Bookmarks
The Save Bookmarks feature controls whether layout and tool changes made during a viewing session are retained or discarded when the session ends. Each user can view and manage only their own saved viewer state.
| State | Behavior |
|---|---|
| Enabled | All viewer layout and tool changes are automatically saved and persist in future sessions. |
| Disabled | Changes are temporary and revert when the session ends, restoring the default bookmark state. |
- Configurations saved with bookmarks:
- Viewport layout and location
- Viewing protocol
- Scout line display
- Study Explorer orientation and height
- Maximize/Restore viewport state
- Adjustment Tools — All Adjustment Tool settings (e.g., Zoom, Pan, Rotate, Window Level, Flip, Invert) are saved and applied in future sessions.
- Markup Tools — All markups and measurements (e.g., lengths, angles, labels, annotations) are saved in the Measurements Panel and remain available in future sessions.
Recommended usage:
- Enable if you frequently customize your viewer layout and want those settings to persist across sessions.
- Disable if you prefer starting with a default layout each time or are demonstrating temporary configurations.
7.12 Hover to Switch Tools
How to access: More Options (⋯) → Settings → Hover to Switch Tools
Enables quick switching between Adjustment Tools and Markup Tools within the Image Control Wheel without additional clicks.
The Image Control Wheel is divided into two sections:
|
|
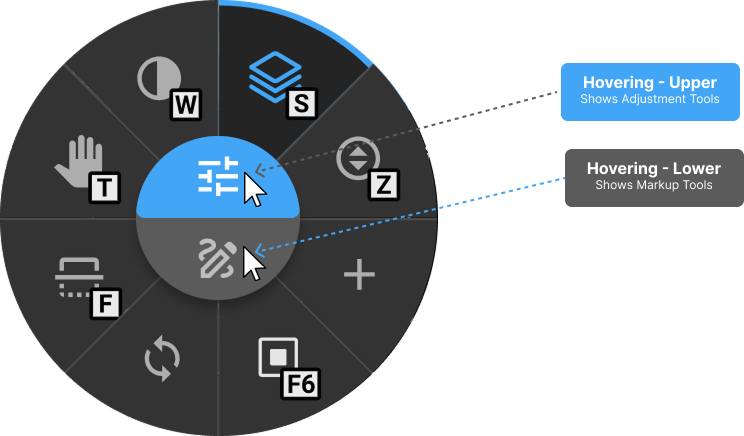
| State | Behavior |
|---|---|
| Enabled | Hovering over the upper or lower section instantly displays the corresponding tool set without clicking. |
| Disabled (default) | The tool set remains fixed unless manually changed by clicking. |
To learn more, see Image Control Wheel.
7.13 About Image Viewer
How to access: More Options (⋯) → Settings → About Image Viewer
Opens the About Us page, which displays company information, contact details, and regulatory information for OmegaAI, including CE authorization, ANVISA registration, and US FDA 510(k) details.
For the latest information, visit www.ramsoft.com.