Image Control Wheel in OmegaAI
The Image Control Wheel is a radial shortcut menu that appears when you right-click on any image in the OmegaAI Image Viewer. It provides quick, centralized access to commonly used Adjustment and Markup tools, allowing users to work efficiently without navigating multiple menus. Designed for speed and simplicity, the wheel presents tools in a clear visual layout, helping users interact with images more intuitively.
How to Access the Image Control Wheel
-
Open any study or series in the Image Viewer.
-
Right-click on the image---the Image Control Wheel appears instantly.
-
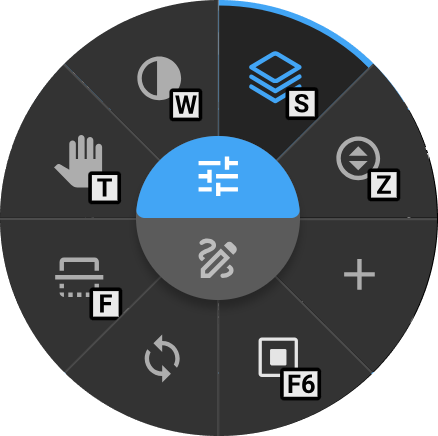
At the center of the wheel, you will see two primary categories:
-
Adjustment Tools
-
Markup Tools
-
-
Click on the category you want to view the available tools.
-
Each tool icon displays its assigned hotkey, allowing users to identify the shortcut quickly.
-
When you hover over a tool, its name appears in the center of the wheel for easy identification.
-
Simply hover to highlight a tool and click to activate it.
Toggle Hover to Switch Tools
This feature allows you to switch between Adjustment Tools and Markup Tools in the Image Control Wheel by simply moving your cursor, without any extra clicks. By default, this feature is turned off.
|
|

How It Works
Once enabled, open the Image Control Wheel by right-clicking on any image. Moving your cursor to the upper section of the wheel instantly displays Adjustment Tools, while moving it to the lower section displays Markup Tools. The switch happens automatically as you move your cursor --- no clicking required.

When the feature is turned off, the wheel displays a fixed tool set, and you need to click manually to switch between Adjustment Tools and Markup Tools.
Customizing the Image Control Wheel
OmegaAI includes a powerful Customize Wheel feature that allows users to tailor the tool wheel to their specific workflow. You can choose wheel layouts with 4, 6, or 8 tool slots, select tools from Adjustment or Markup categories, assign hotkeys, and save personalized configurations.
Customized wheels streamline navigation, reduce repetitive actions, and support efficient diagnostic review.
Accessing the Customize Wheel Feature
-
Open the OmegaAI Image Viewer.
-
Click on the More Options (three-dot menu) in the top toolbar.
-
Select Settings > Customize Wheel.
-
The Wheel Customization drawer will open on the right side of the screen.

Customization Interface and Wheel Settings
Tabs for Customization
1. Adjustment Tab
Contains tools related to image visualization and display control. These tools help refine brightness, contrast, orientation, zoom, and other parameters essential for accurate review and navigation of medical images.
2. Markup Tab
Includes tools for annotation and measurement. Markup tools enable users to measure anatomical structures, add labels, document findings, and communicate diagnostic observations directly on the image.
Learn more about the Adjustment and Markup Tools Guide
Configuring and Customizing the Wheel
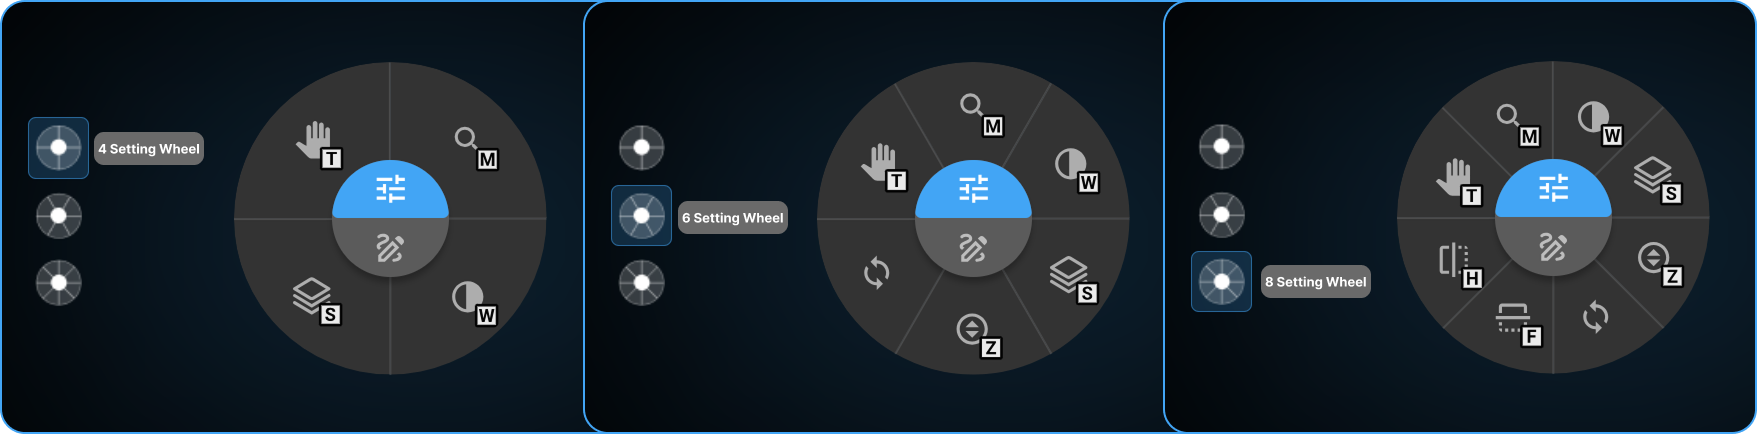
Select Wheel Type
Choose how many tools should appear on your radial menu:
-
4-setting wheel
-
6-setting wheel
-
8-setting wheel
Click your preferred configuration to begin customizing.
Tool Arrangement
-
All available tools appear in the customization panel.
-
Reorder tools by dragging them using the (⋮⋮) drag handle on the left side that appears on hover.
-
Tools placed above the "Currently Not Assigned" section will appear in the Image Control Wheel.
-
If a tool is not applicable to the current image or modality, OmegaAI automatically switches to the next available tool in your list.

Assigning Hotkeys
Most tools come with default hotkeys, but you can modify them:
-
Click on the tool you want to update.
-
Select an available hotkey slot.
-
Press your preferred key or key combination (e.g., T, Ctrl+W, Shift+D).
-
Avoid using shortcuts already used by your browser or OS.
-
To remove the hot key, click the delete (trash) icon.

Saving Your Customizations
-
After configuring tools and hotkeys, click Save.
-
Your preferences are stored in your personal user profile and do not affect other users.
Best Practices
-
Choose tools that fit your modality types and daily workflow.
-
Assign intuitive, easy-to-remember hotkeys.
-
Review and update your wheel periodically as your workflow evolves.
-
Use the hover feature in the wheel to quickly identify tools before selection.