Image Control Wheel
Overview
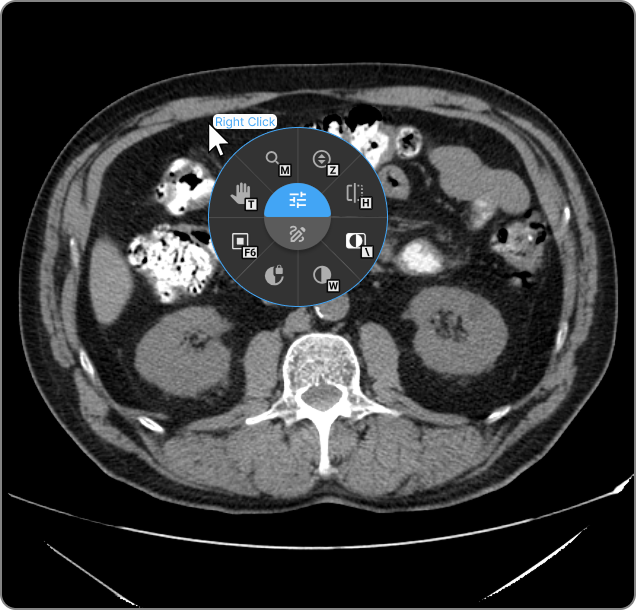
The Image Control Wheel is a radial shortcut menu that provides quick, centralized access to commonly used Adjustment and Markup tools in the OmegaAI Image Viewer. It allows users to work efficiently without navigating multiple menus. Right-click on any image in the Image Viewer to open the wheel instantly.
Tool Categories
The wheel is organized into two tool categories. Click the corresponding center button to switch between them:
- Adjustment Tools — Image visualization and display controls including Window/Level, Zoom, Pan, Rotate, and more.
- Markup Tools — Annotation and measurement tools including Length, Angle, ROI, Annotate, and more.
Each tool slot on the wheel displays its assigned hotkey. Hover over a tool to see its name at the center of the wheel. Click any tool to activate it.
To learn more, see Adjustment & Markup Tools.
Hover to Switch Tools
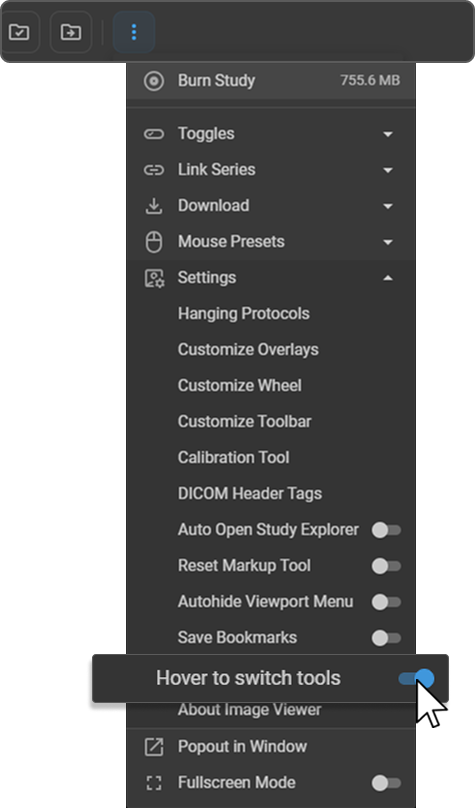
When enabled, this feature lets you switch between Adjustment and Markup tool sets by moving your cursor over the center button of the wheel — no clicking required. By default, this feature is turned off.
How to Enable
|
|
How It Works
The center button is split into two halves:
|
|
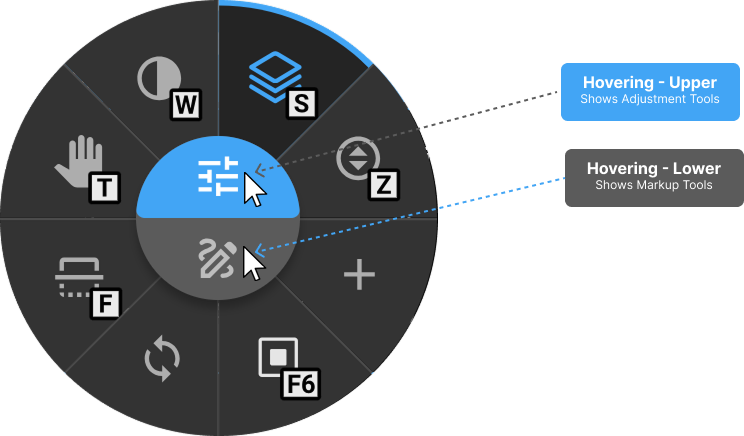
The switch is instant as you move your cursor. When the feature is disabled, the wheel shows a fixed tool set and you must click the center button manually to switch between tool categories.
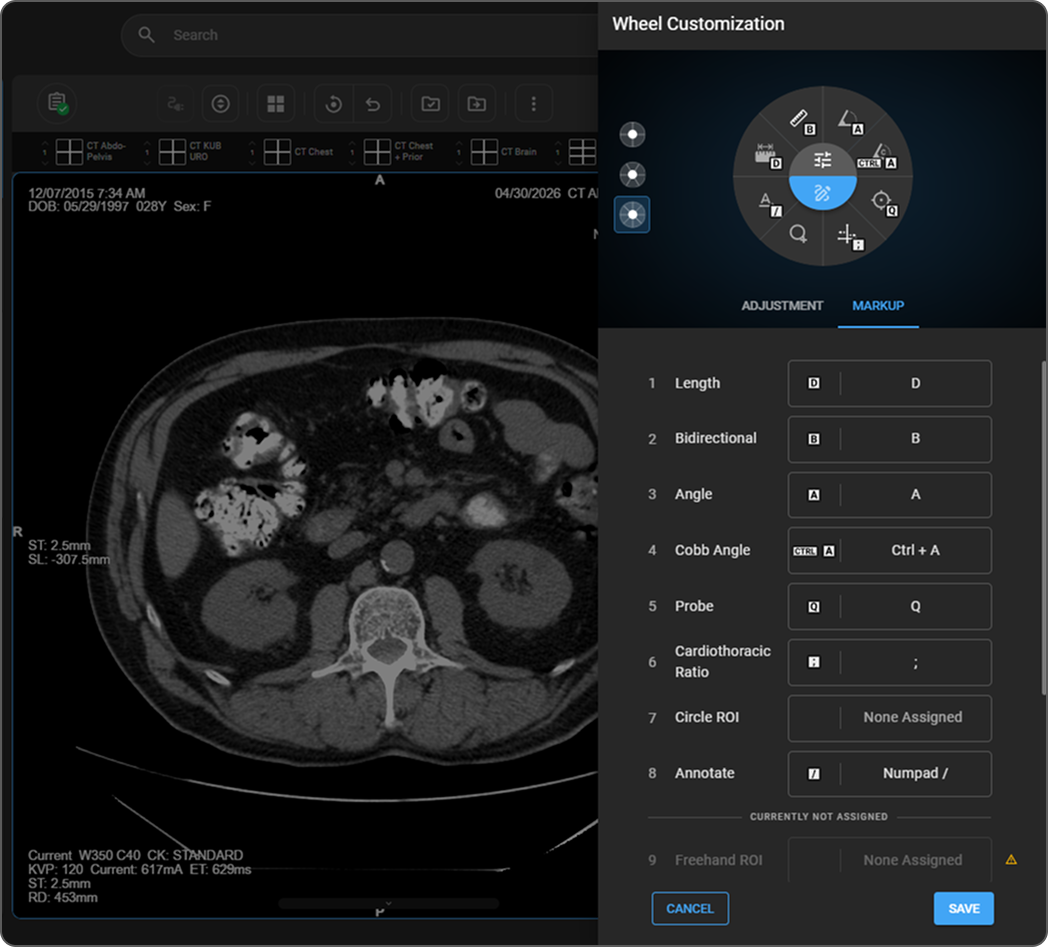
Customizing the Image Control Wheel
You can tailor the wheel to your workflow by selecting a layout size, choosing which tools appear, assigning hotkeys, and saving your configuration.
Accessing Customize Wheel
|
|
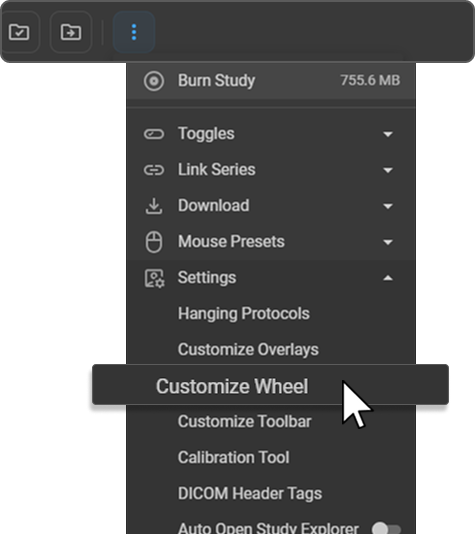
The Wheel Customization drawer opens on the right side of the screen.
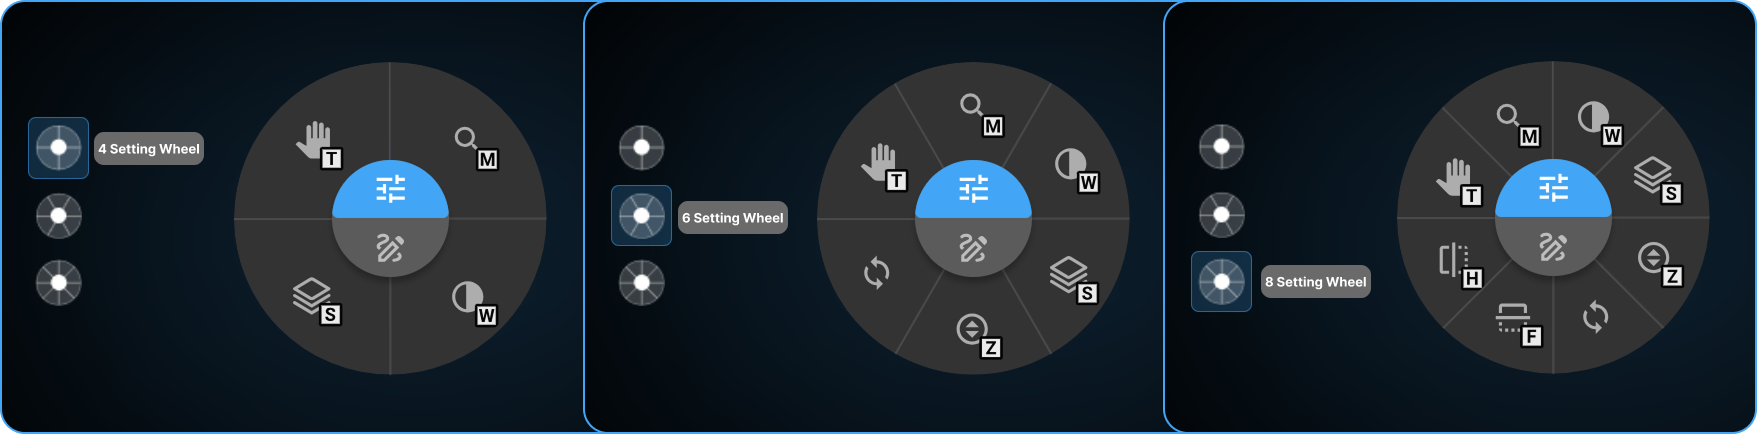
Step 1 — Select a Wheel Size
Three wheel size options are displayed as dot selectors on the left side of the drawer. Click your preferred size:
| Wheel Type | Tool Slots |
|---|---|
| 4-setting wheel | 4 |
| 6-setting wheel | 6 |
| 8-setting wheel | 8 |
A live preview of the wheel updates at the top of the drawer as you select.
Step 2 — Select a Tool Category
Click the Adjustment or Markup tab to switch between tool sets:
- Adjustment — Pan, Magnify, Window Level, Clamped Window Level, Quad Tool, Crosshair Pointer, Stack Scroll, Zoom, and more.
- Markup — Annotation and measurement tools.
Step 3 — Arrange Tools
Tools are listed in numbered order. Tools numbered within the wheel slot count (e.g., 1–8 for an 8-slot wheel) appear on the wheel. Tools listed below the Currently Not Assigned divider are available but do not appear on the wheel.
|
|
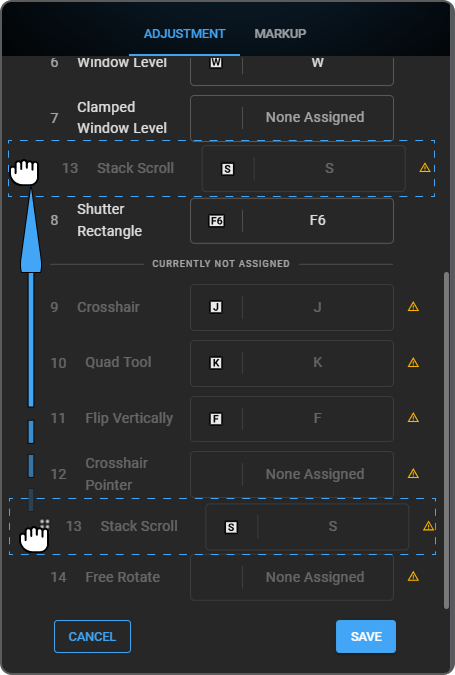
Tools listed below the Currently Not Assigned divider are indicated with a ⚠ warning icon. To re-enable them, reorder the tool list or change the wheel size so they fall within the active slot count.
Step 4 — Assign Hotkeys
|
|
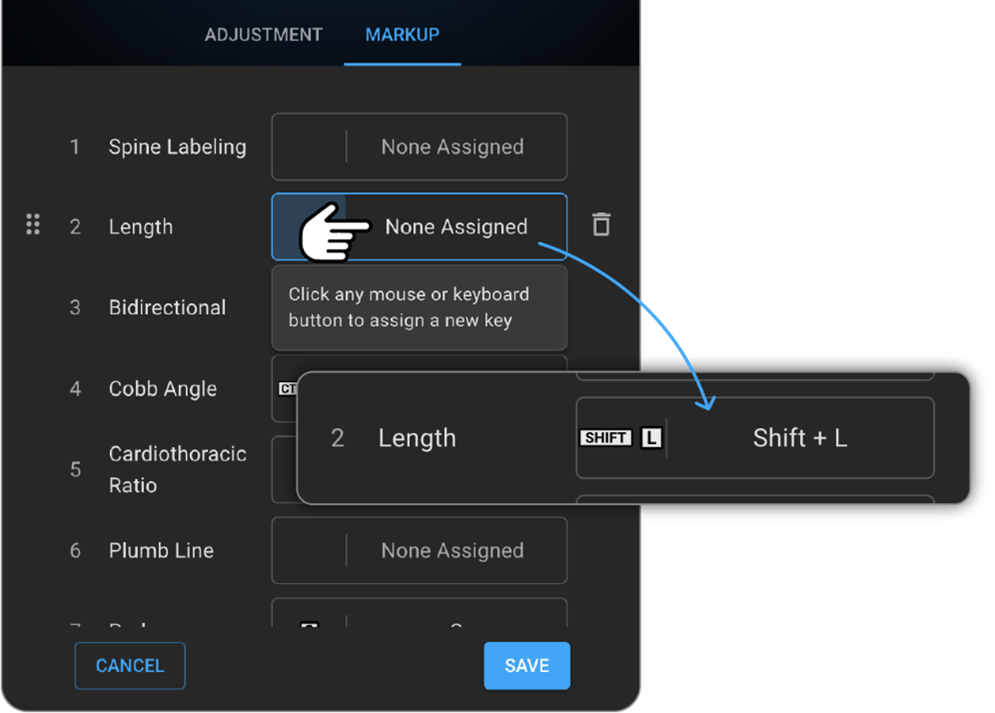
- Avoid using shortcuts already reserved by your browser or operating system.
- To remove a hotkey, click the Delete (trash) icon next to the hotkey field.
To manage all Image Viewer hotkeys from a single location, see Hotkey Customization.
Step 5 — Save
Click Save to apply your configuration, or Cancel to discard changes. Your configuration is stored in your personal user profile and does not affect other users.
Best Practices
- Choose tools that match your modality types and daily workflow.
- Assign intuitive, easy-to-remember hotkeys.
- Review and update your wheel configuration periodically as your workflow evolves.
- Use the hover feature in the wheel to quickly identify tools before selecting.