Image Viewer Toolbar in OmegaAI
Overview
The Image Viewer Toolbar provides quick, one-click access to key functions that support efficient study review and reporting. Positioned below the search bar, it brings together essential tools for navigation, layout management, documentation, and collaboration — helping users tailor their viewing environment to their workflow.
The toolbar is fully customizable. Users can add, remove, or rearrange Adjustment, Markup, and Additional Tools to create a personalized and streamlined viewing experience.

Toolbar Components
| Icon | Toolbar Item | Description | Learn More |
|---|---|---|---|
 | Technologist Form | Opens the Technologist Form, allowing radiologists to review technologist-entered clinical, technical, and procedural information related to the study. | Technologist Form |
 | Layout Selector & Hanging Protocols | Set up viewport layouts or apply predefined hanging protocols for structured viewing. | Hanging Protocols |
 | More Options (⋯) | Access additional viewer settings and options. | More Options Menu |
 | Document Review Mode | In single-monitor mode, view documents or create reports side-by-side with images. | Document Review Mode |
 | Voice Notes & Study Notes | Add written notes to the study or record a voice note or dictation for reference. | Voice Notes & Study Notes |
 | Share | Share studies with other users or organizations. | Sharing Studies |
 | CAD Objects Toggle | Show or hide Computer-Aided Detection (CAD) findings. Appears only when a mammography study containing CAD SR objects is loaded. | Mammography Features |
Undo and Reset Tools
These tools become visible only after an adjustment or markup action is performed on the image.
| Icon | Tool | Description |
|---|---|---|
 | Reset All | Restores the viewer to its default state, clearing all applied adjustments, annotations, and measurements. |
 | Undo Previous | Reverts the most recent action performed in the viewer, allowing you to quickly correct changes or mistakes. |
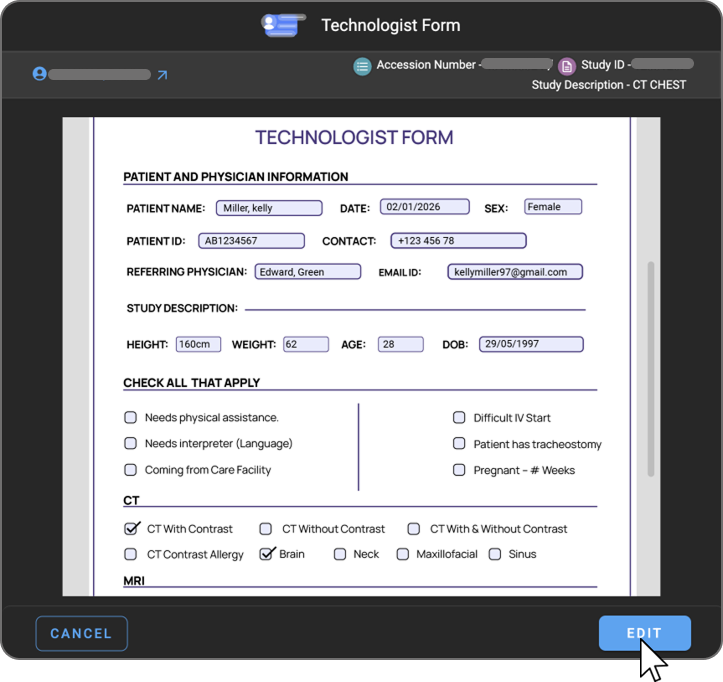
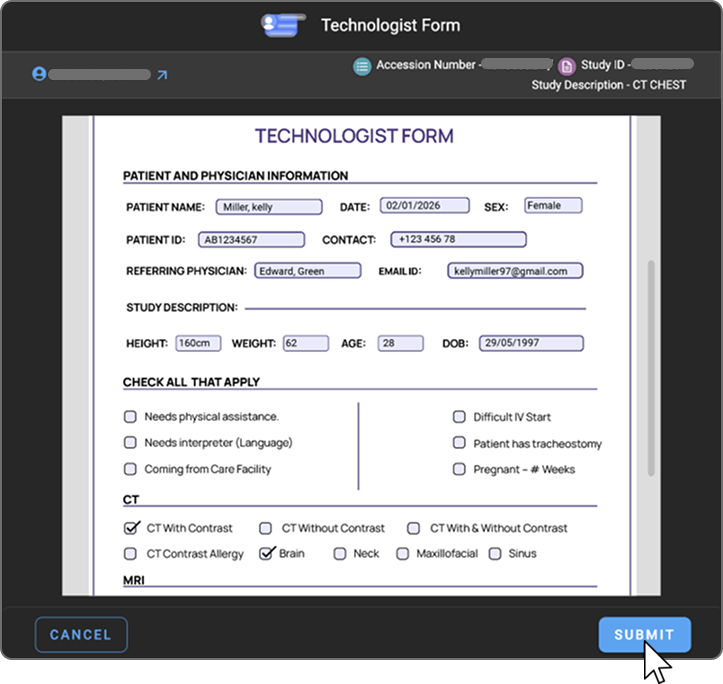
Technologist Form
The Technologist Form is an organization-specific form accessed directly from the Image Viewer toolbar. It displays clinical, technical, and procedural information entered by technologists during or after exam acquisition, presented alongside the study to support accurate image interpretation without interrupting the viewing workflow. The form supports documentation, quality tracking, and effective communication across the care team.
Configuration and Availability
- Technologist Forms are organization-specific and must be created and published by administrators.
- Forms are configured under Organization Forms as part of the organization setup.
- If no form is configured or published, the Technologist Form option will not be visible in the Image Viewer toolbar.
For setup instructions, see Setting Up Forms.
Review Status
| Status | Meaning | Icon |
|---|---|---|
| Yellow (Pending) | The form has not yet been reviewed. |  |
| Green (Completed) | The form has been reviewed and submitted. |  |
Reviewing the Technologist Form
- Open a study from the Worklist.
- Click the Technologist Form icon in the Image Viewer toolbar. The form opens in a new window without affecting viewer functionality.

- Review the technologist-entered details.
- Click Edit to make changes if required.
- Click Submit to complete the review. The form status updates to Green (Completed).
Use Cases
Reading radiologists can use the Technologist Form to:
- Review clinical context before or during interpretation
- Verify exam conditions and safety considerations
- Understand technical factors influencing image quality
- Correlate findings with acquisition technique or protocol
- Reduce follow-up communication by accessing technologist notes directly
- Reference documentation for reporting, QA, or audit purposes
Layout Selector
The Layout Selector allows you to customize the arrangement of viewports in the Image Viewer. It is accessible from the toolbar and supports both standard and mammography-specific viewing protocols.
Accessing the Layout Selector
- Open any study in the Image Viewer.
- Click the Change Layout (Grid icon) in the top toolbar.
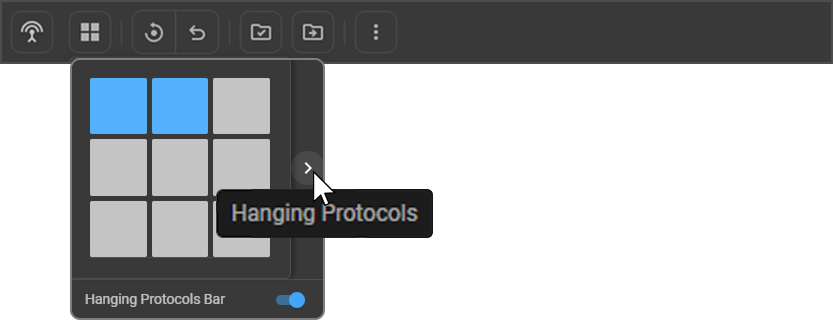
- The Layout Selector panel opens, displaying a 3×3 grid with the current layout highlighted in blue.
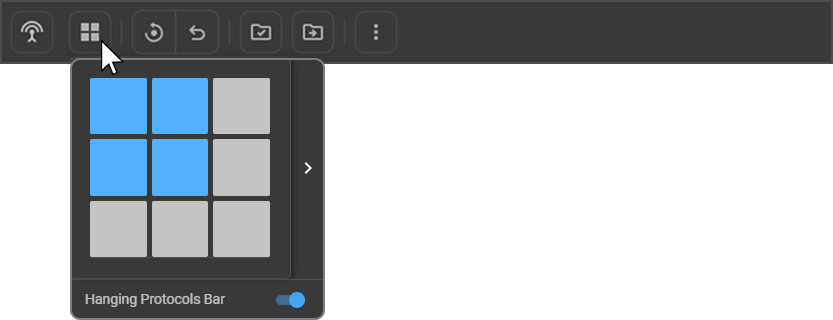
Customizing Viewport Layouts
- Adjusting viewport numbers — Increase or decrease the number of viewports by dragging the grid cells left, right, up, or down. You can configure up to an 8×8 grid on each monitor.
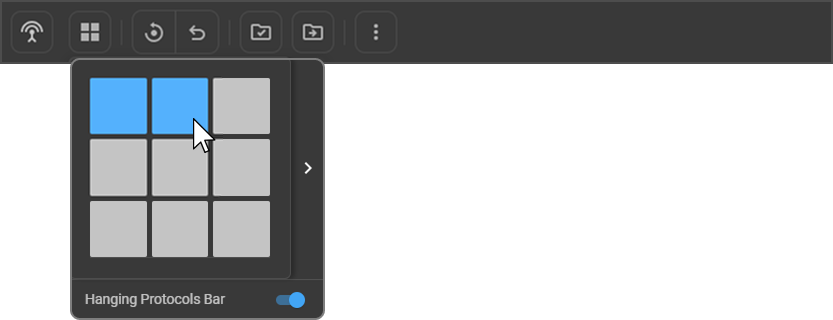
- Applying Hanging Protocols — Click the Right Arrow (>) to expand the panel and view all available Hanging Protocols. Click any protocol to apply it.
- In a single-monitor setup, the protocol applies to the current monitor only.
- In a multi-monitor setup, it applies to all connected monitors.
To learn more, see Hanging Protocols.
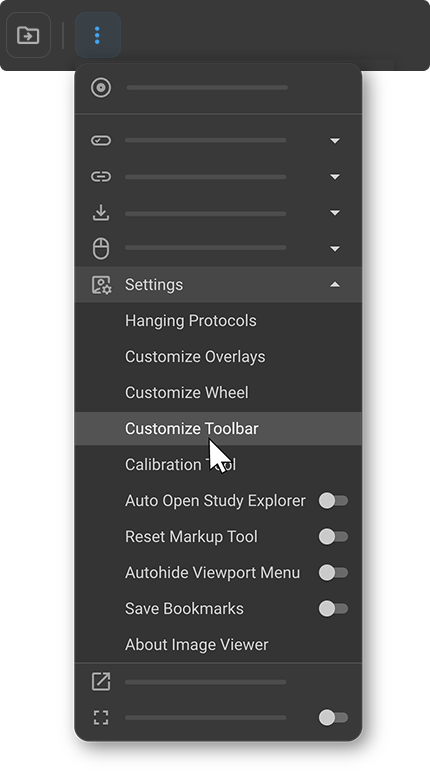
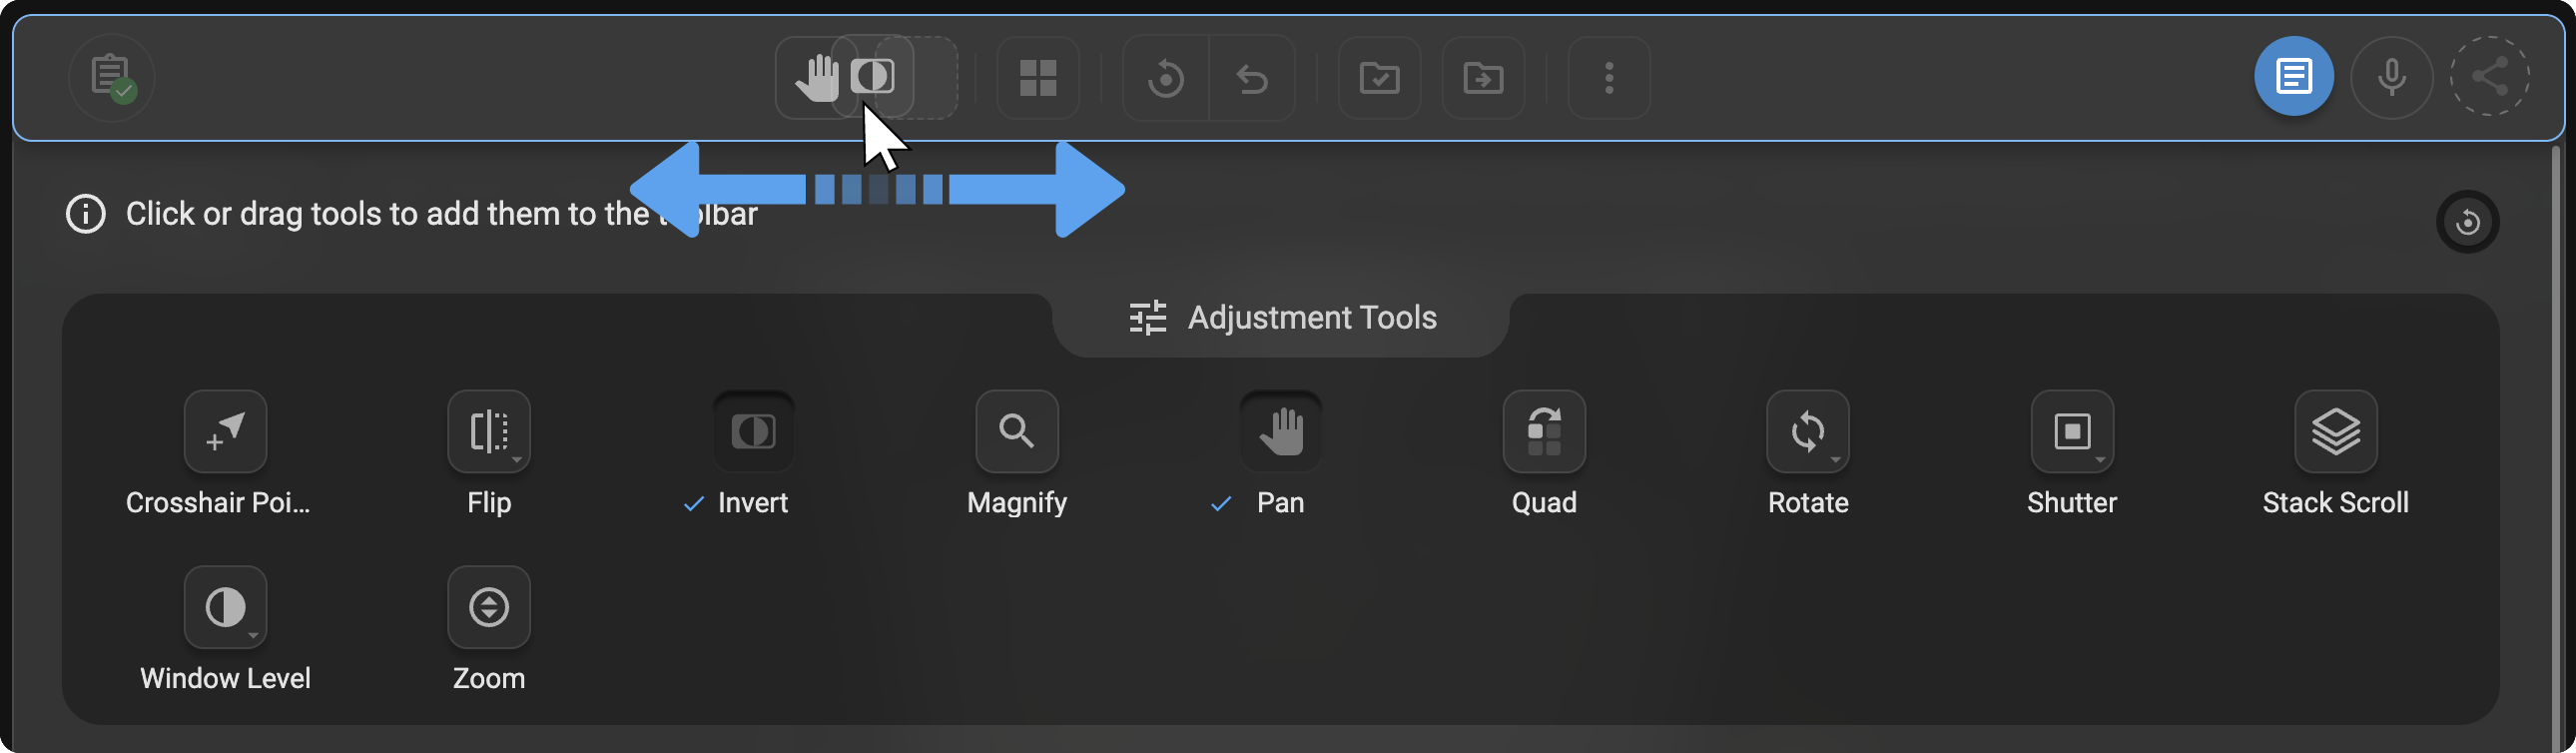
Customizing the Toolbar
Accessing Toolbar Customization
|
|
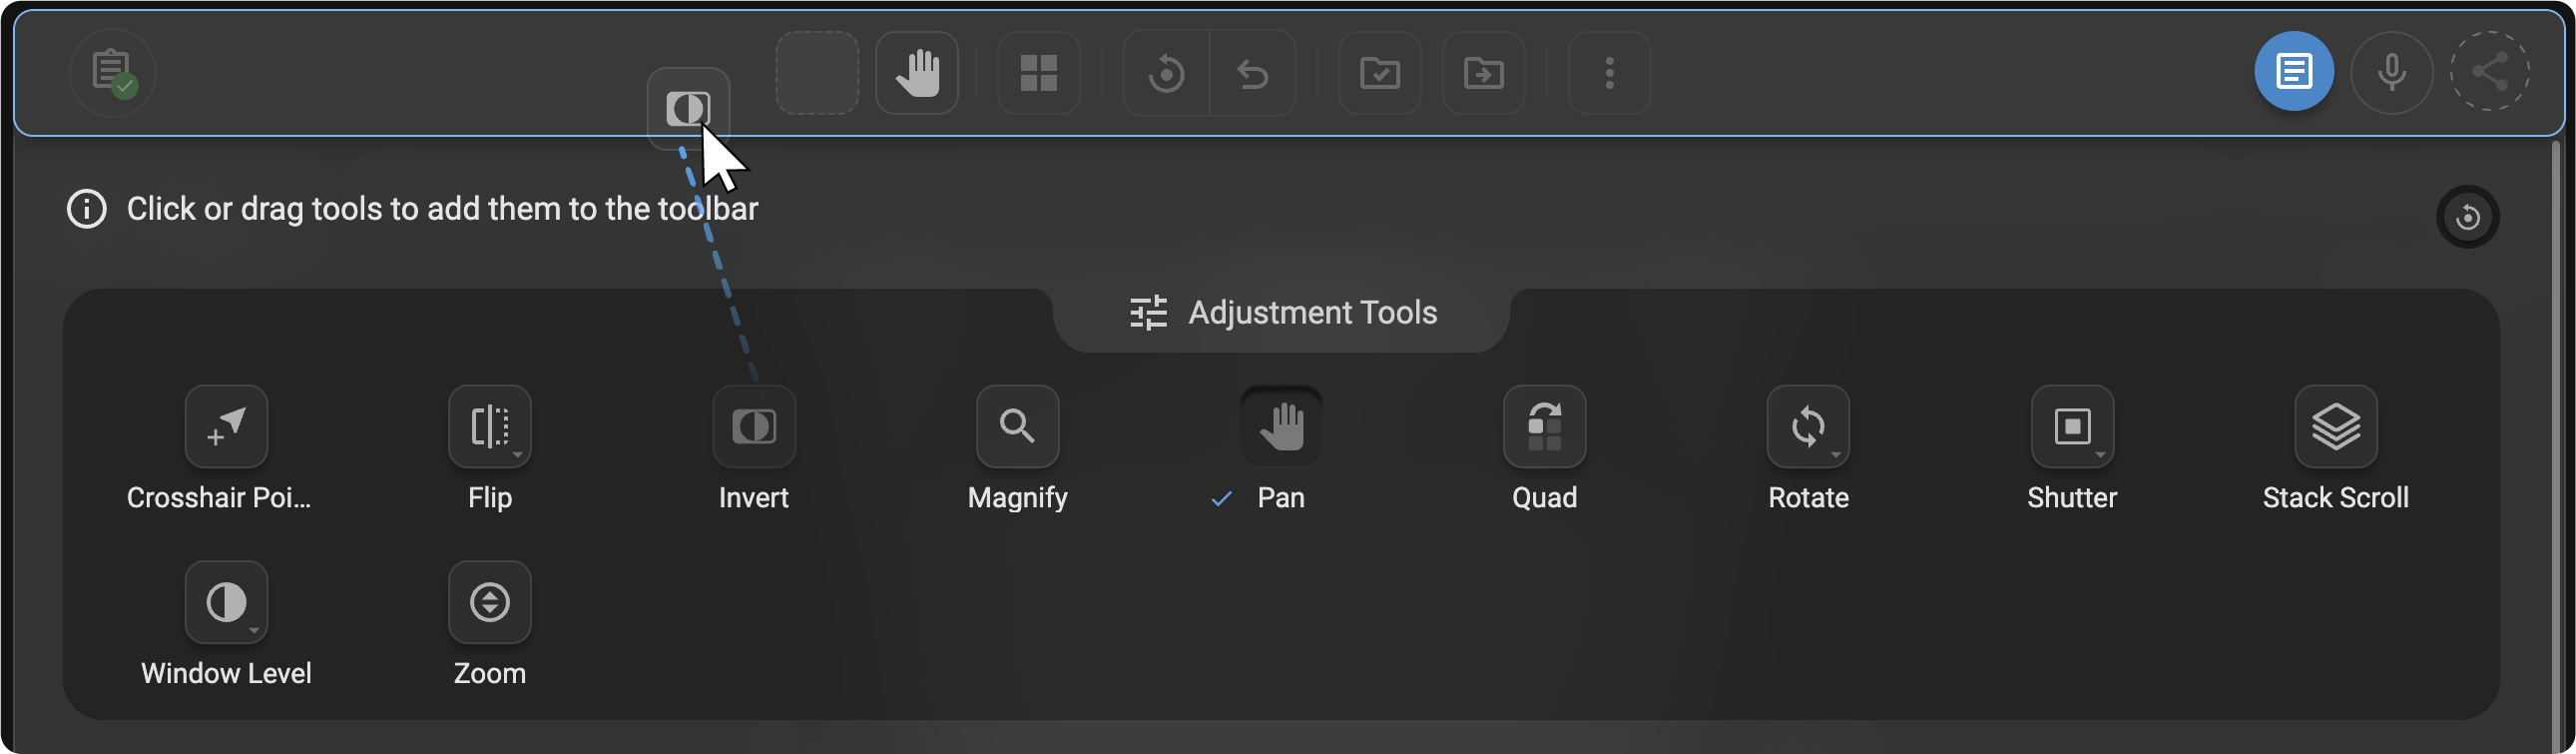
Toolbar Tool Categories
The toolbar is organized into three categories:
-
Markup Tools — Angle, Annotate, Bidirectional, CTR, Drag Probe, Spine Labeling, Length, ROI (Rectangular, Circular, Freehand), Plumb Line. See Adjustment & Markup Tools.
-
Adjustment Tools — Crosshair Pointer, Pan, Rotate, Zoom, Flip, Invert, Magnify, Quad Zoom, Shutter, Stack Scroll, Window Level. See Adjustment & Markup Tools.
-
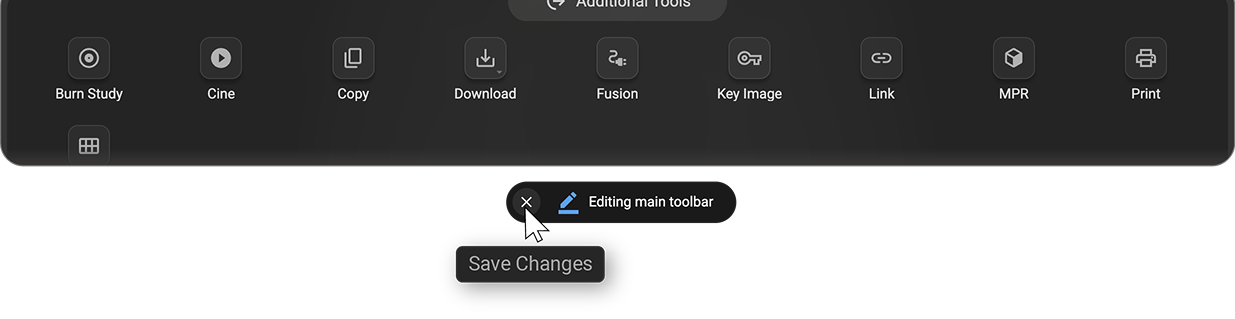
Additional Tools — Cine, Fusion, Print, MPR, Key Image, Tile Mode, Link, Copy, Download Study, Download Image, Burn Study. See Additional Tools.

Adding and Removing Tools
- To add — Click or drag and drop the desired tool into the toolbar area. A checkmark appears on the tool once added.
- To remove — Hover over an existing toolbar tool and click the × (Remove) icon that appears.
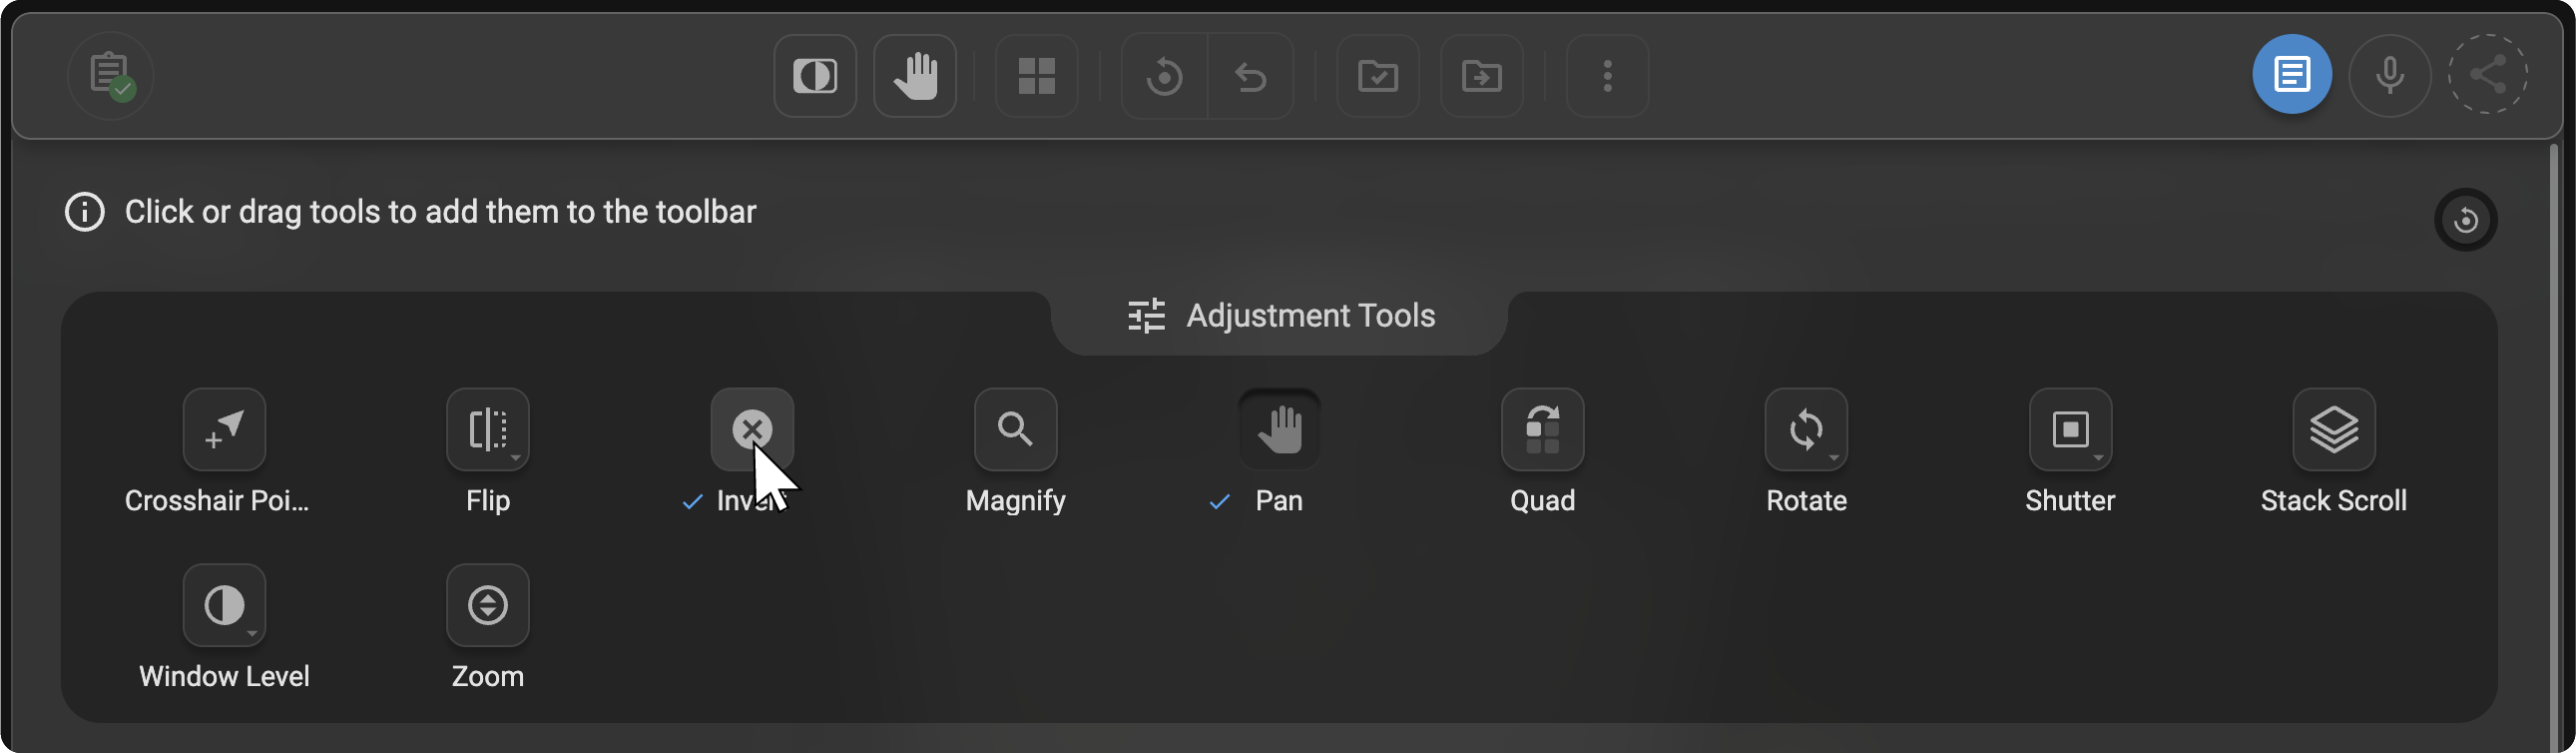
- To rearrange — Click and drag any tool to your preferred position.
Undoing and Resetting
Hover over the Reset icon (circular arrow) in the top-right corner of the customization panel to access:
- Undo Previous — Reverts the last customization action.
- Reset All — Restores the toolbar to its default configuration.
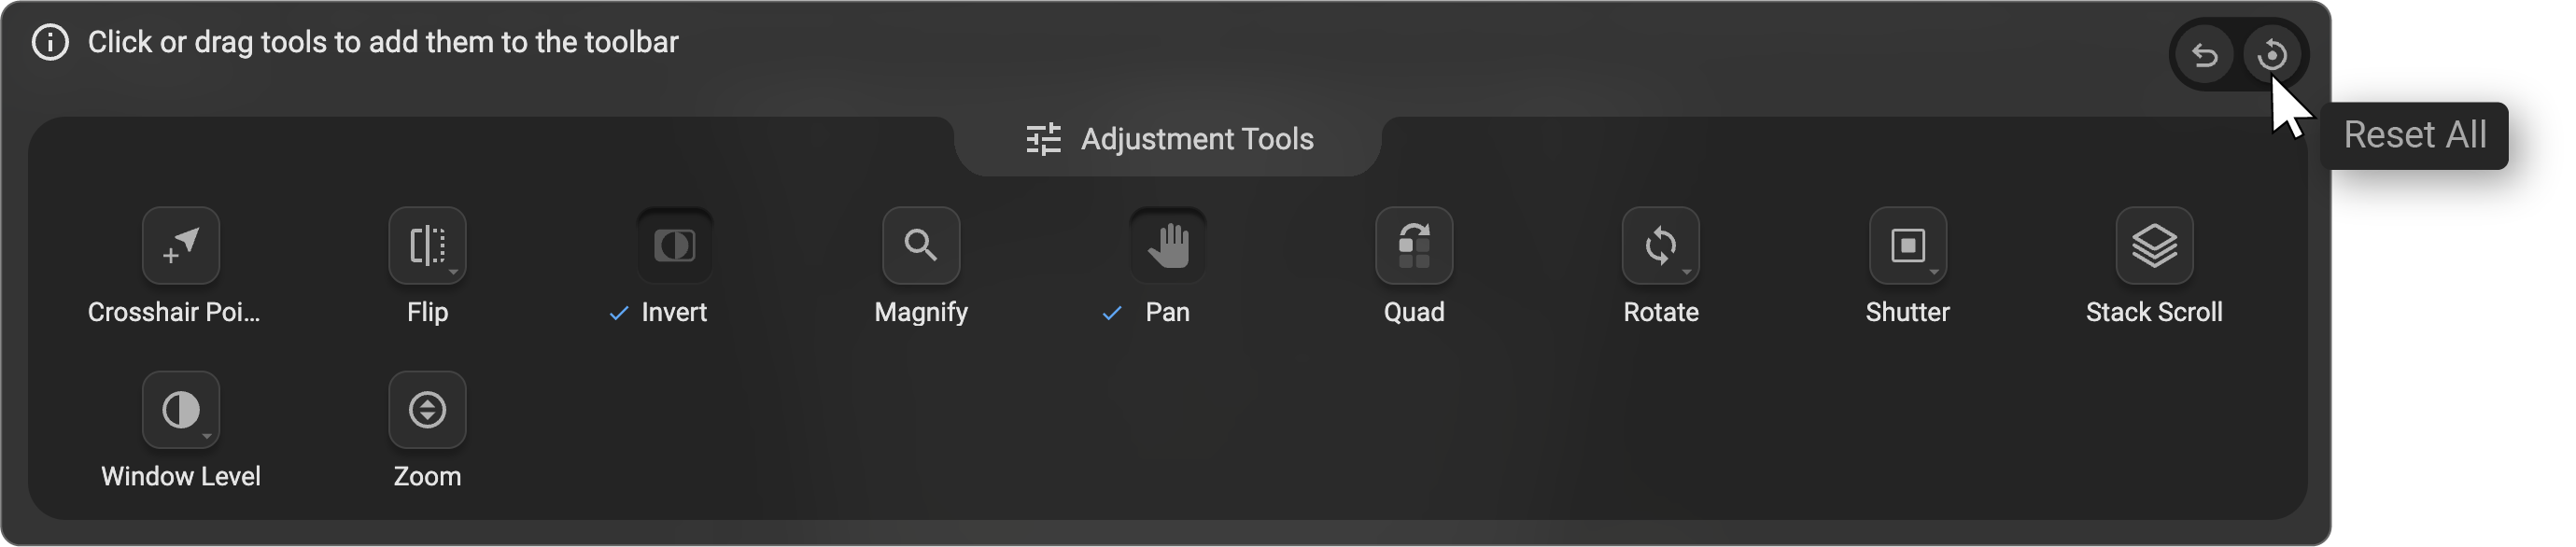
To save your changes, click the × (Close) button at the end of the panel. Your layout is applied immediately.
Additional Notes
- Fixed tools — Hanging Protocol, Reset, Done, Done & Next, Transcriptions (Mic icon), and Share are fixed and cannot be removed.
- Multi-monitor customization — A different toolbar can be configured for each monitor in multi-monitor mode. See Multi-Monitor Settings.
- Modality-based availability — Tools not applicable to the active modality in the viewport are automatically disabled.