Orientation of the Image Viewer in OmegaAI
Overview
The Image Viewer in OmegaAI is a comprehensive diagnostic workspace designed to help users review, analyze, compare, and manage medical imaging studies.
This article provides an overview of the main components of the Image Viewer interface, including navigation panels, toolbars, viewports, and image interaction tools. Understanding these components will help you work more efficiently and customize your viewing experience to suit your workflow.

Main Components
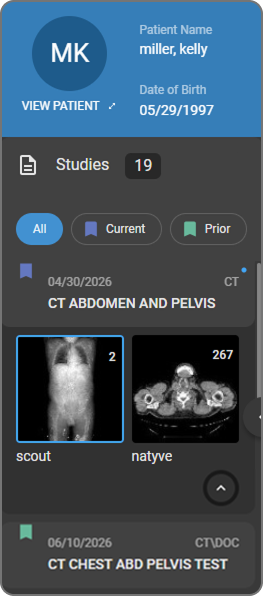
1. Study Explorer (Left Panel)
The Study Explorer is located on the left side of the Image Viewer and is collapsed by default. Click the Study Explorer icon (File icon) in the top-left corner to expand the panel.
The Study Explorer acts as a Study Quality Control (QC) module, allowing you to review and manage patient studies efficiently.
It contains the following sections:
|
|
To learn more, see Study Explorer and Image QC Module.
2. Search Bar
The Search Bar is located at the top of the Image Viewer and allows global search across the database. It automatically hides in Full-Screen Mode to maximize viewing space.

To learn more, see Using Global Search.
3. Toolbar
The Main Toolbar is located directly below the Search Bar and provides quick access to essential tools. The toolbar is fully customizable — you can add, remove, or rearrange tools to match your workflow.

To learn more, see Image Viewer Toolbar.
Hanging Protocol Strip
Directly below the main toolbar, the Quick Access Strip displays all available hanging protocols for the active study as a horizontal row of tiles. Click any tile to apply it instantly. The strip is automatically filtered to show only protocols relevant to the active study's modality.

To learn more, see Hanging Protocols.
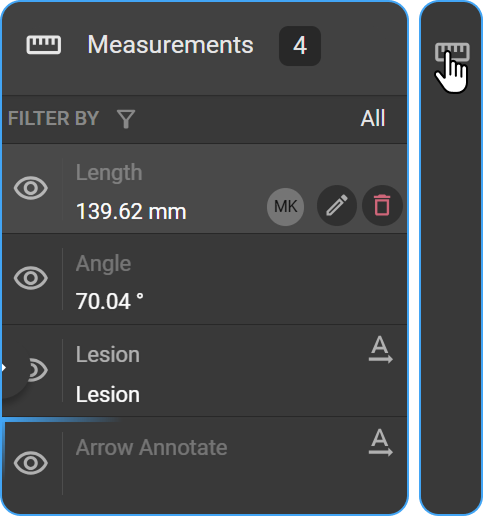
4. Measurement Panel (Right Panel)
The Measurement Panel is located on the right side of the Image Viewer. It allows you to manage and review all measurements and annotations related to the current study or series, and organize image findings efficiently.
To learn more, see Measurement Panel.
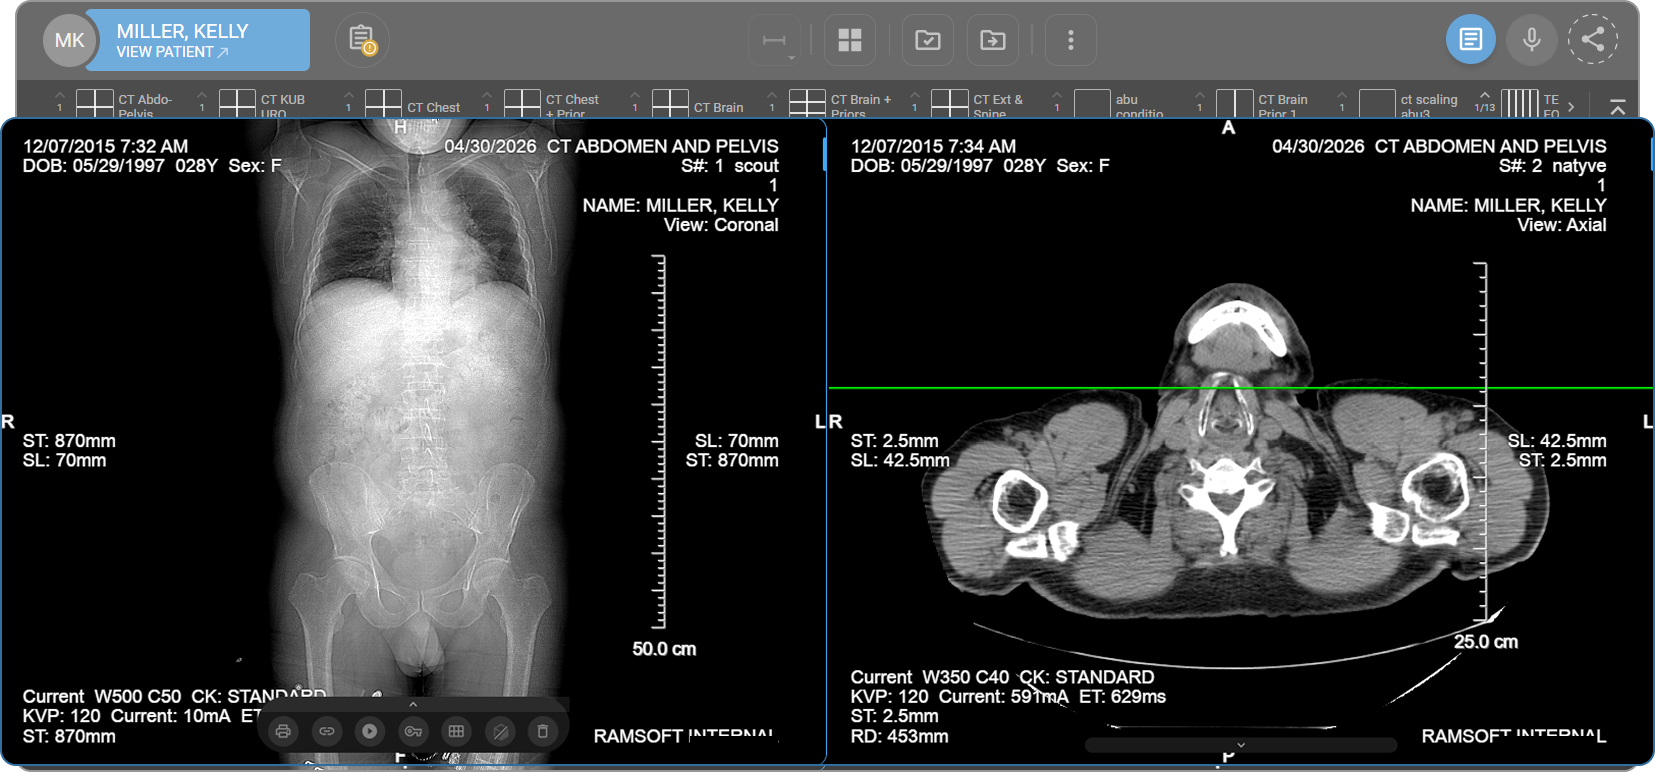
5. Viewports (Main Display Area)
The Viewport Area is the central workspace where images are displayed. It supports multiple viewport layouts and shows overlay annotations, positional indicators, and image markers.
To learn more about the Layout Selector, see Layout Selector.
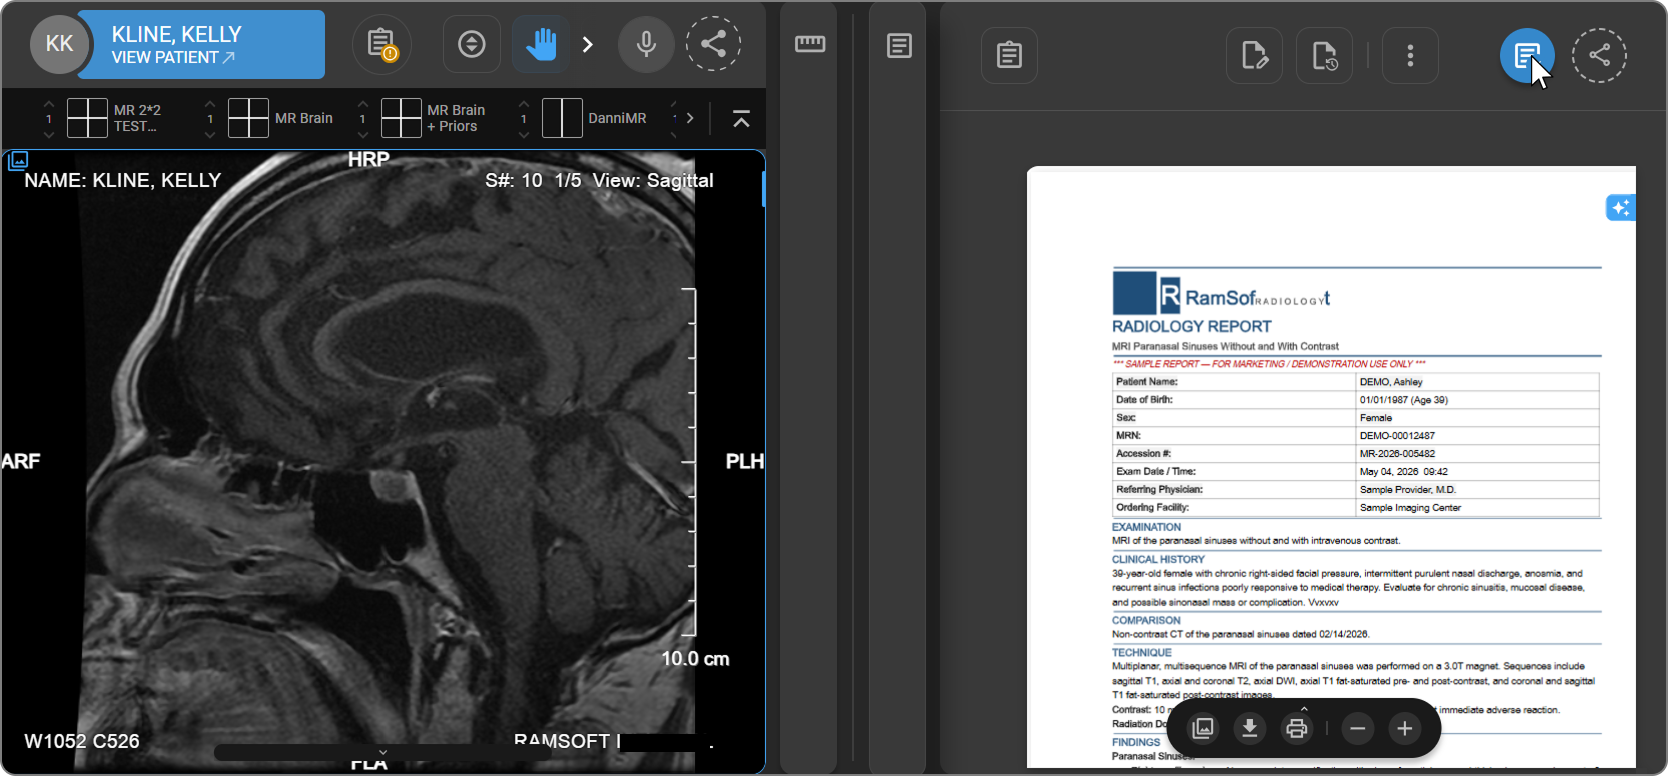
Embedded Document Viewer (EDV)
The Embedded Document Viewer provides a unified workspace where radiologists and physicians can view DICOM images, navigate prior studies, and document findings — all within a single interface. It supports advanced diagnostic workflows and complex reporting needs while ensuring accuracy, traceability, and ease of use.
To learn more, see Embedded Document Viewer.
Viewport Tools and Controls
6. Viewport Menu (Bottom Center of Each Viewport)
The Viewport Menu is located at the bottom center of each viewport. Hover over the arrow bar to expand or collapse it. Available options may vary depending on the image type.
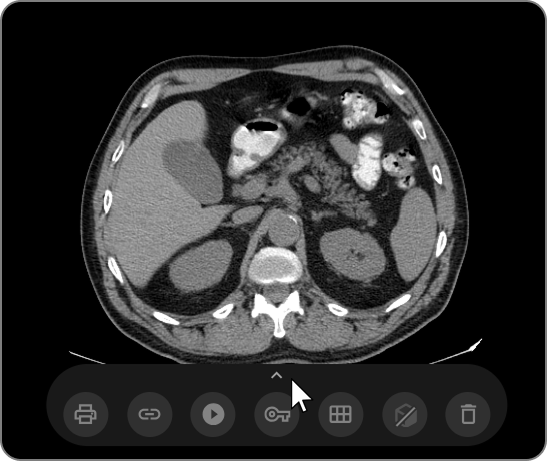
| Icon | Option | Description | Learn More |
|---|---|---|---|
 | Print Image | Print the currently displayed image. | |
 | Copy to Clipboard | Copy the active image frame for use in reports or presentations. | Copy |
 | Prior Study Navigation | Navigate between current and prior studies for comparison. | Prior Navigation |
 | Cine Playback Controller | Control playback of multi-frame image series, including play, pause, speed adjustment, and frame navigation. | Cine |
 | Create Key Image | Mark an image as clinically significant. Automatically saved under the study in Study Explorer. | Key Image |
 | Tile Mode | Split the viewport into multiple tiles for simultaneous viewing. | Tile Mode |
 | MPR Mode | Enable coronal, sagittal, and axial reconstructions for volumetric and 3D analysis. | MPR |
 | Delete Frame or Frame Set | Remove a single frame or an entire frame set from the viewport. | Delete a Frame or Frame Set |
 | PET-CT Fusion Mode | Overlay PET metabolic data with CT anatomical images for enhanced diagnostic interpretation. | PET-CT Fusion Mode |
7. Scroll Bar (Frame Navigation)
The Scroll Bar is located on the right border of each viewport. Use it to navigate through multi-frame image series — hover to display the current frame number, then click and drag or use the mouse wheel to move between frames.

To navigate through image stacks using the mouse or keyboard, see Stack Scroll.