Study Notes, Voice Notes and Dictations
Overview
The Study Notes, Voice Notes, and Dictations feature in OmegaAI enables users to capture and manage text-based and voice-based notes directly within the Image Viewer. Notes and dictations are attached to the active study, time-stamped, and attributed to the creating user — supporting traceable clinical documentation throughout the study review workflow.
Accessing the Dictations & Notes Panel
-
Open the required study in the Image Viewer.
-
Click the Dictations & Notes icon (microphone/document symbol) in the top toolbar.
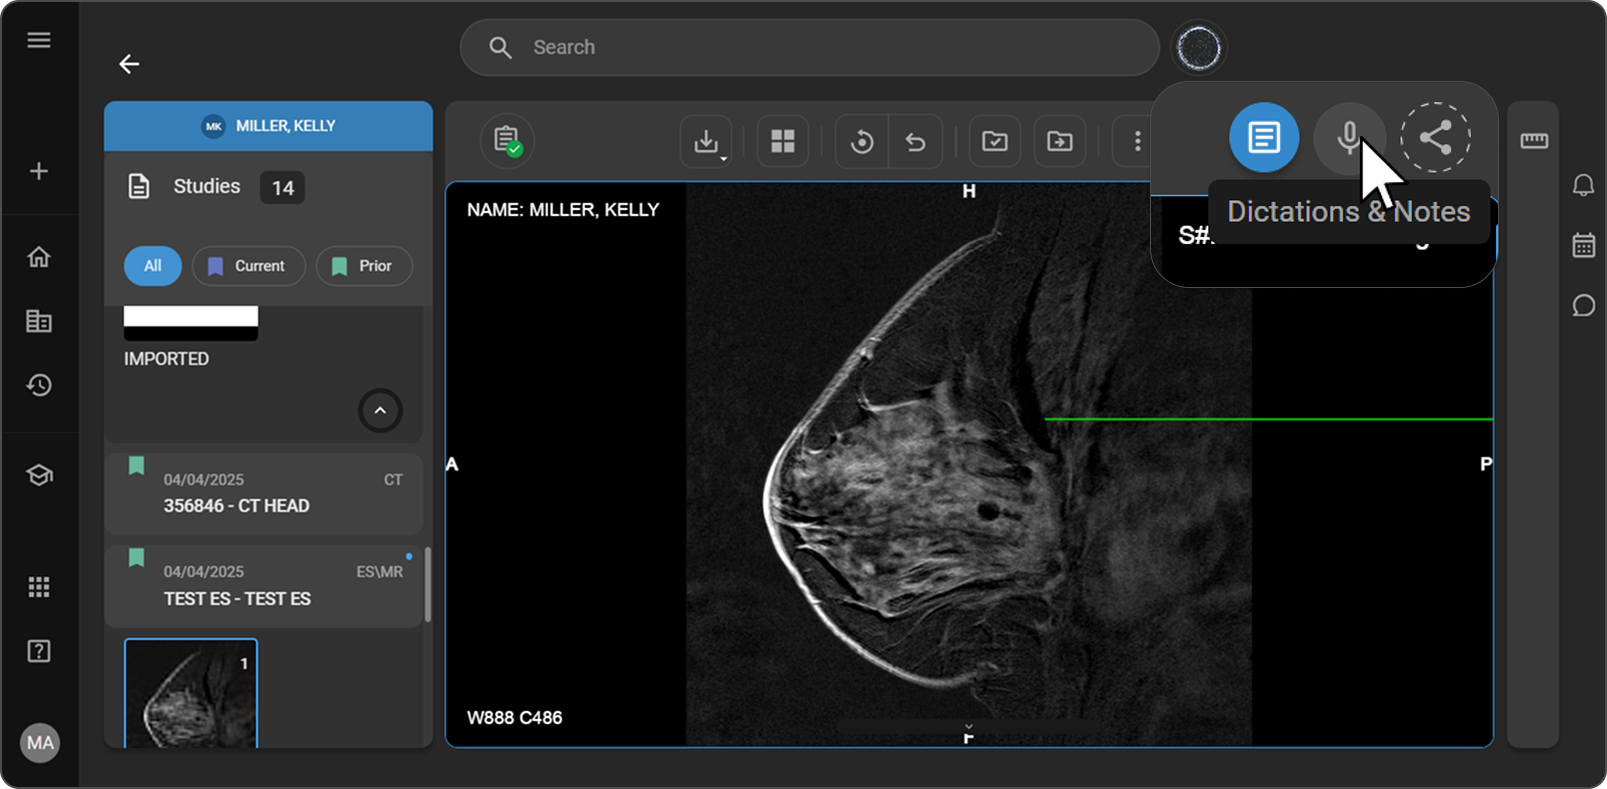
Clicking the icon once opens the text note input field. Clicking it again switches to the voice recording interface. To go directly to voice recording, click the icon twice.
Adding a Study Note
-
Click the Dictations & Notes icon once — the input field appears with the placeholder "Type your note here."
-
Click inside the field and type the required note or comment.
-
A Message Preview pop-up appears. Review the content.
-
Press Enter or click the Send (arrow) icon to save, or click Discard to cancel.
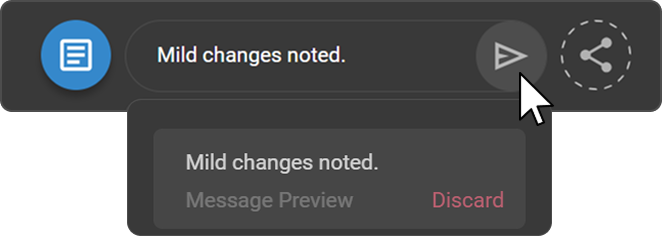
Saved notes appear in the panel with a timestamp, displayed in reverse chronological order (most recent first).
Recording a Dictation
-
Click the Dictations & Notes icon once to open the text field.
-
Click the icon again to switch to the voice recording interface.
-
Begin speaking into your microphone — the system begins recording.

Standard microphones are supported. The feature is also compatible with Philips SpeechMike devices for high-quality clinical dictation.
Recommended Practices
- Ensure the microphone is properly connected before starting.
- Minimize background noise.
- Speak clearly and at a steady pace.
- Confirm microphone permissions if prompted by the system or browser.
Recording Controls and Saving
| Control | Description |
|---|---|
| Pause | Temporarily pauses the recording. Resume without creating a new file. |
| Stop | Ends the recording session and saves the file automatically. |
| Restart | Discards the current recording and starts a new session. |

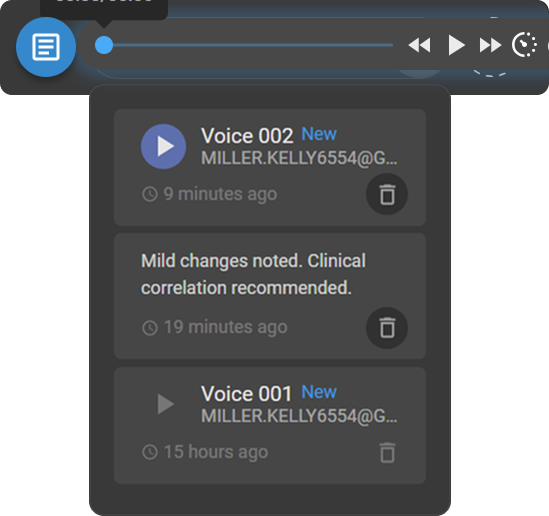
After clicking Stop, the recording is saved automatically and attached to the active study. The saved entry appears in the Dictations & Notes panel with a timestamp and the creator's user name for traceability. All entries are displayed in reverse chronological order.
Reviewing and Managing Notes
Playback
-
Click the Dictations & Notes icon.
-
Locate the desired voice recording in the list.
-
Click the Playback icon to listen.
Deleting Notes or Dictations
Click and hold the Delete (trash) icon next to the entry to remove it.
Deletion capability depends on user role configuration.
Philips SpeechMike Integration
The Dictations & Notes feature integrates with Philips SpeechMike devices, providing:
- Professional-grade recording quality
- Reliable voice capture
- Improved clarity for clinical documentation
- Efficient hands-free dictation workflow